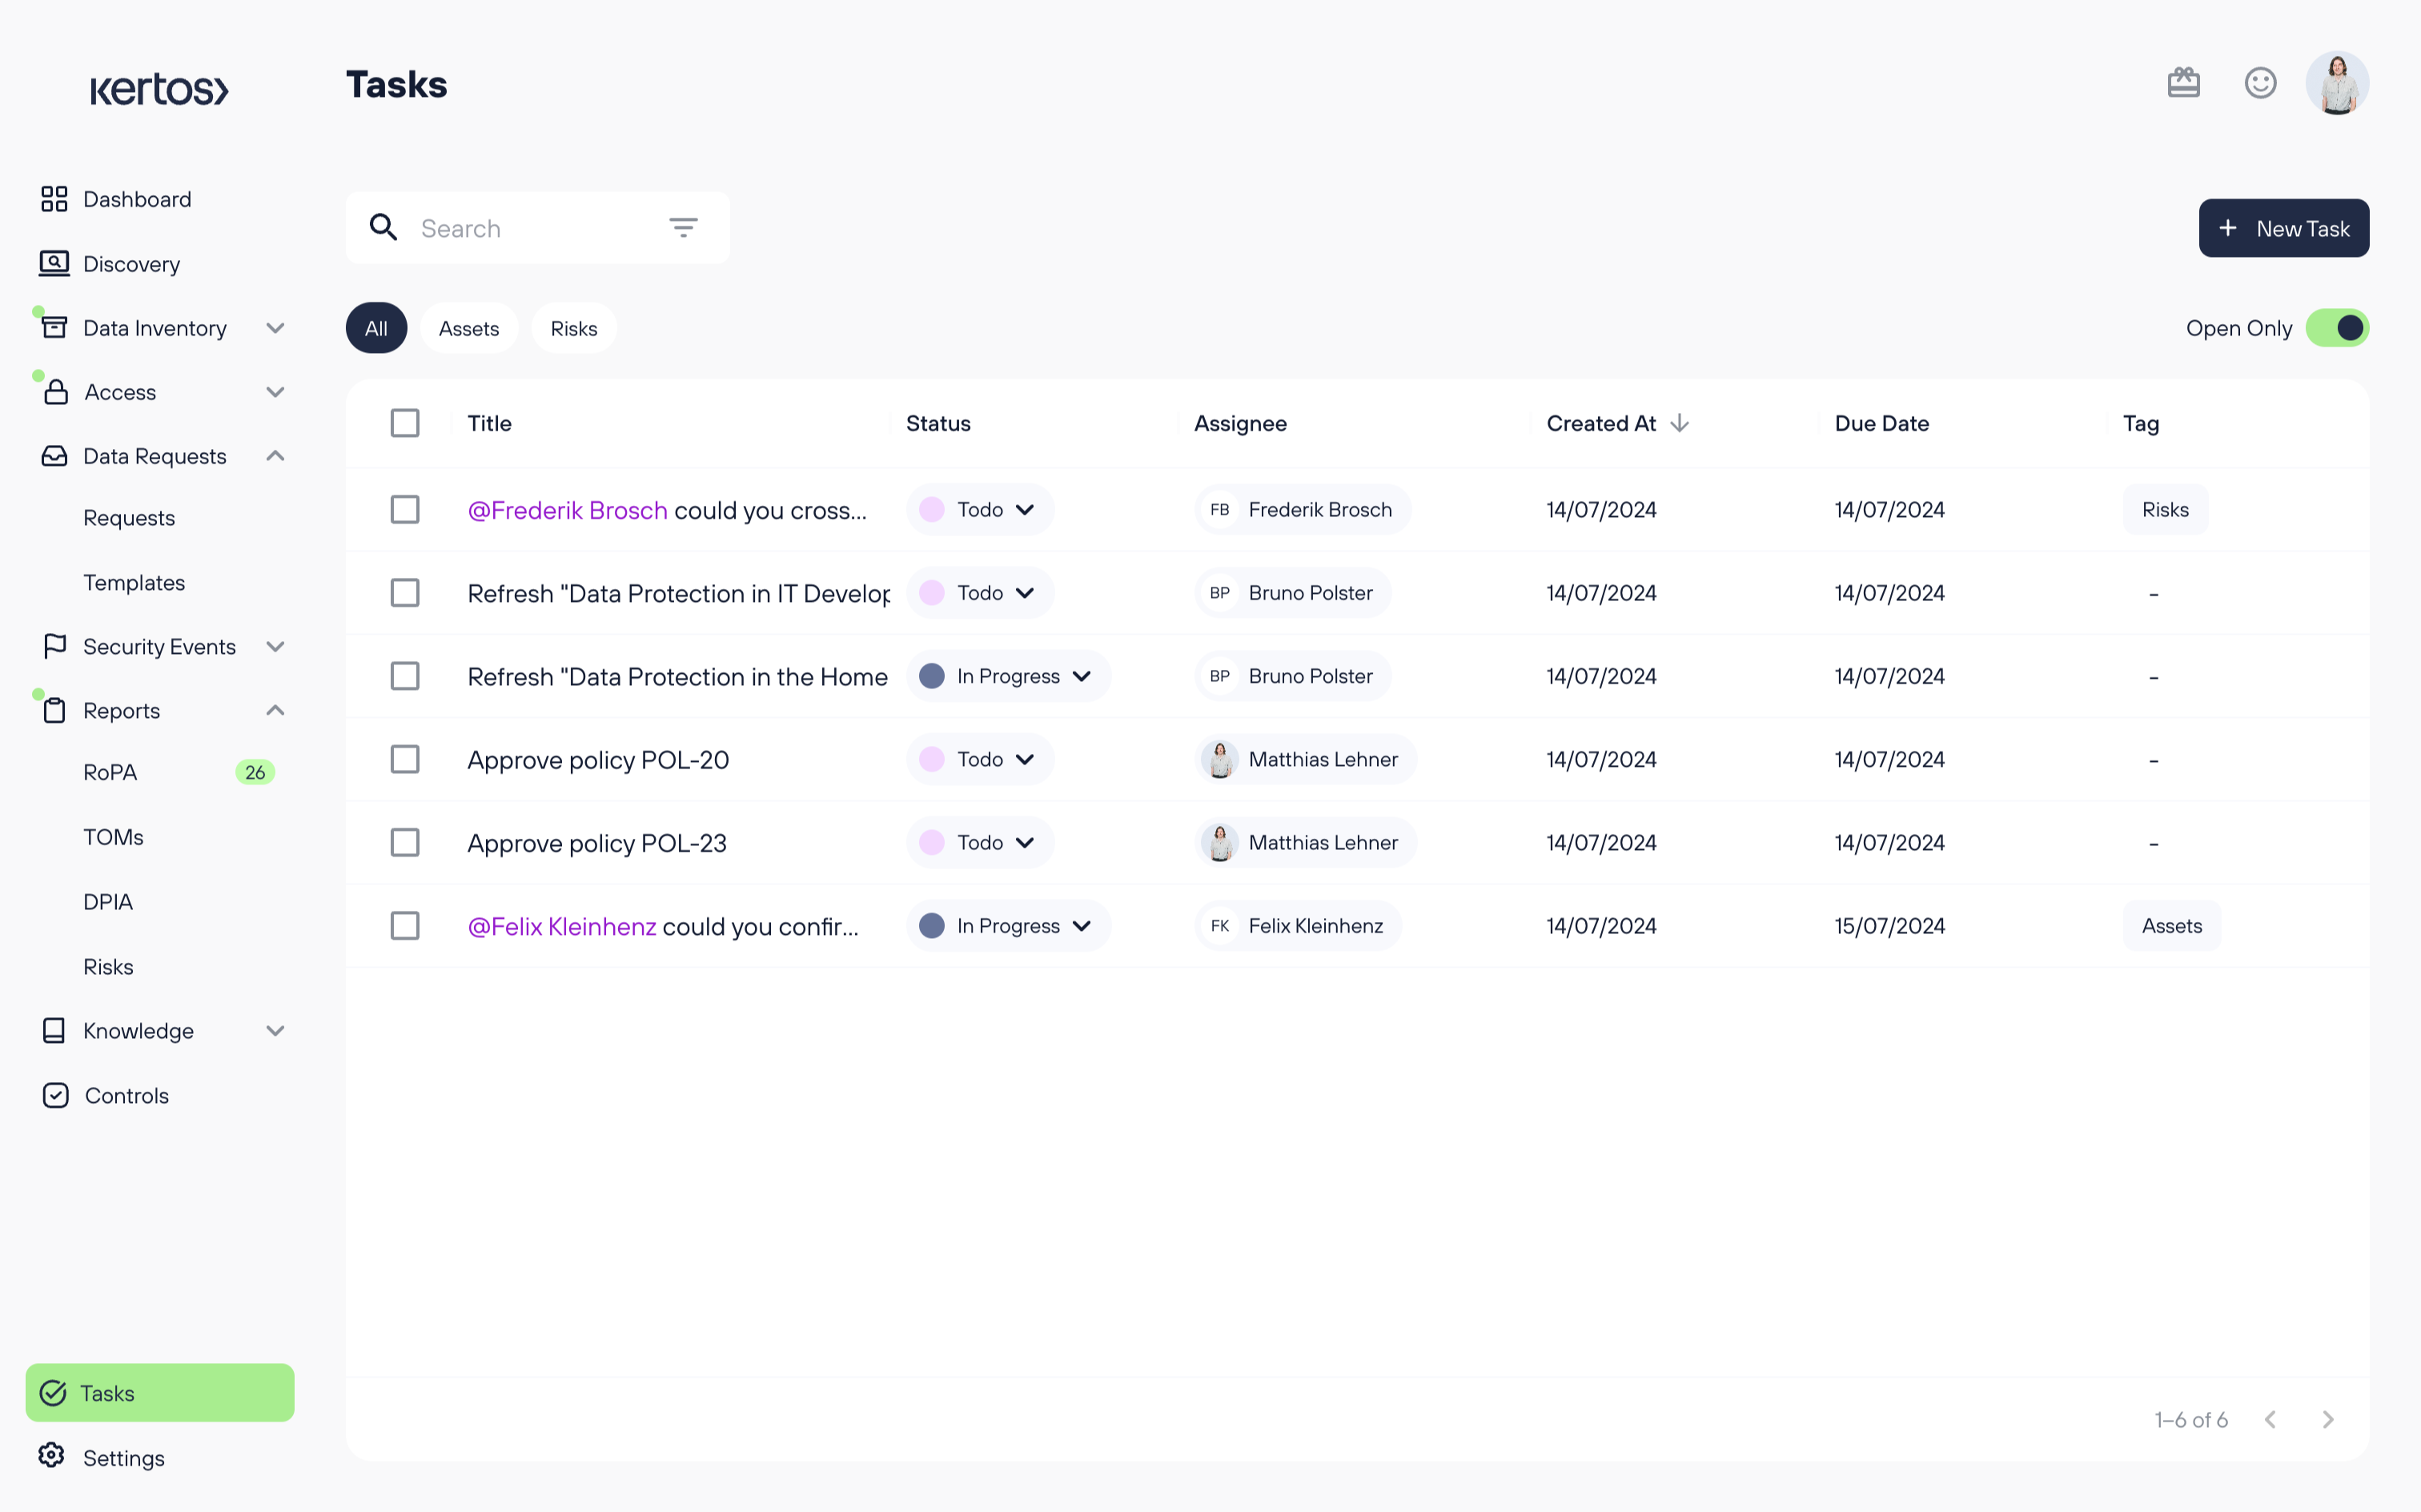
Efficient task management is crucial for the efficient privacy and compliance operations. This article explains how to assign tasks to team members, set due dates, and monitor progress using the Kertos task management feature.
Task Overview
To get an overview of all Tasks your team is currently working on, go to "Tasks" at the bottom of the navigation sidebar. There, you see a list of all Tasks your team is currently involved in.

On the overview, you can select if you want to see only tasks currently open or already closed items as well. In addition to that, it is possible to filter by the area a task is revolving around (e.g. assets or risks), its assignee, status as well as creation and due date.
Task Detail View
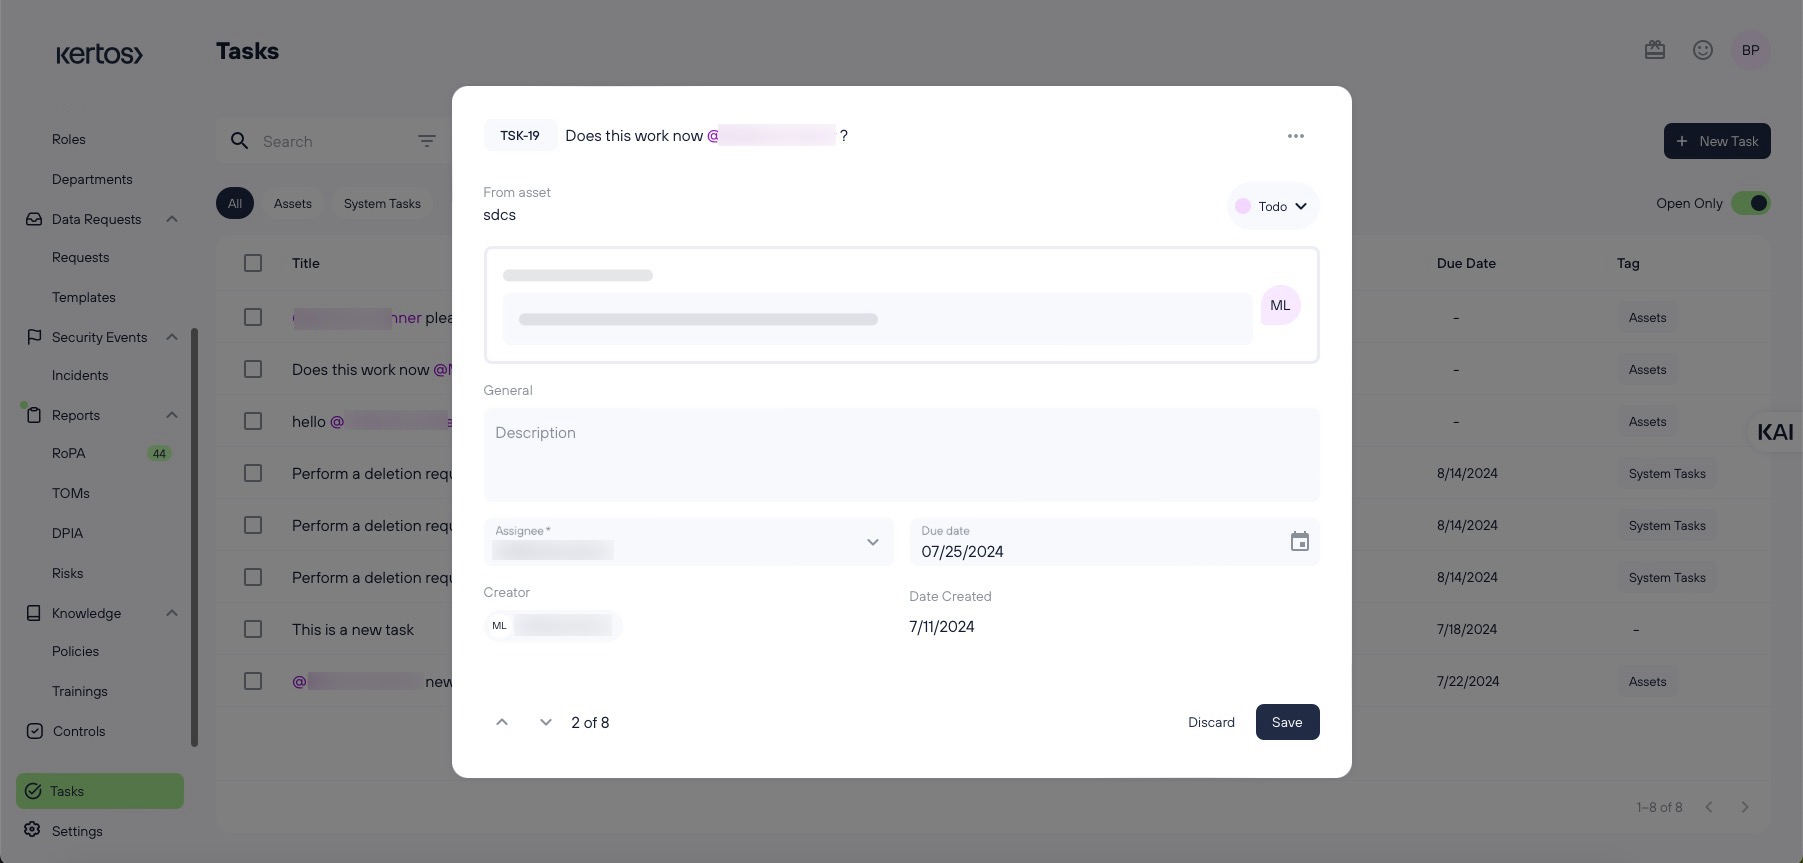
You can click into a task on the Task overview page to open its detail view.

The Task detail view gives you the following information:
Task ID: Kertos automatically gives every Task a unique ID that you can see in the top left corner of the detail view (TSK-19, in this case).
Task Title: The name of the task next to its ID, including the tag of the assignee if the task was created from a comment section.
Options: In the top right corner of the detail view, you can click on the options icon, which will enable you to delete the task or copy the link to it.
Card: If the task was created from a comment section, you can click on this card in order to jump to the comment section.
Description: Further information about the task.
Assignee: Who is responsible for completing the task.
Due Date: The deadline of the task.
Creator: Who created the task.
Data Created: When the task was created.
Integrating with Jira
If your team also uses Jira for task management, you can integrate Jira with Kertos to sync tasks seamlessly between both platforms. This integration allows for real-time updates, ensuring that your tasks remain consistent across systems. Learn more about setting up the Jira integration here.