From the discovery page, you can seamlessly transition to viewing the data you just discovered and activate them.
The differentiation between “Discovered” and “Active” enables you to only work with the data on the platform that is relevant to your organization. For example, the website scan can identify software that does not store your users’ data somewhere and therefore might be irrelevant from a compliance perspective. Read how to archive this data here.
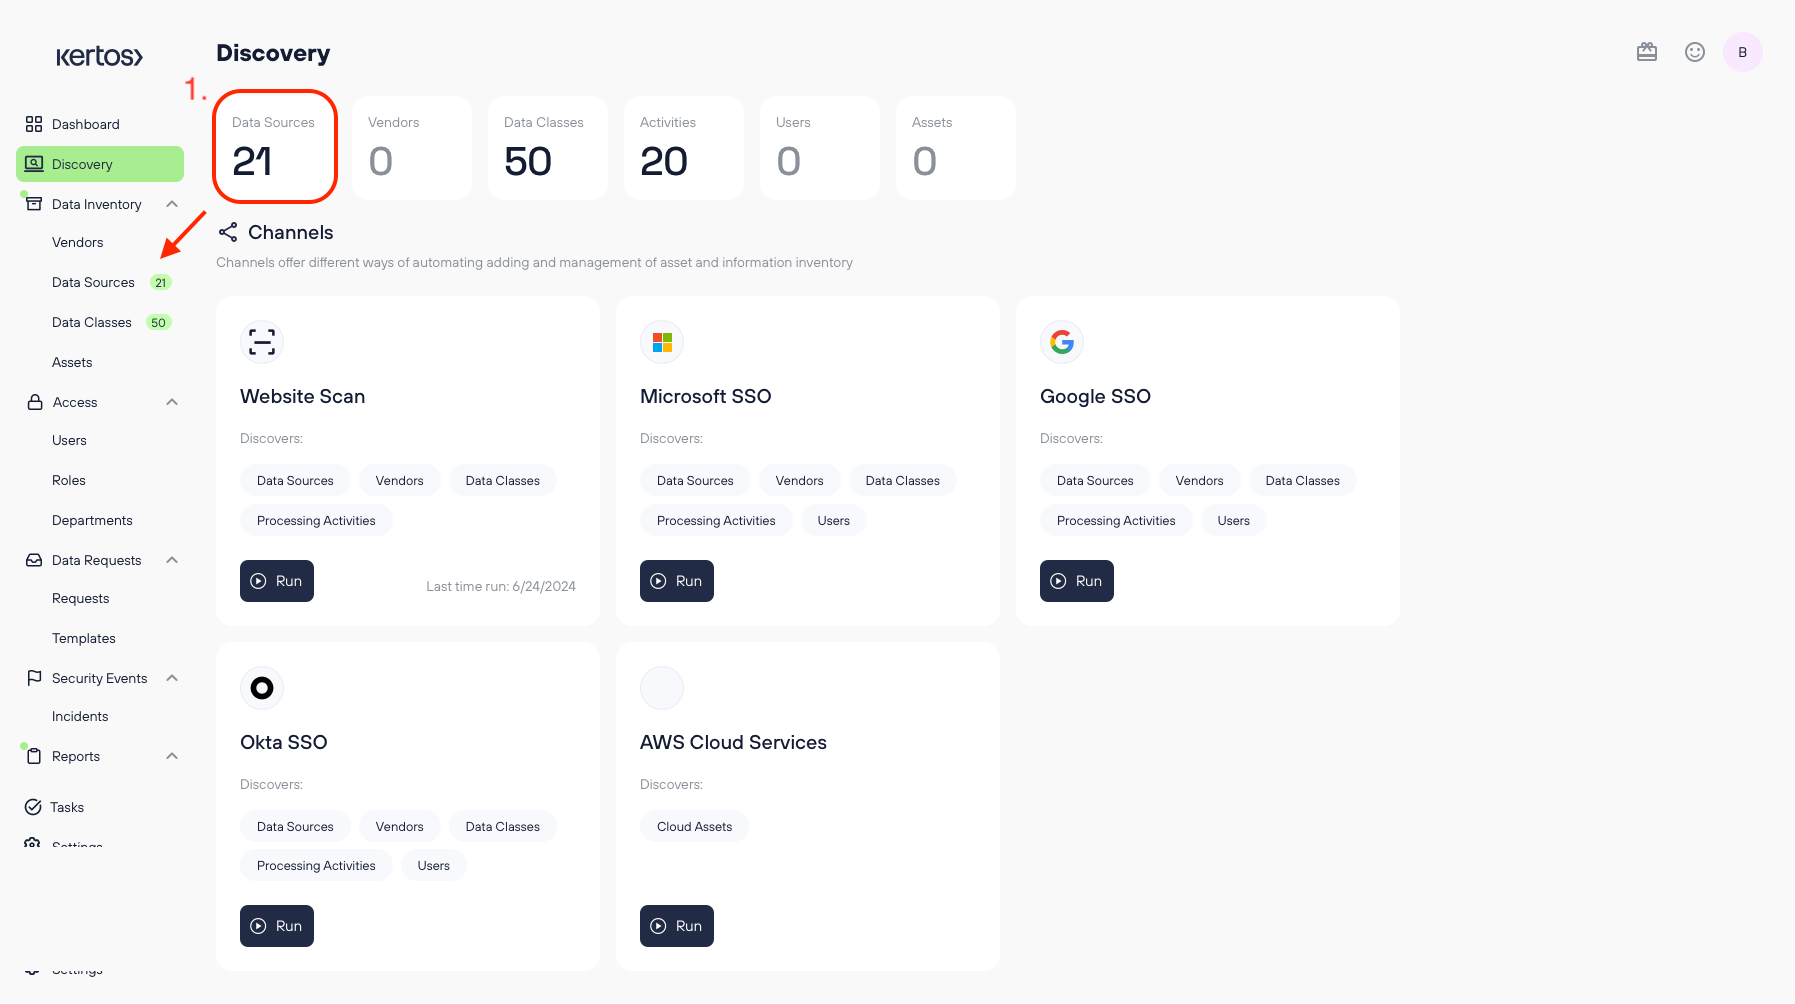
1. Clicking on of the tiles at the top of the discovery page will redirect you to the corresponding overview page of each tile’s data type (in this case, Data Sources). This works the same for every data type.
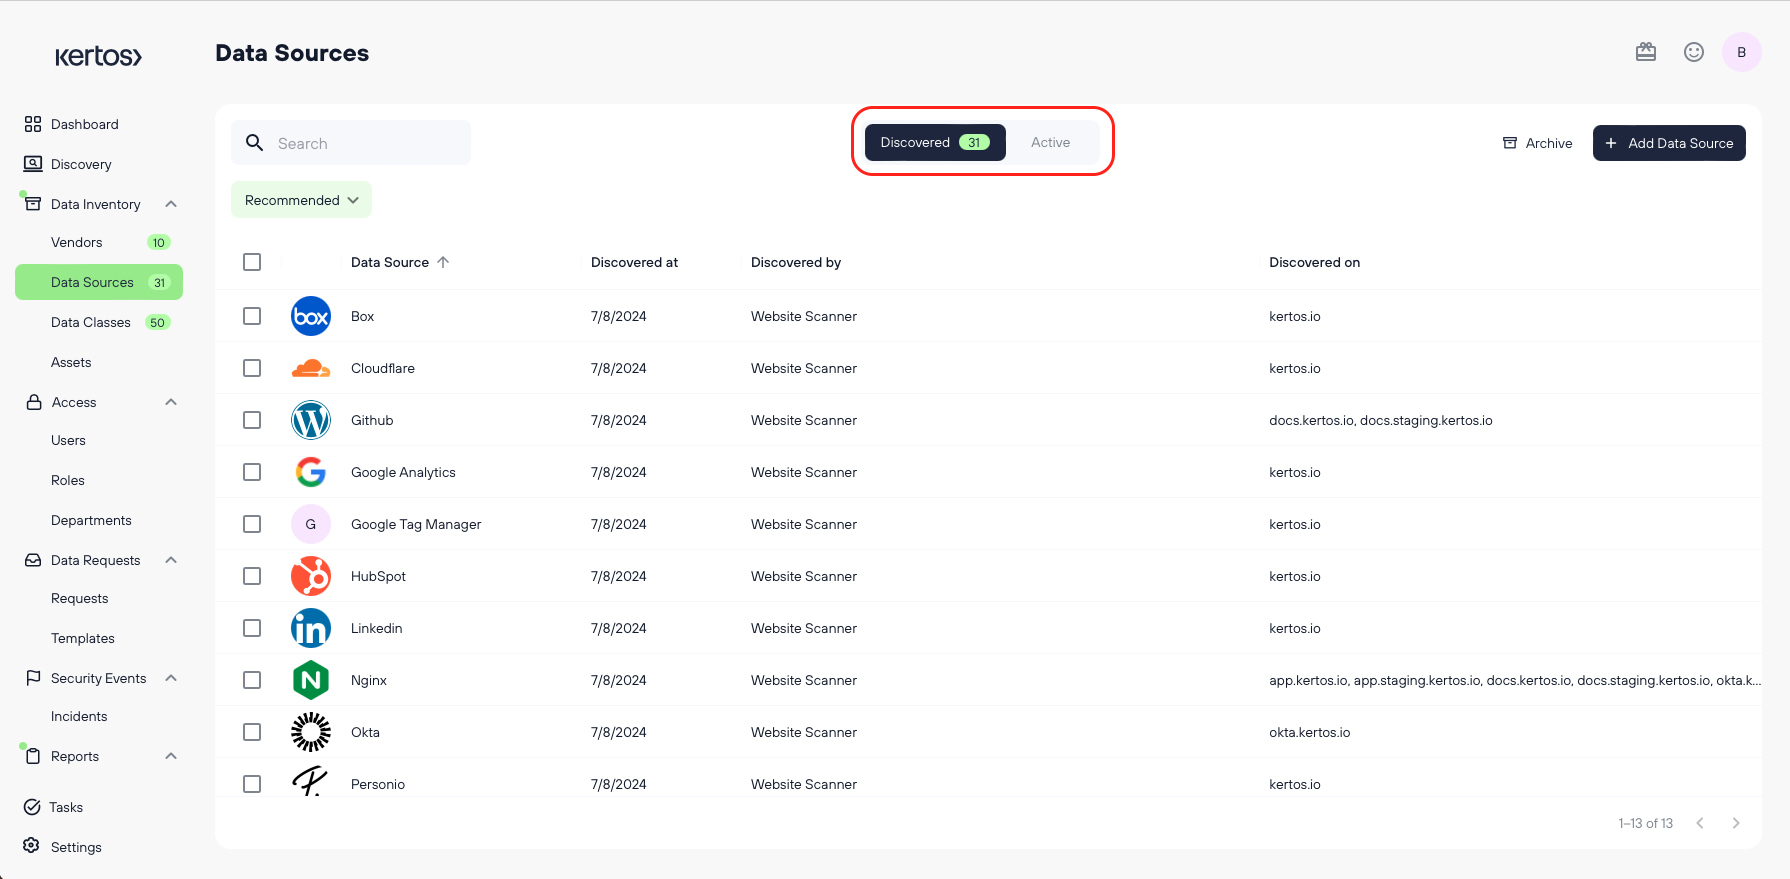
The difference between accessing the respective data type page via the navigation bar on the left and accessing it via the discovery page is that the latter will set the toggle bar at the top of the page automatically to “Discovered”.
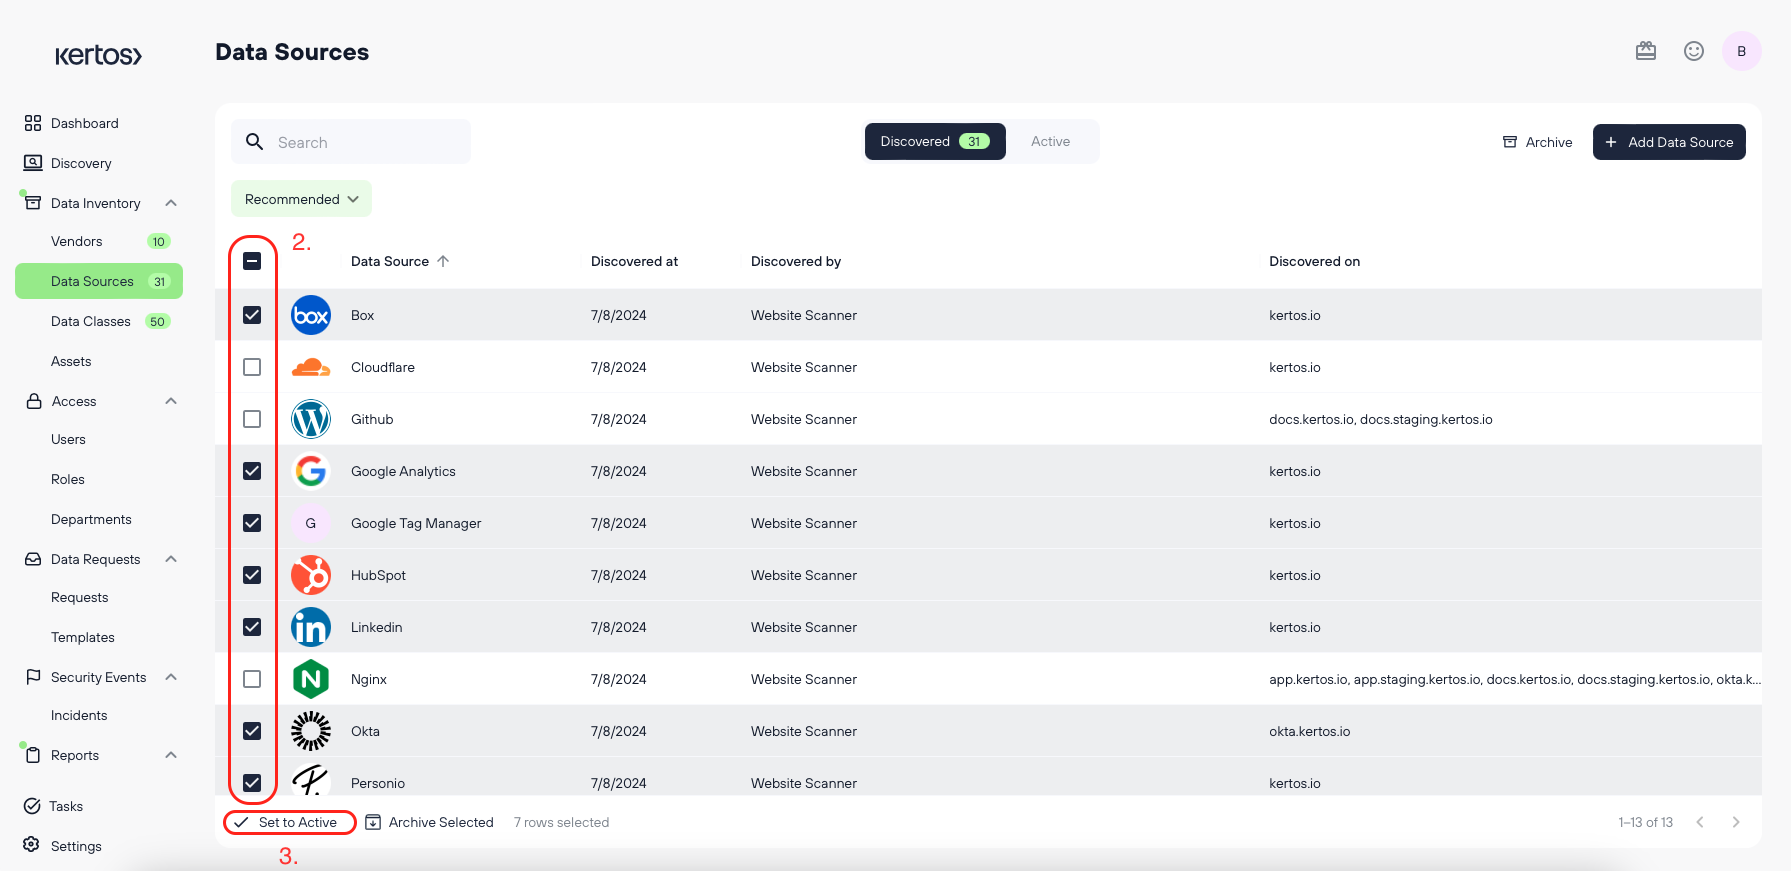
2. In this case, select the Data Sources relevant to your organization.
3. Click “Set to Active”.
.png)
4. Only for Data Sources: Choose if you want to add Data Classes suggested by Kertos (recommended) or only activate the Data Sources you discovered.
5. Click “Continue”.
The same workflow (except for step 4) applies to all other data types. Once you have set a data object to active, you can edit it and process it further.