Setting Up an Organization
In this chapter, you will set up an organization, including the Corporate Identity, company settings, departments and users. The goal here is to demonstrate the way in which you can adapt an organization in Kertos to fit specific requirements and reflect the operational structure.
Organization Setup
On the left side of the application, click on the "Settings" tab to find the organization settings.

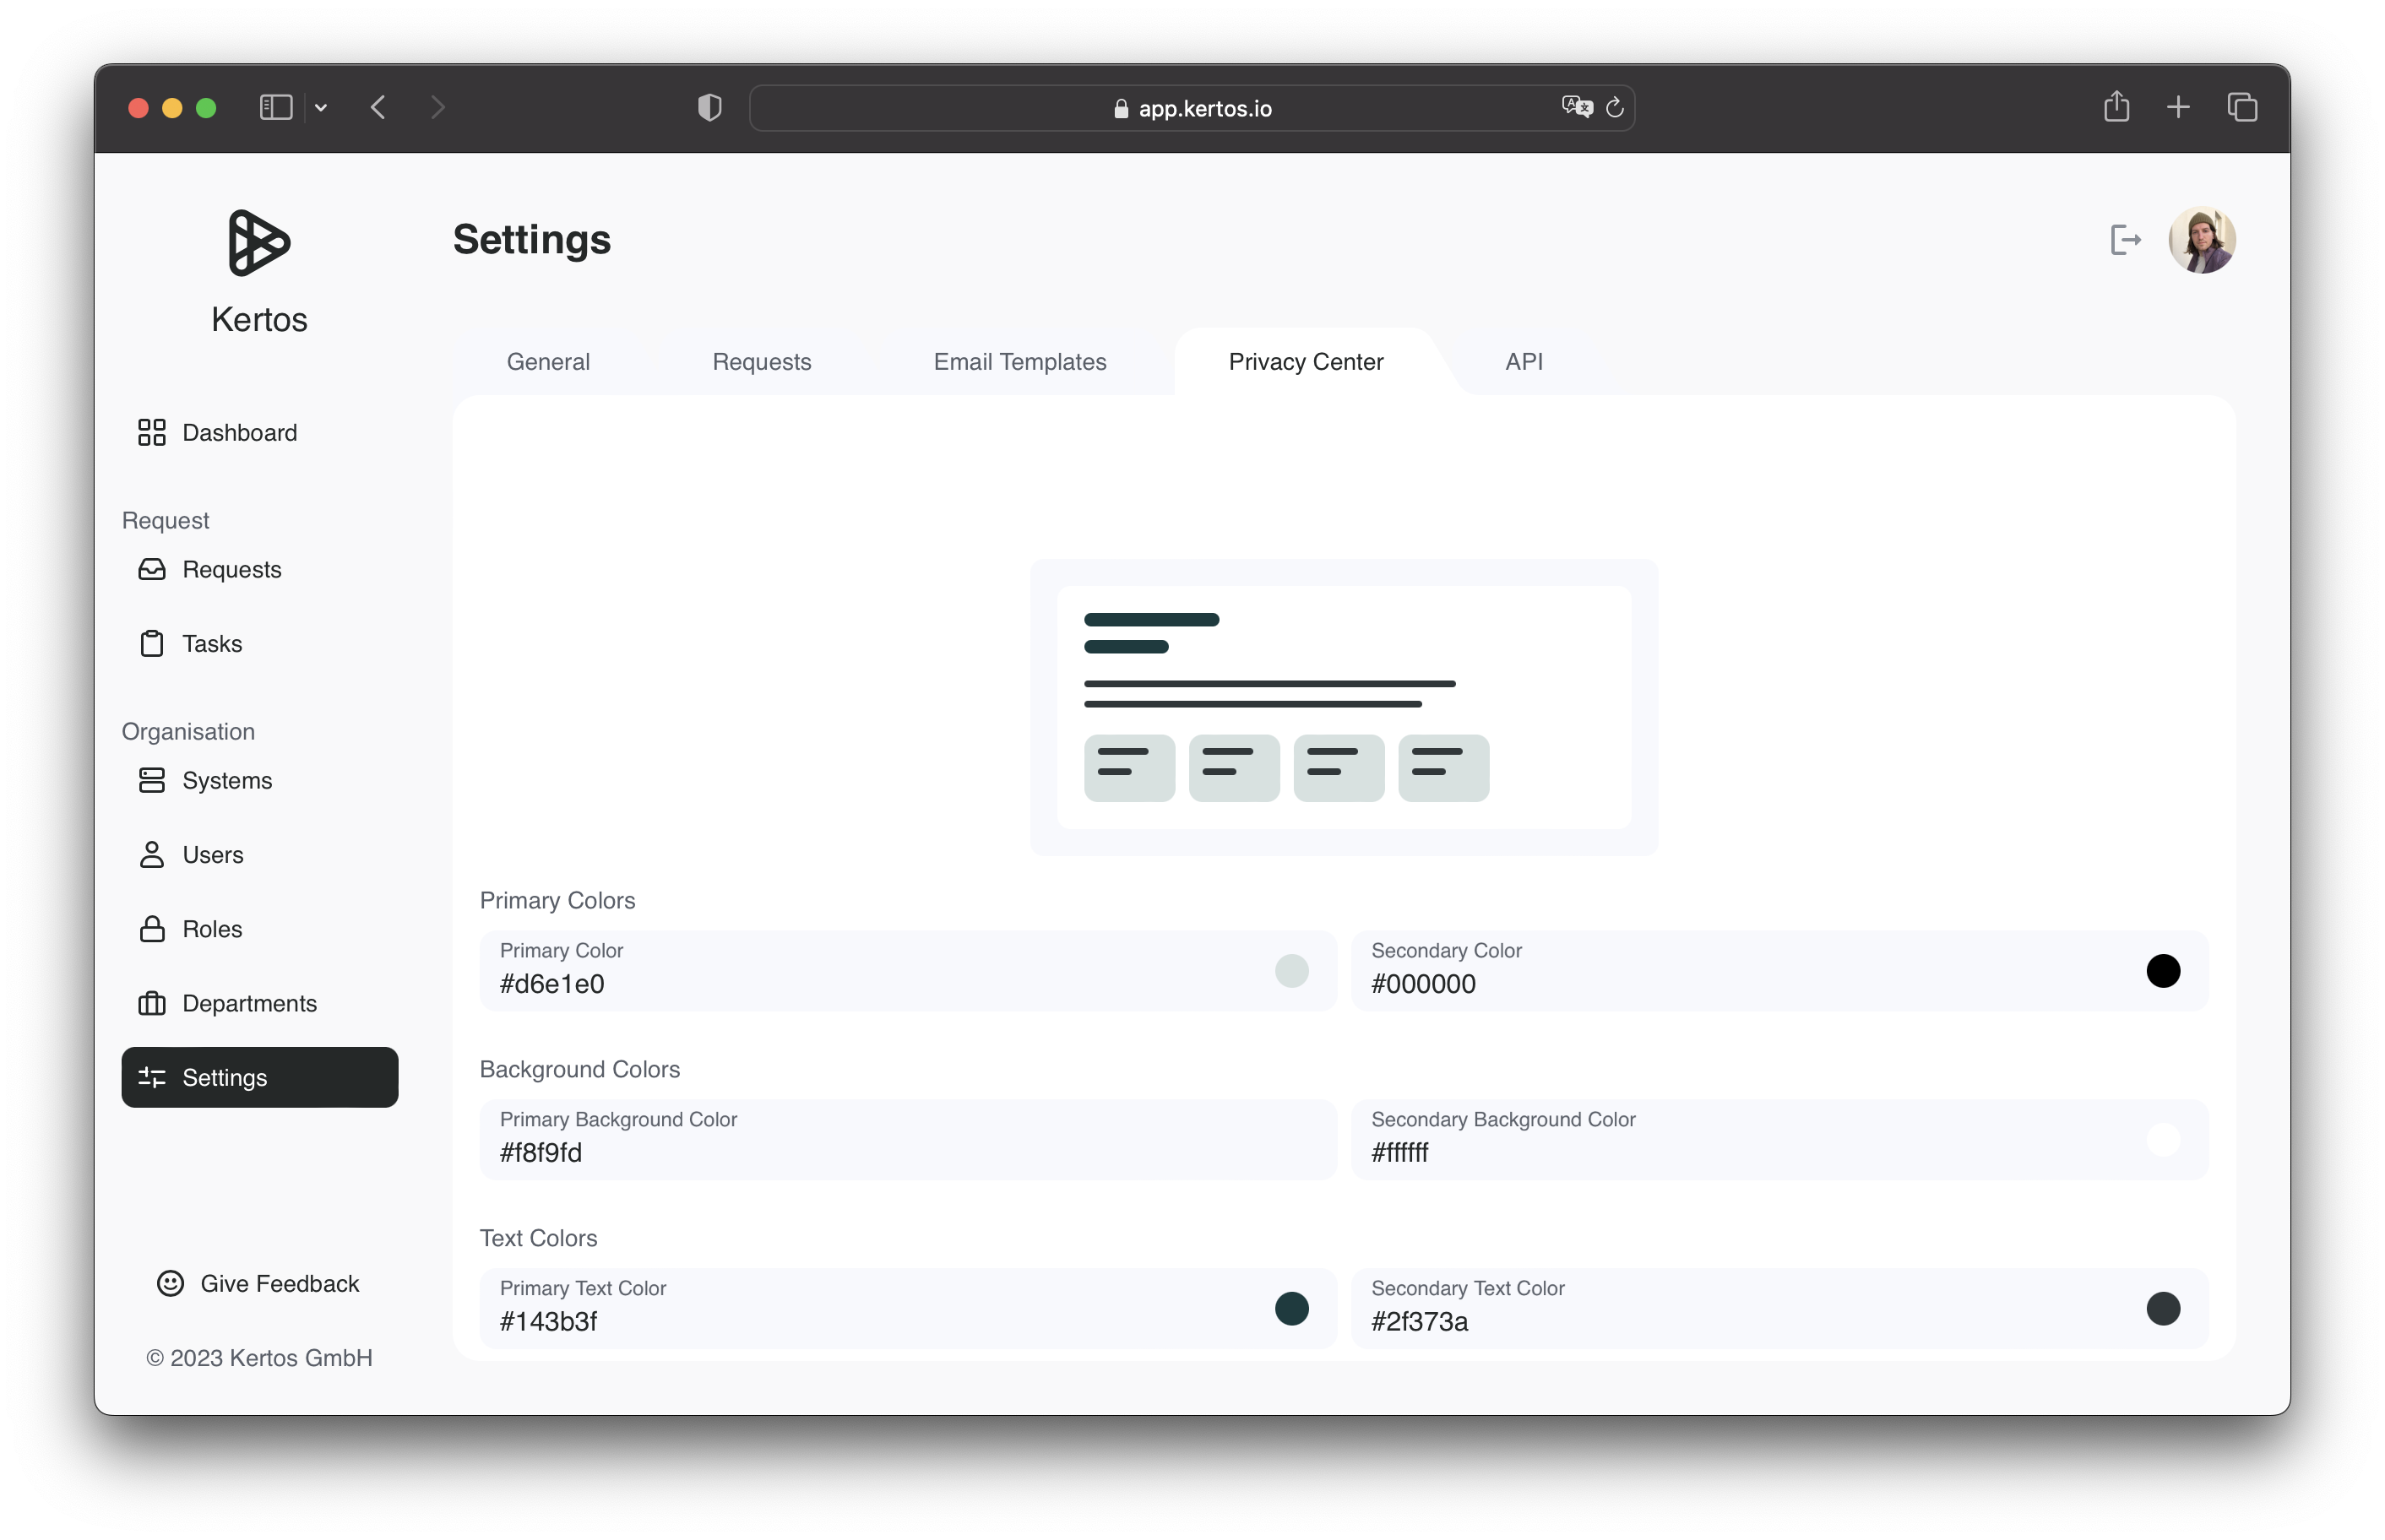
In the "General" section, you can enter the name of your organization and upload the logo. Right below you'll find the "Privacy Center" in which you can set the colors reflecting your Corporate Identity. These colors will be used when deploying the Kertos Privacy Center, which enables you to offer your Data Subjects a convenient way to hand in requests.
Next, you'll see the "Requests" section, where you can adapt the application to fit your organization's request policy.
In the "Due Date" subsection, you have the option to set a default due date for new Data Subject Requests. For each new request, there will still be the opportunity to set a different due date, if required.
The due date of a request is a legal requirement, which is determined by regulations like the GDPR! Please make sure that you have consulted all responsible parties before setting a default due date!
Below that, you can also adjust the request notification settings, under "Reminders for System Owners". There, you can decide whether System Owners should be reminded of due requests, including the specific timeframes for reminders.
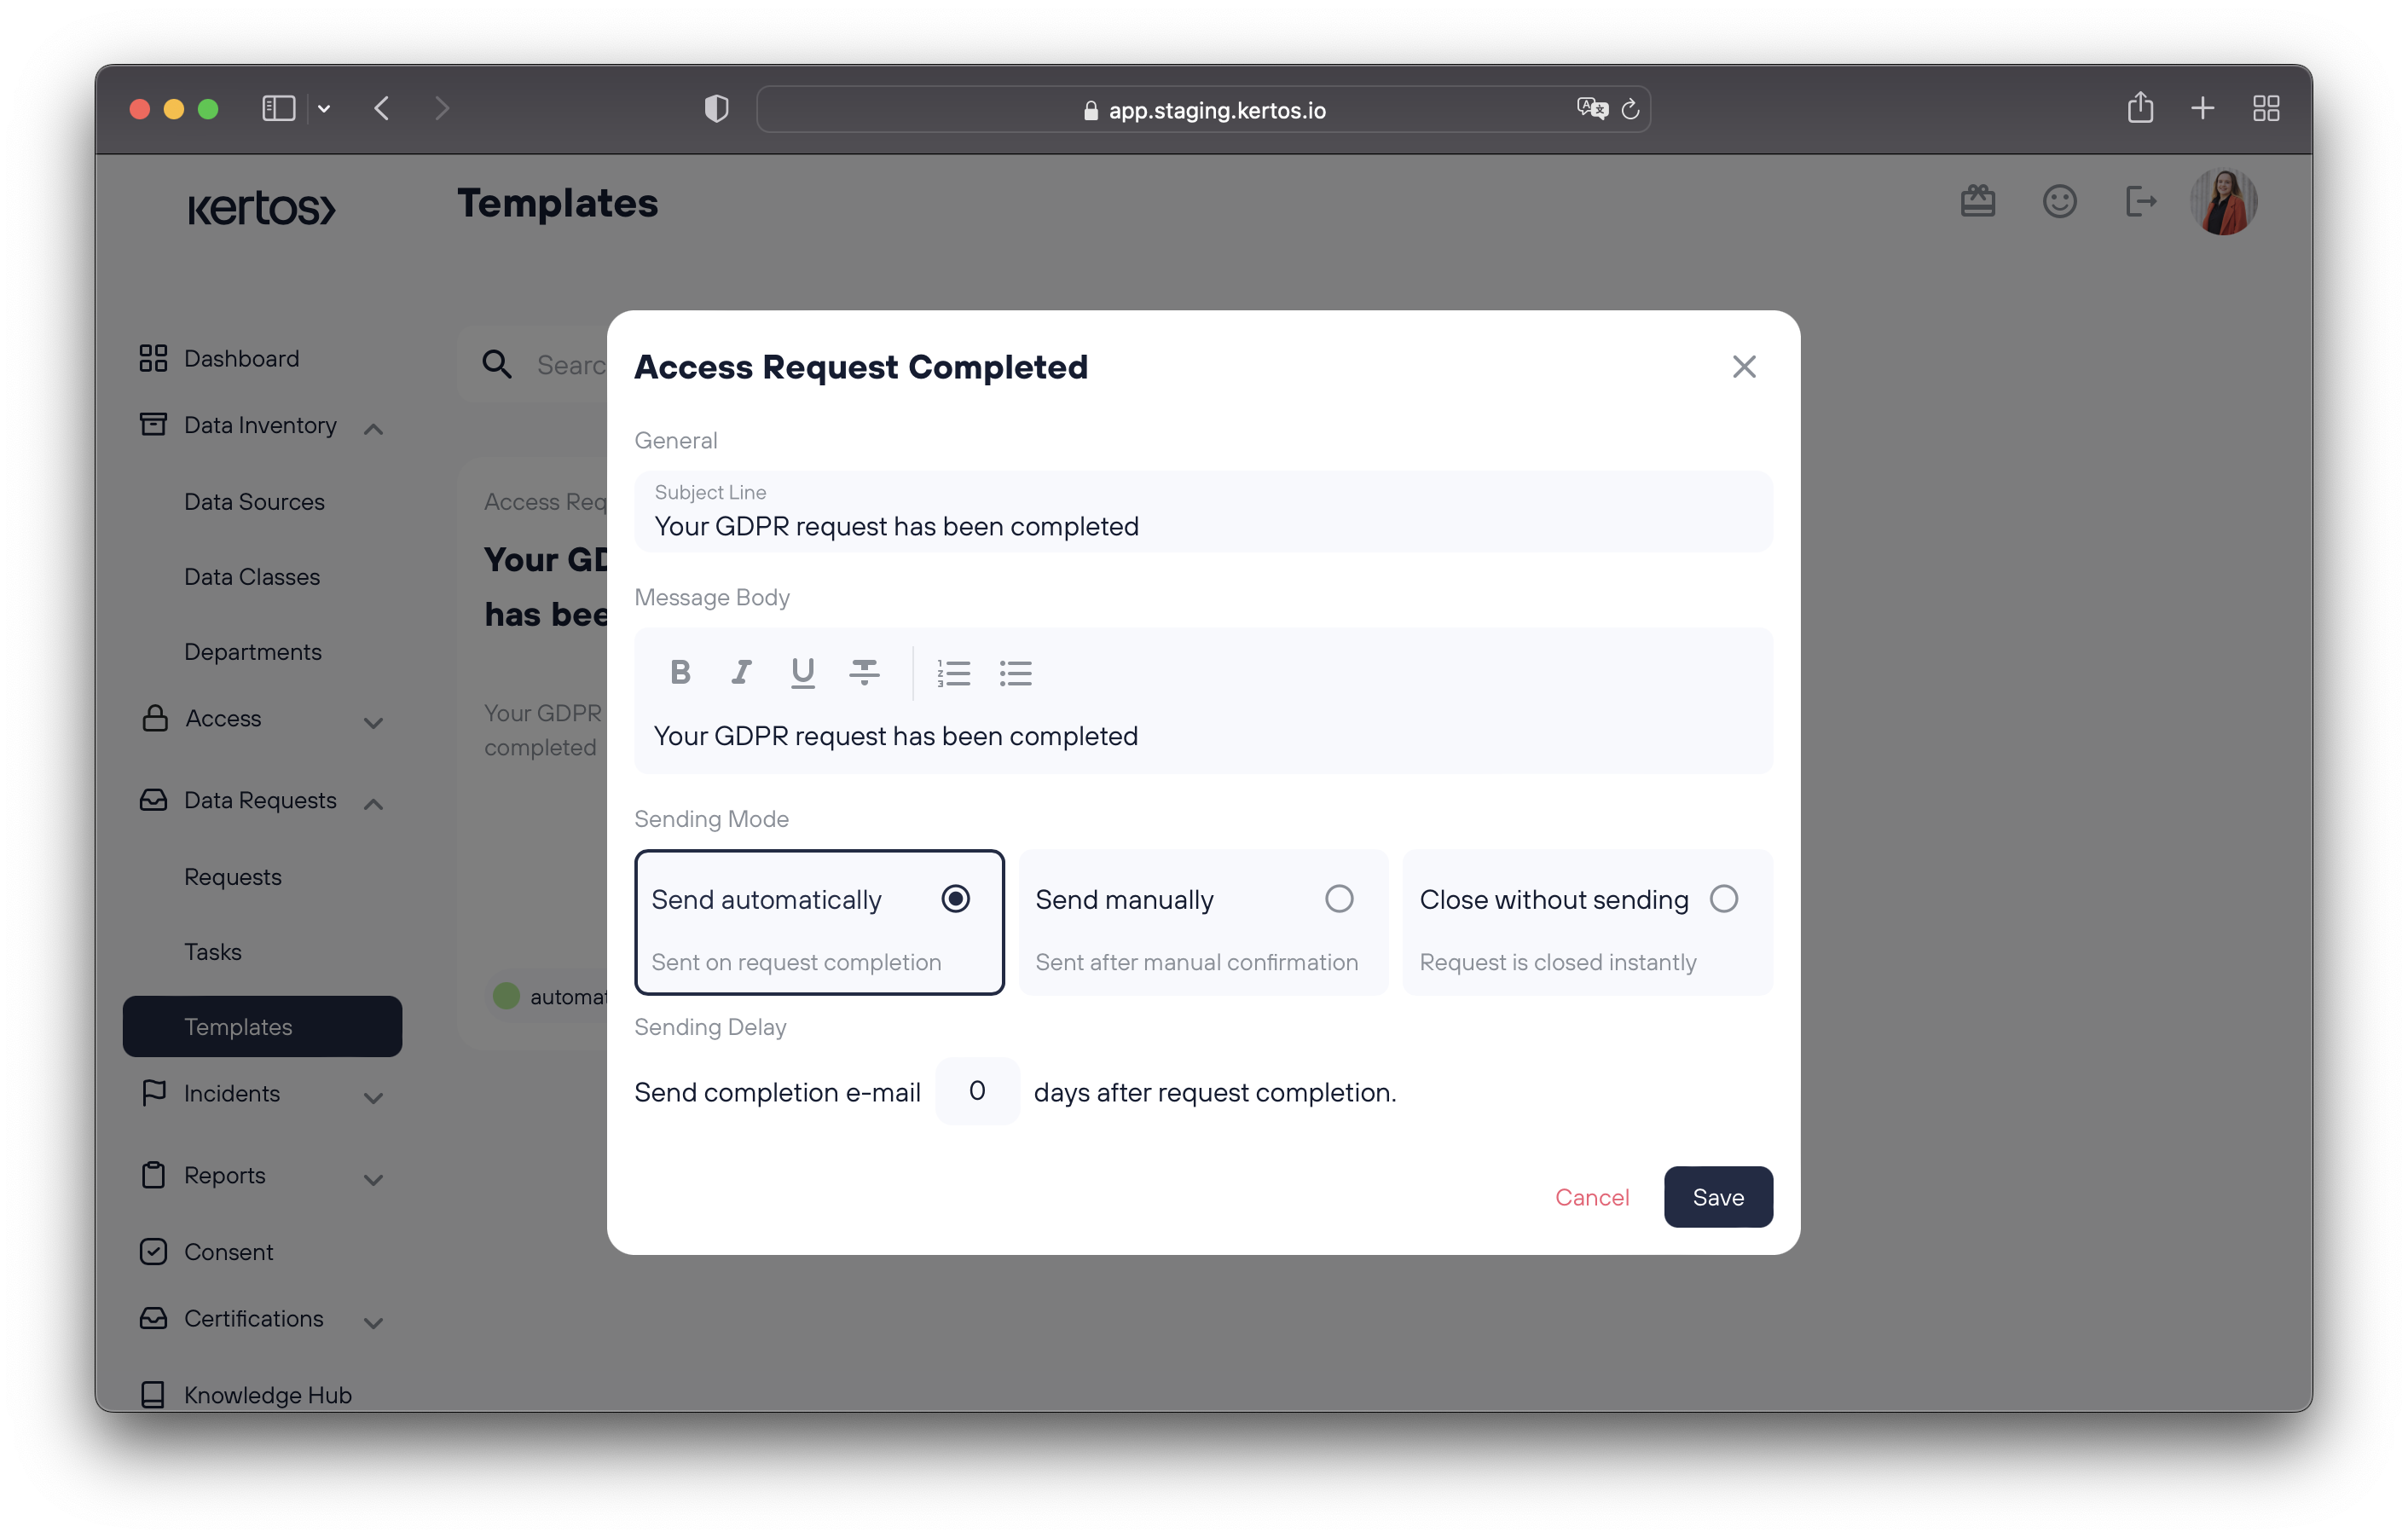
In the subsection Access Request Completion and Deletion Request Completion, you can enable the automated completion messages. Both sections have a subject line and a message body, which can be customized according to your company requirements. These templates will be sent out via email to the Data Subject as soon as the respective requests are completed.
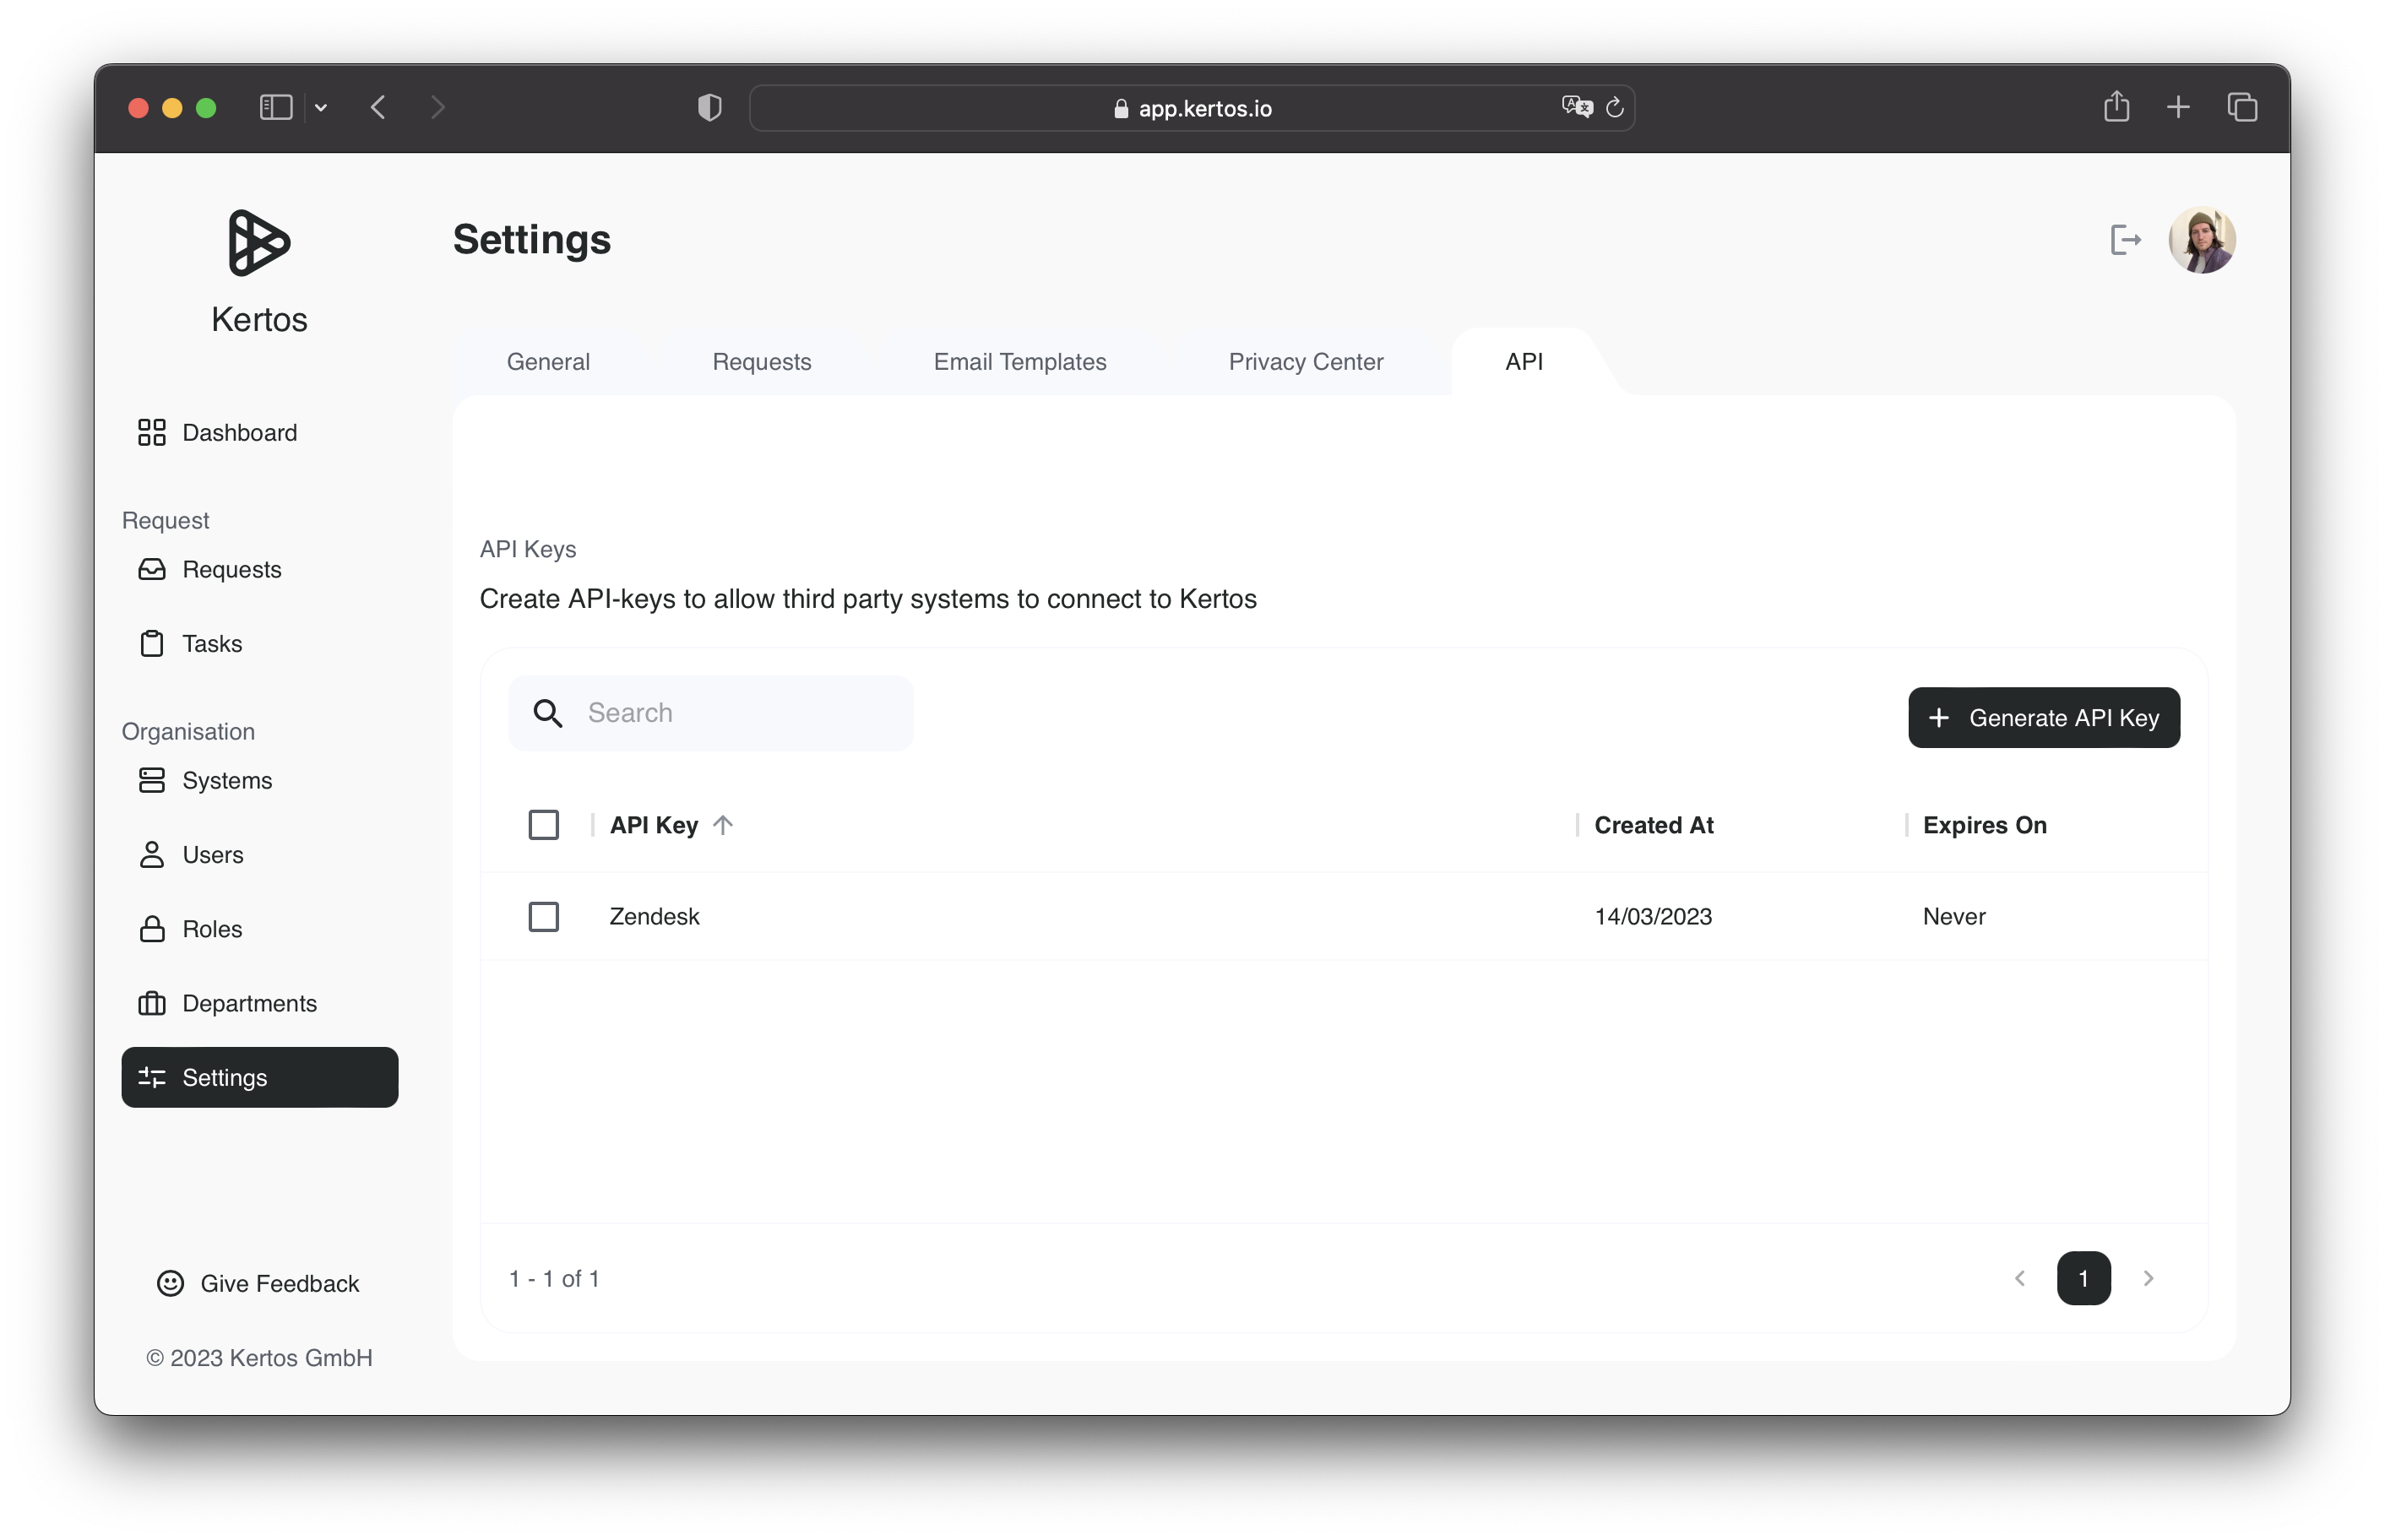
As a final step, head over to the API section. In this section, you can create API keys to allow third-party systems to connect to Kertos. By clicking on the "Generate API Key"- button, you can easily add a new API key to your list.
Organization Structure
After adjusting the settings for your whole organization, the next part will be about representing the structure. In this part, you will see how to set up new departments and how to invite a new user to the platform.
Department Setup
On the left side of the application, select the "Departments" tab to see all existing departments.
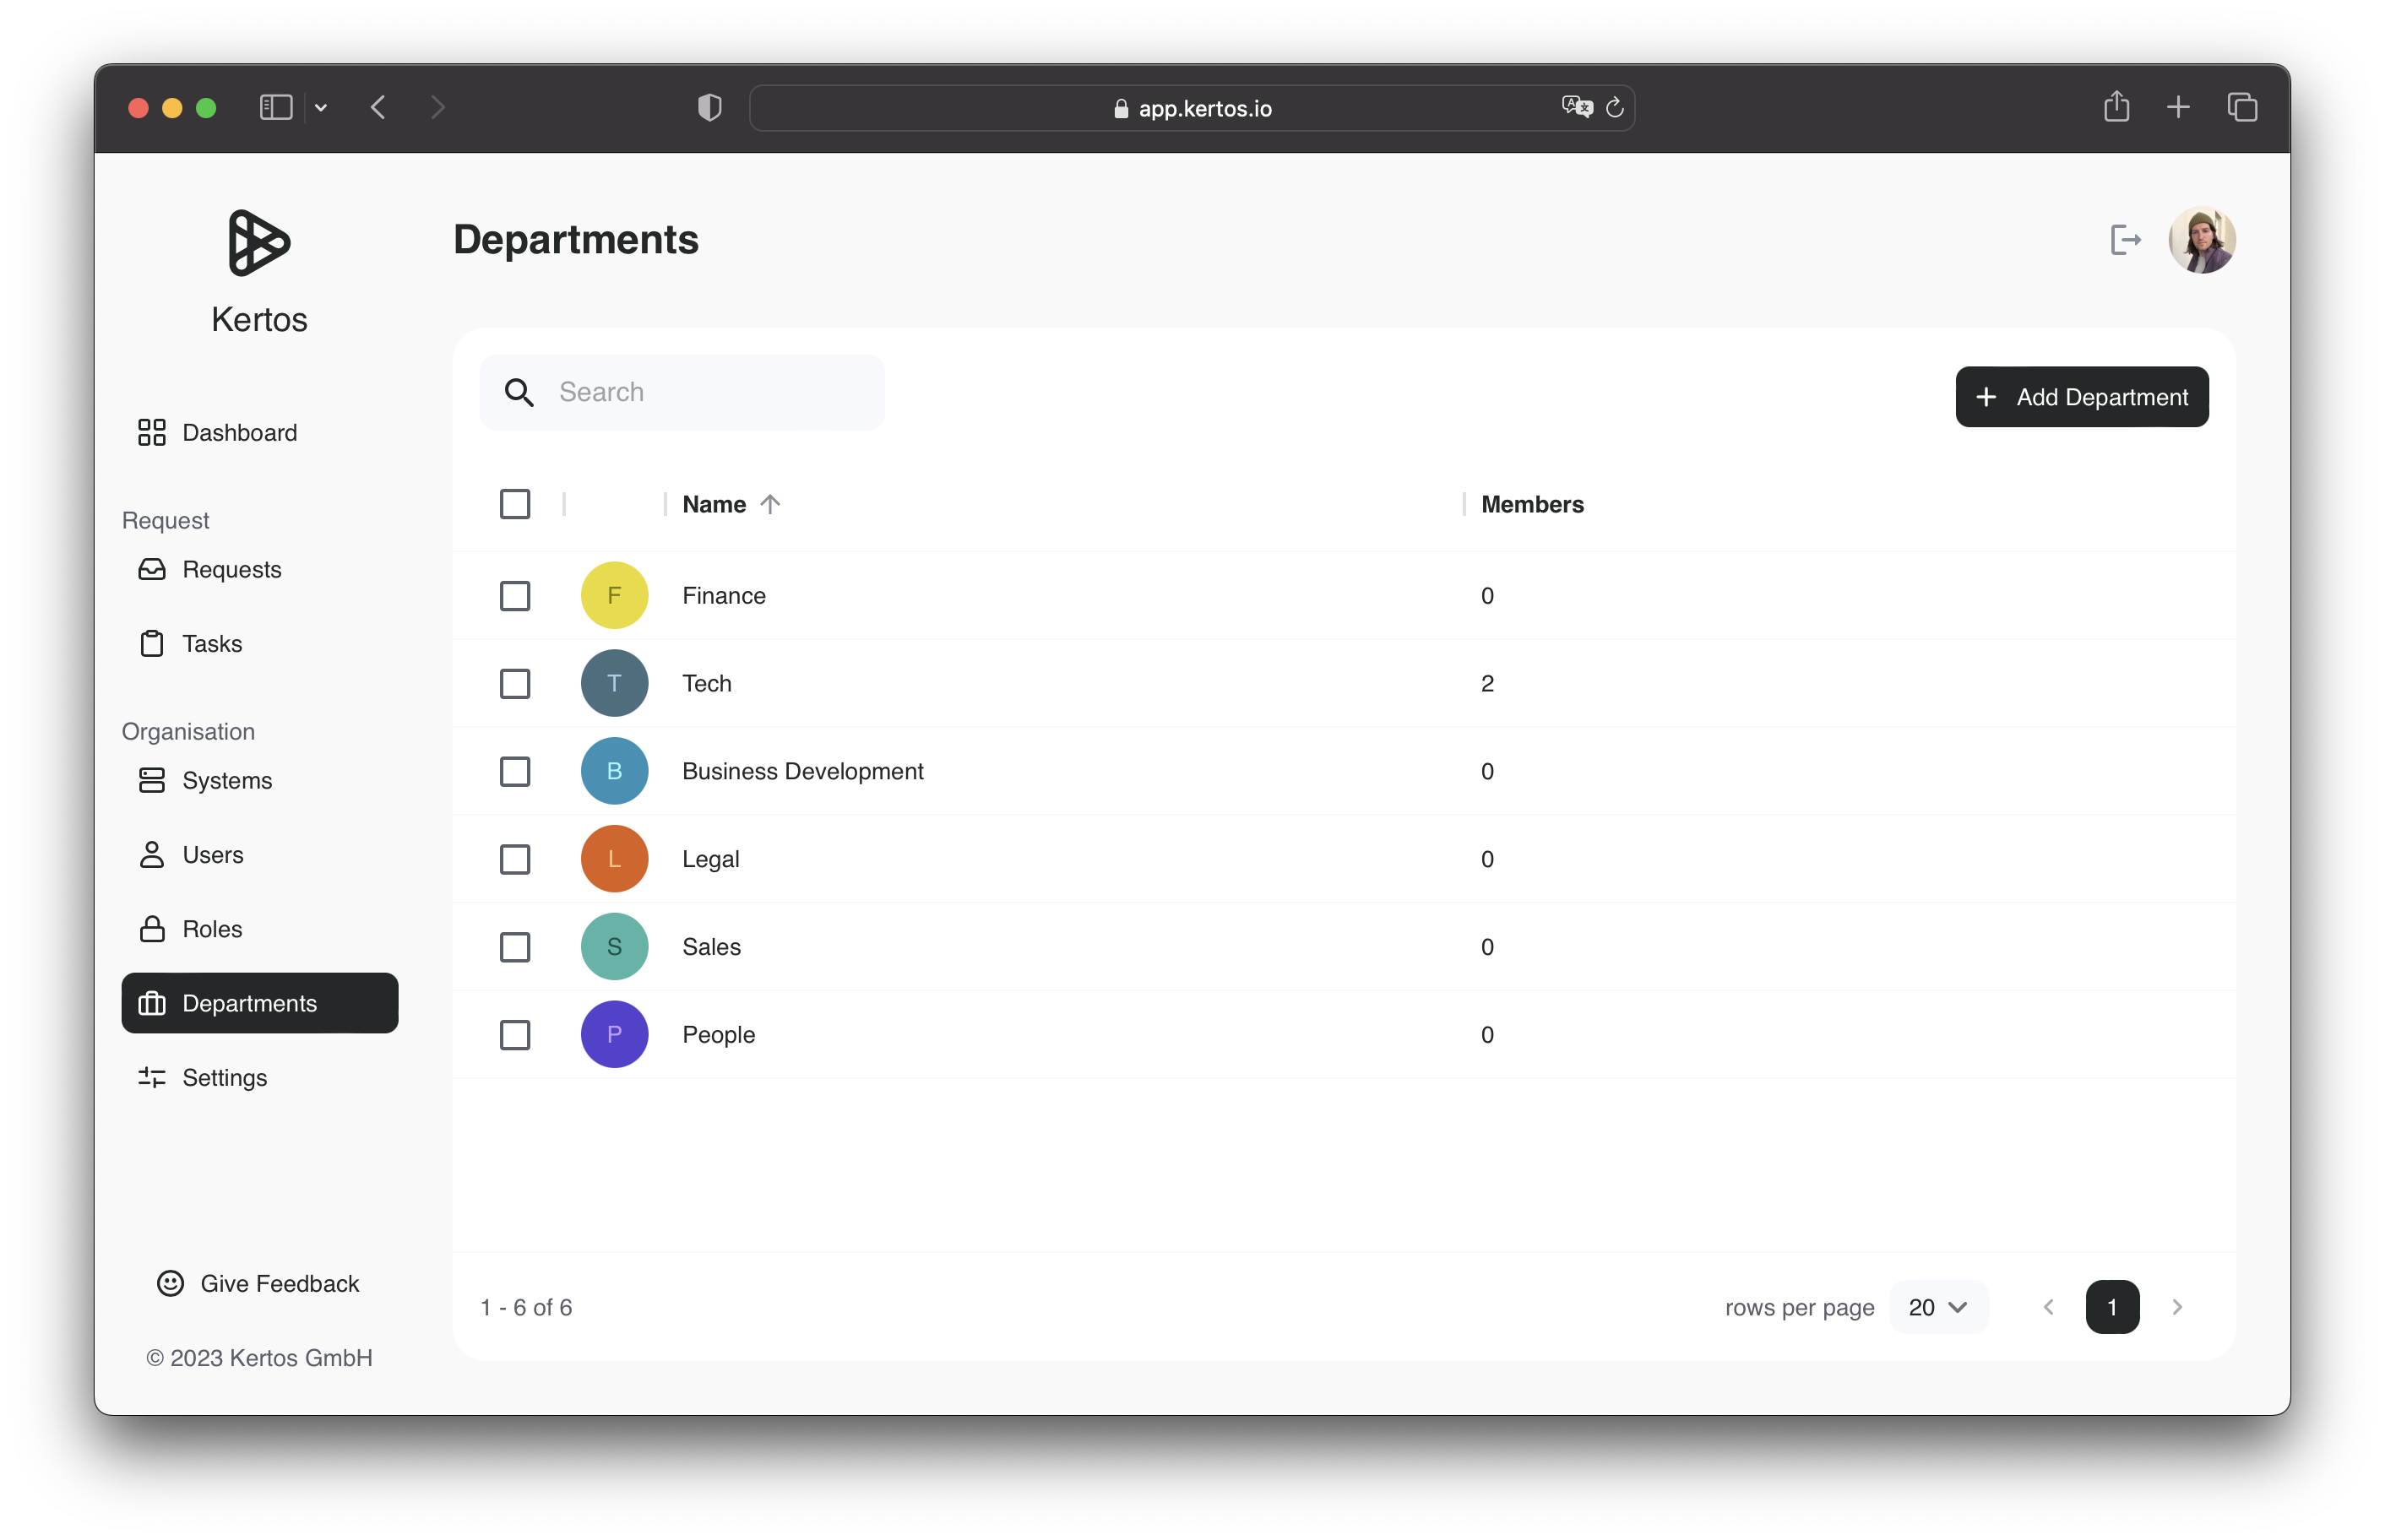
On the right upper side, you see a button labeled "Add Department". Click this button and add a new department.
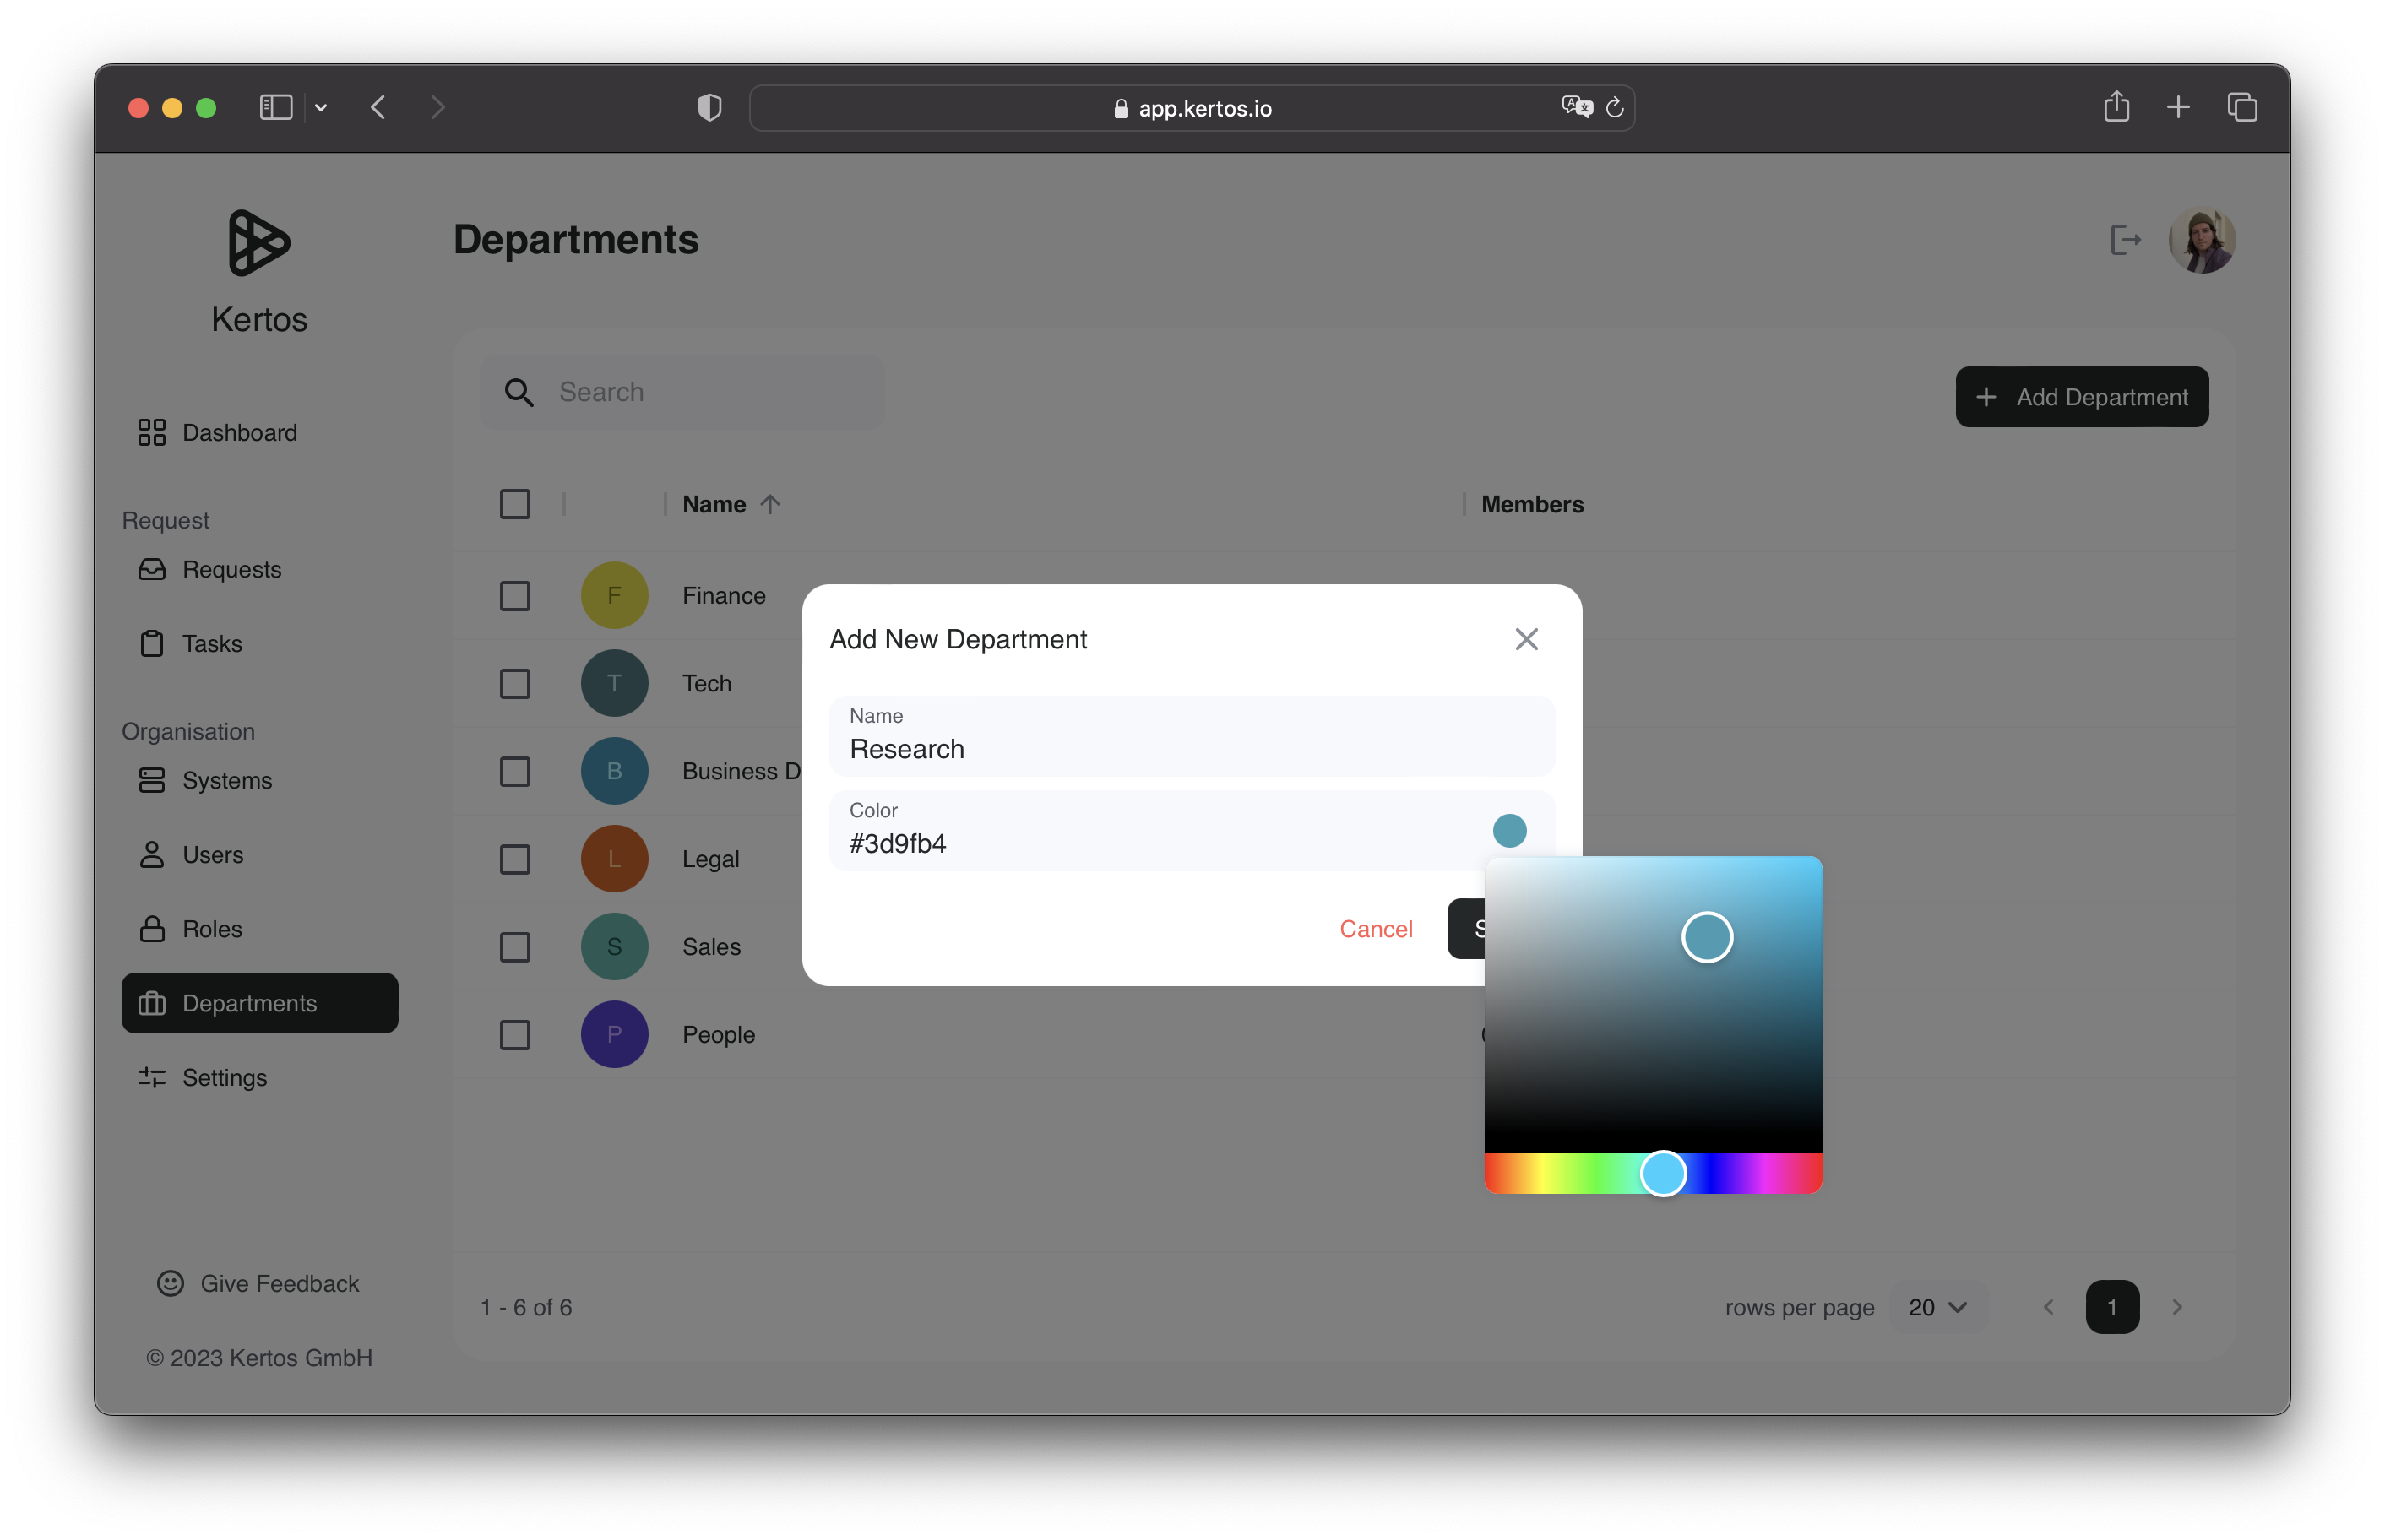
When adding the department you have the option to provide a color code that will be used throughout the application. Use this method to set up all departments you want to represent within the application.
Inviting a New User
After setting up the departments, you can now switch over to the "Users" tab.
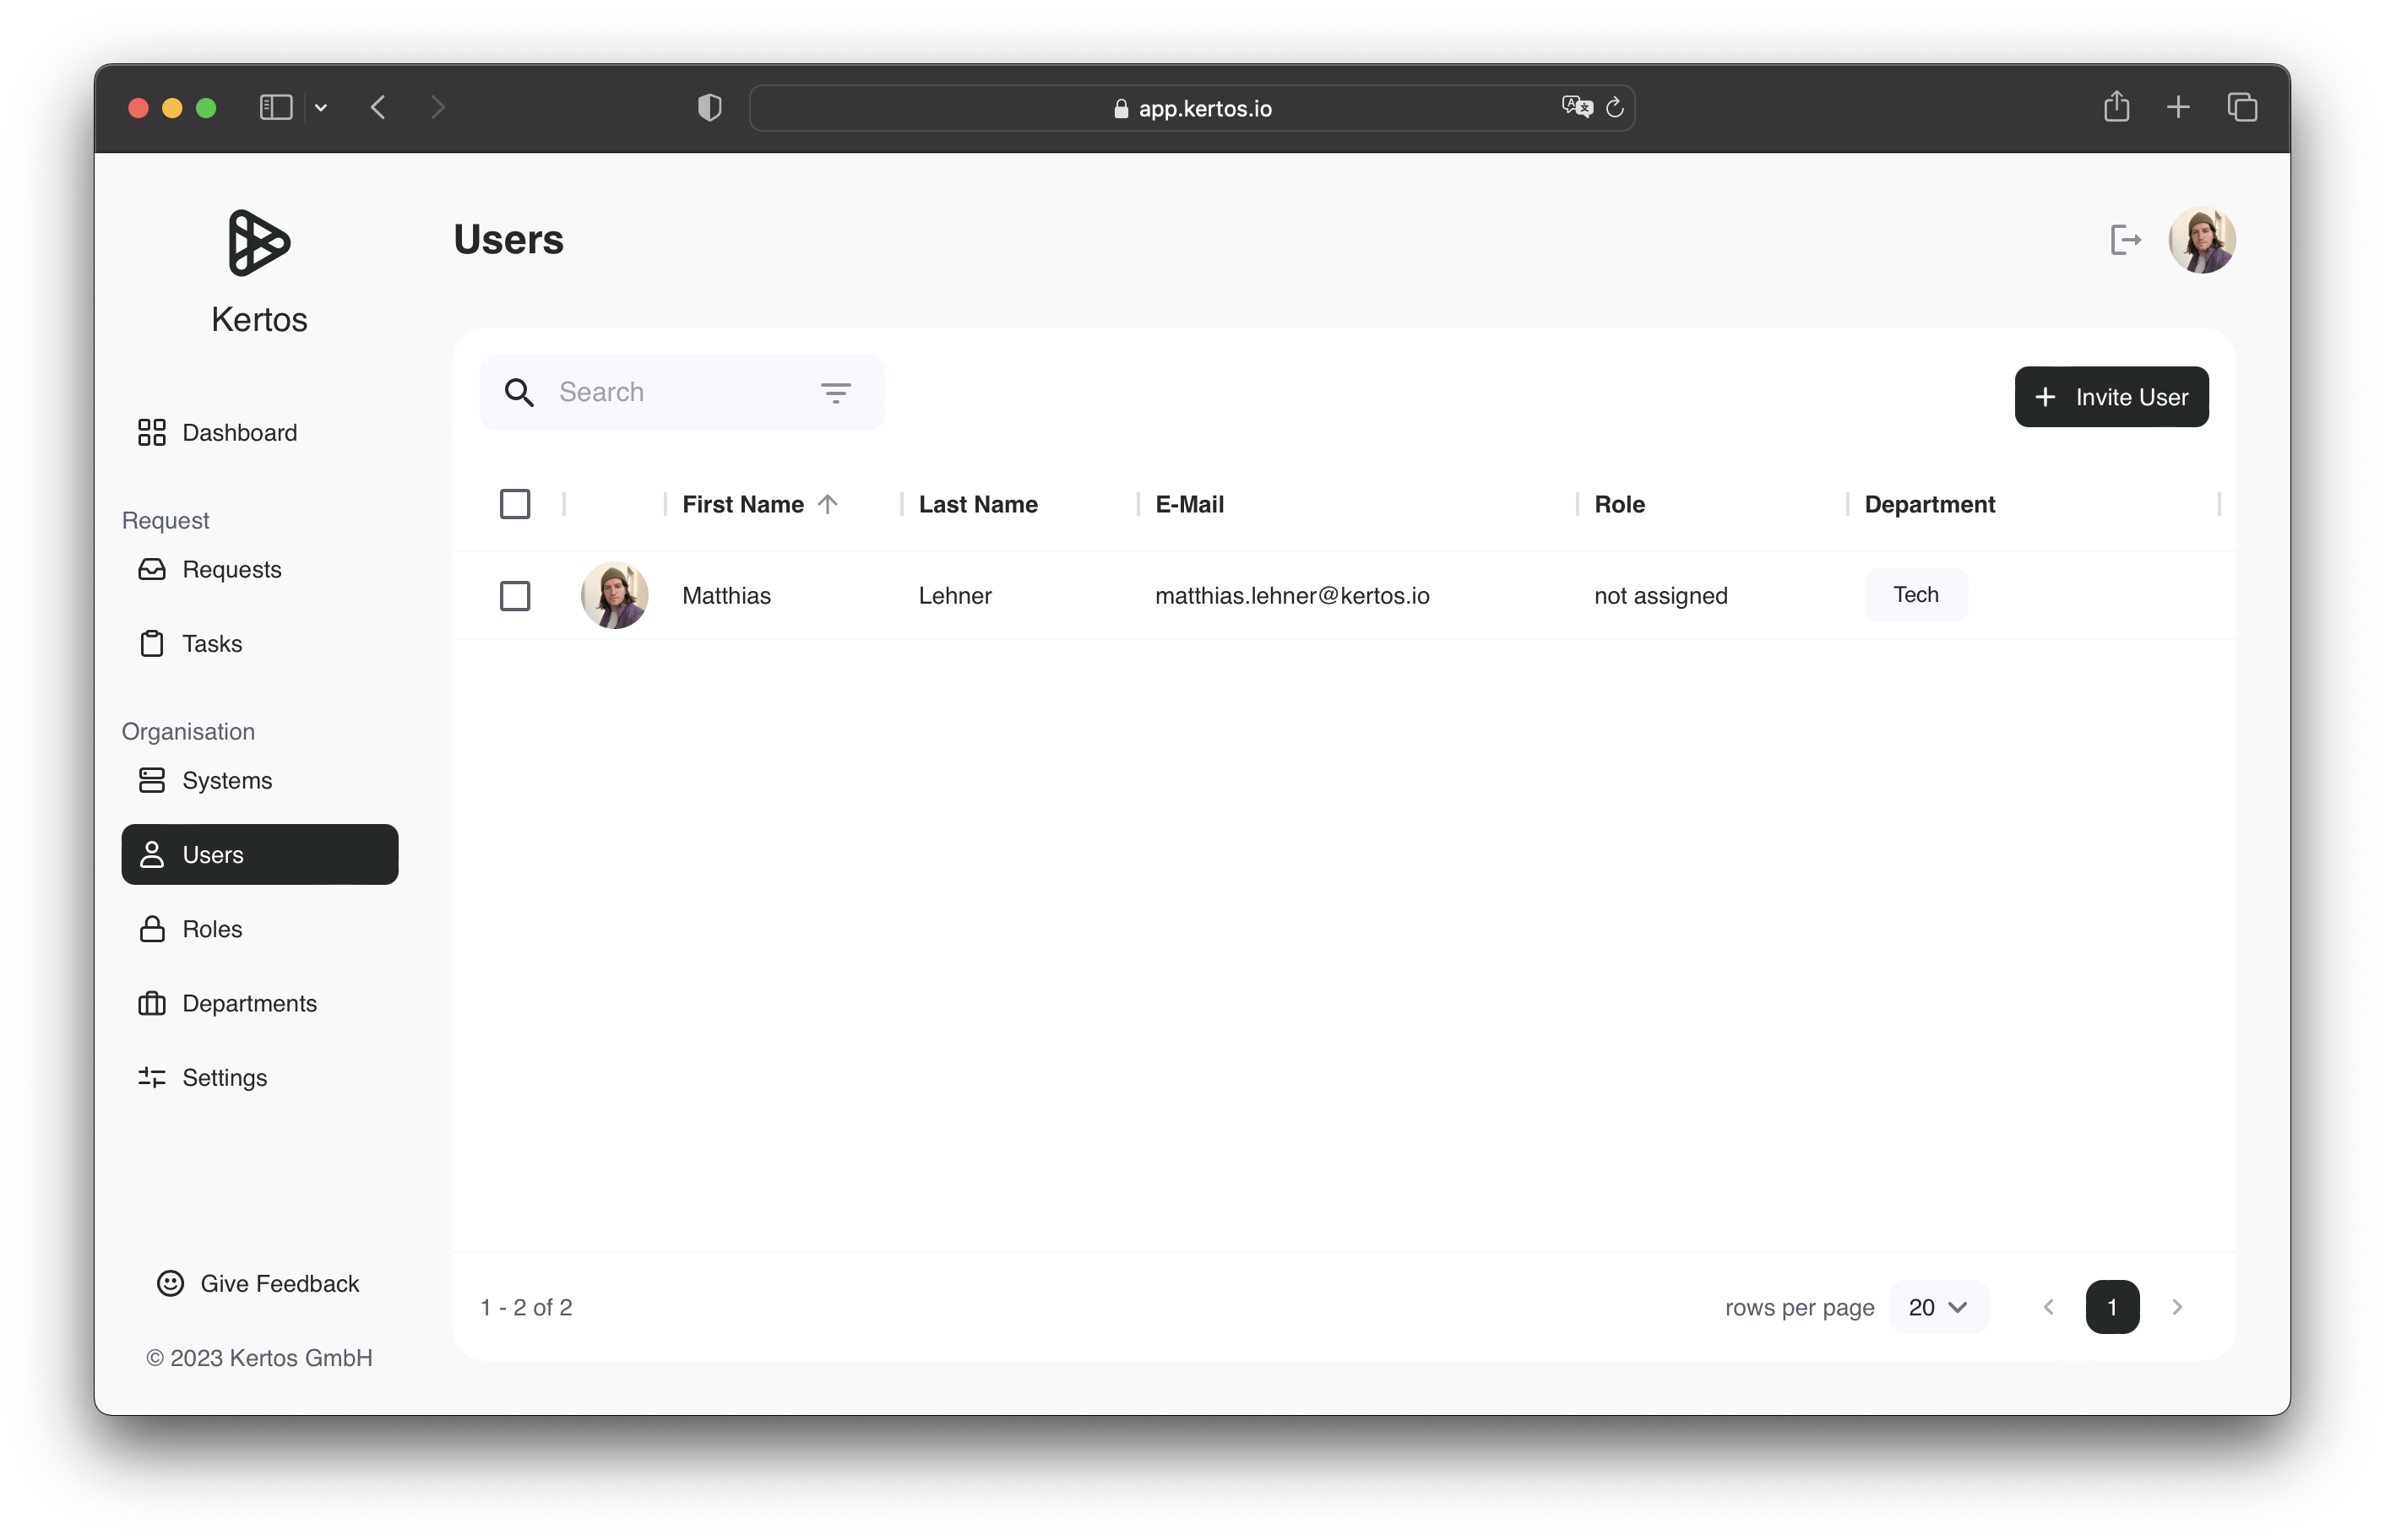
You see the overview over all users including their name, email, role and the departments that they belong to. Here you also have the opportunity to filter for a specific attribute and thus quickly identify corresponding users.
By clicking the "Add User" button on the top right of the screen, you can initialize the invitation of a new user.
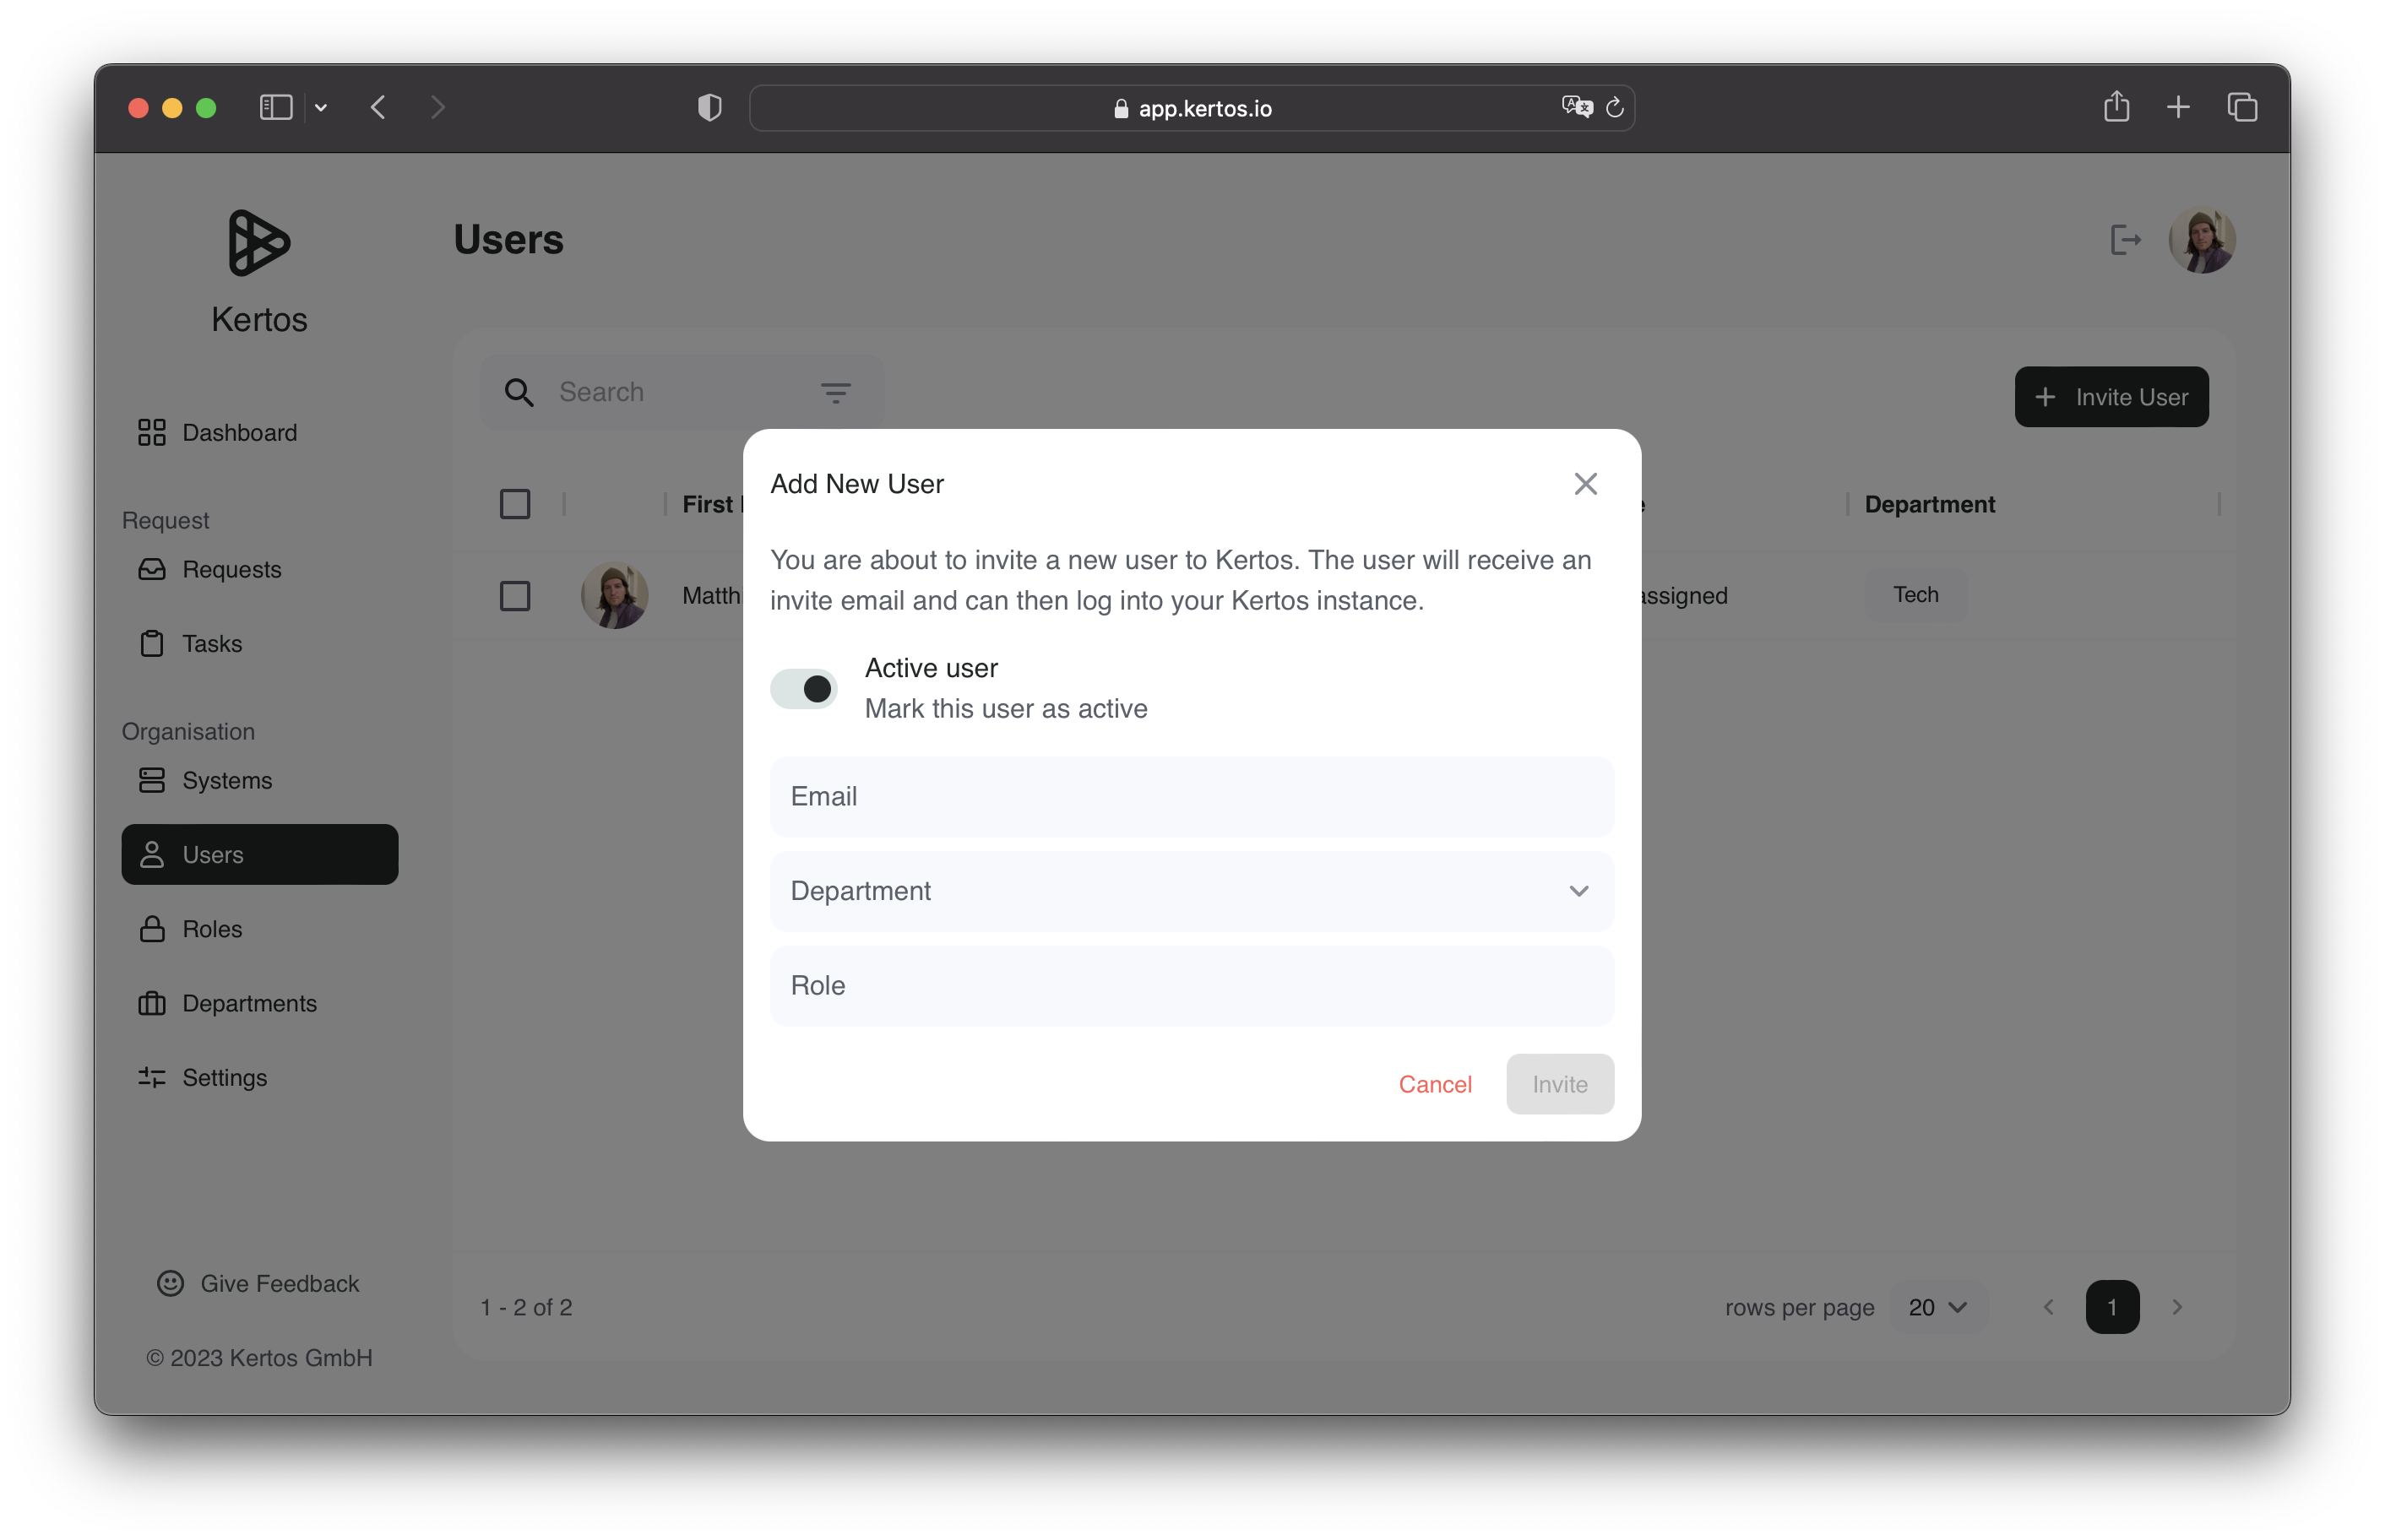
To finish the invitation, enter the email address, the department of the invited user and their role. You can also enter multiple users by separating their email addresses with a comma.
After you clicked the invite button, an email will be sent out to the user. The invited user then has to click on the link to complete the email verification and will be redirected to a form, which allows them to provide their personal information.