Entering an Incoming Data Subject Request
This chapter will demonstrate the essential steps to create and manage Data Subject Requests. It will cover the most important details of dealing with incoming requests, like defining due dates, data subject verification and additional requirements.
Requests Overview
Select the "Requests" tab on the left side to see all Data Subject Requests stored within the application.
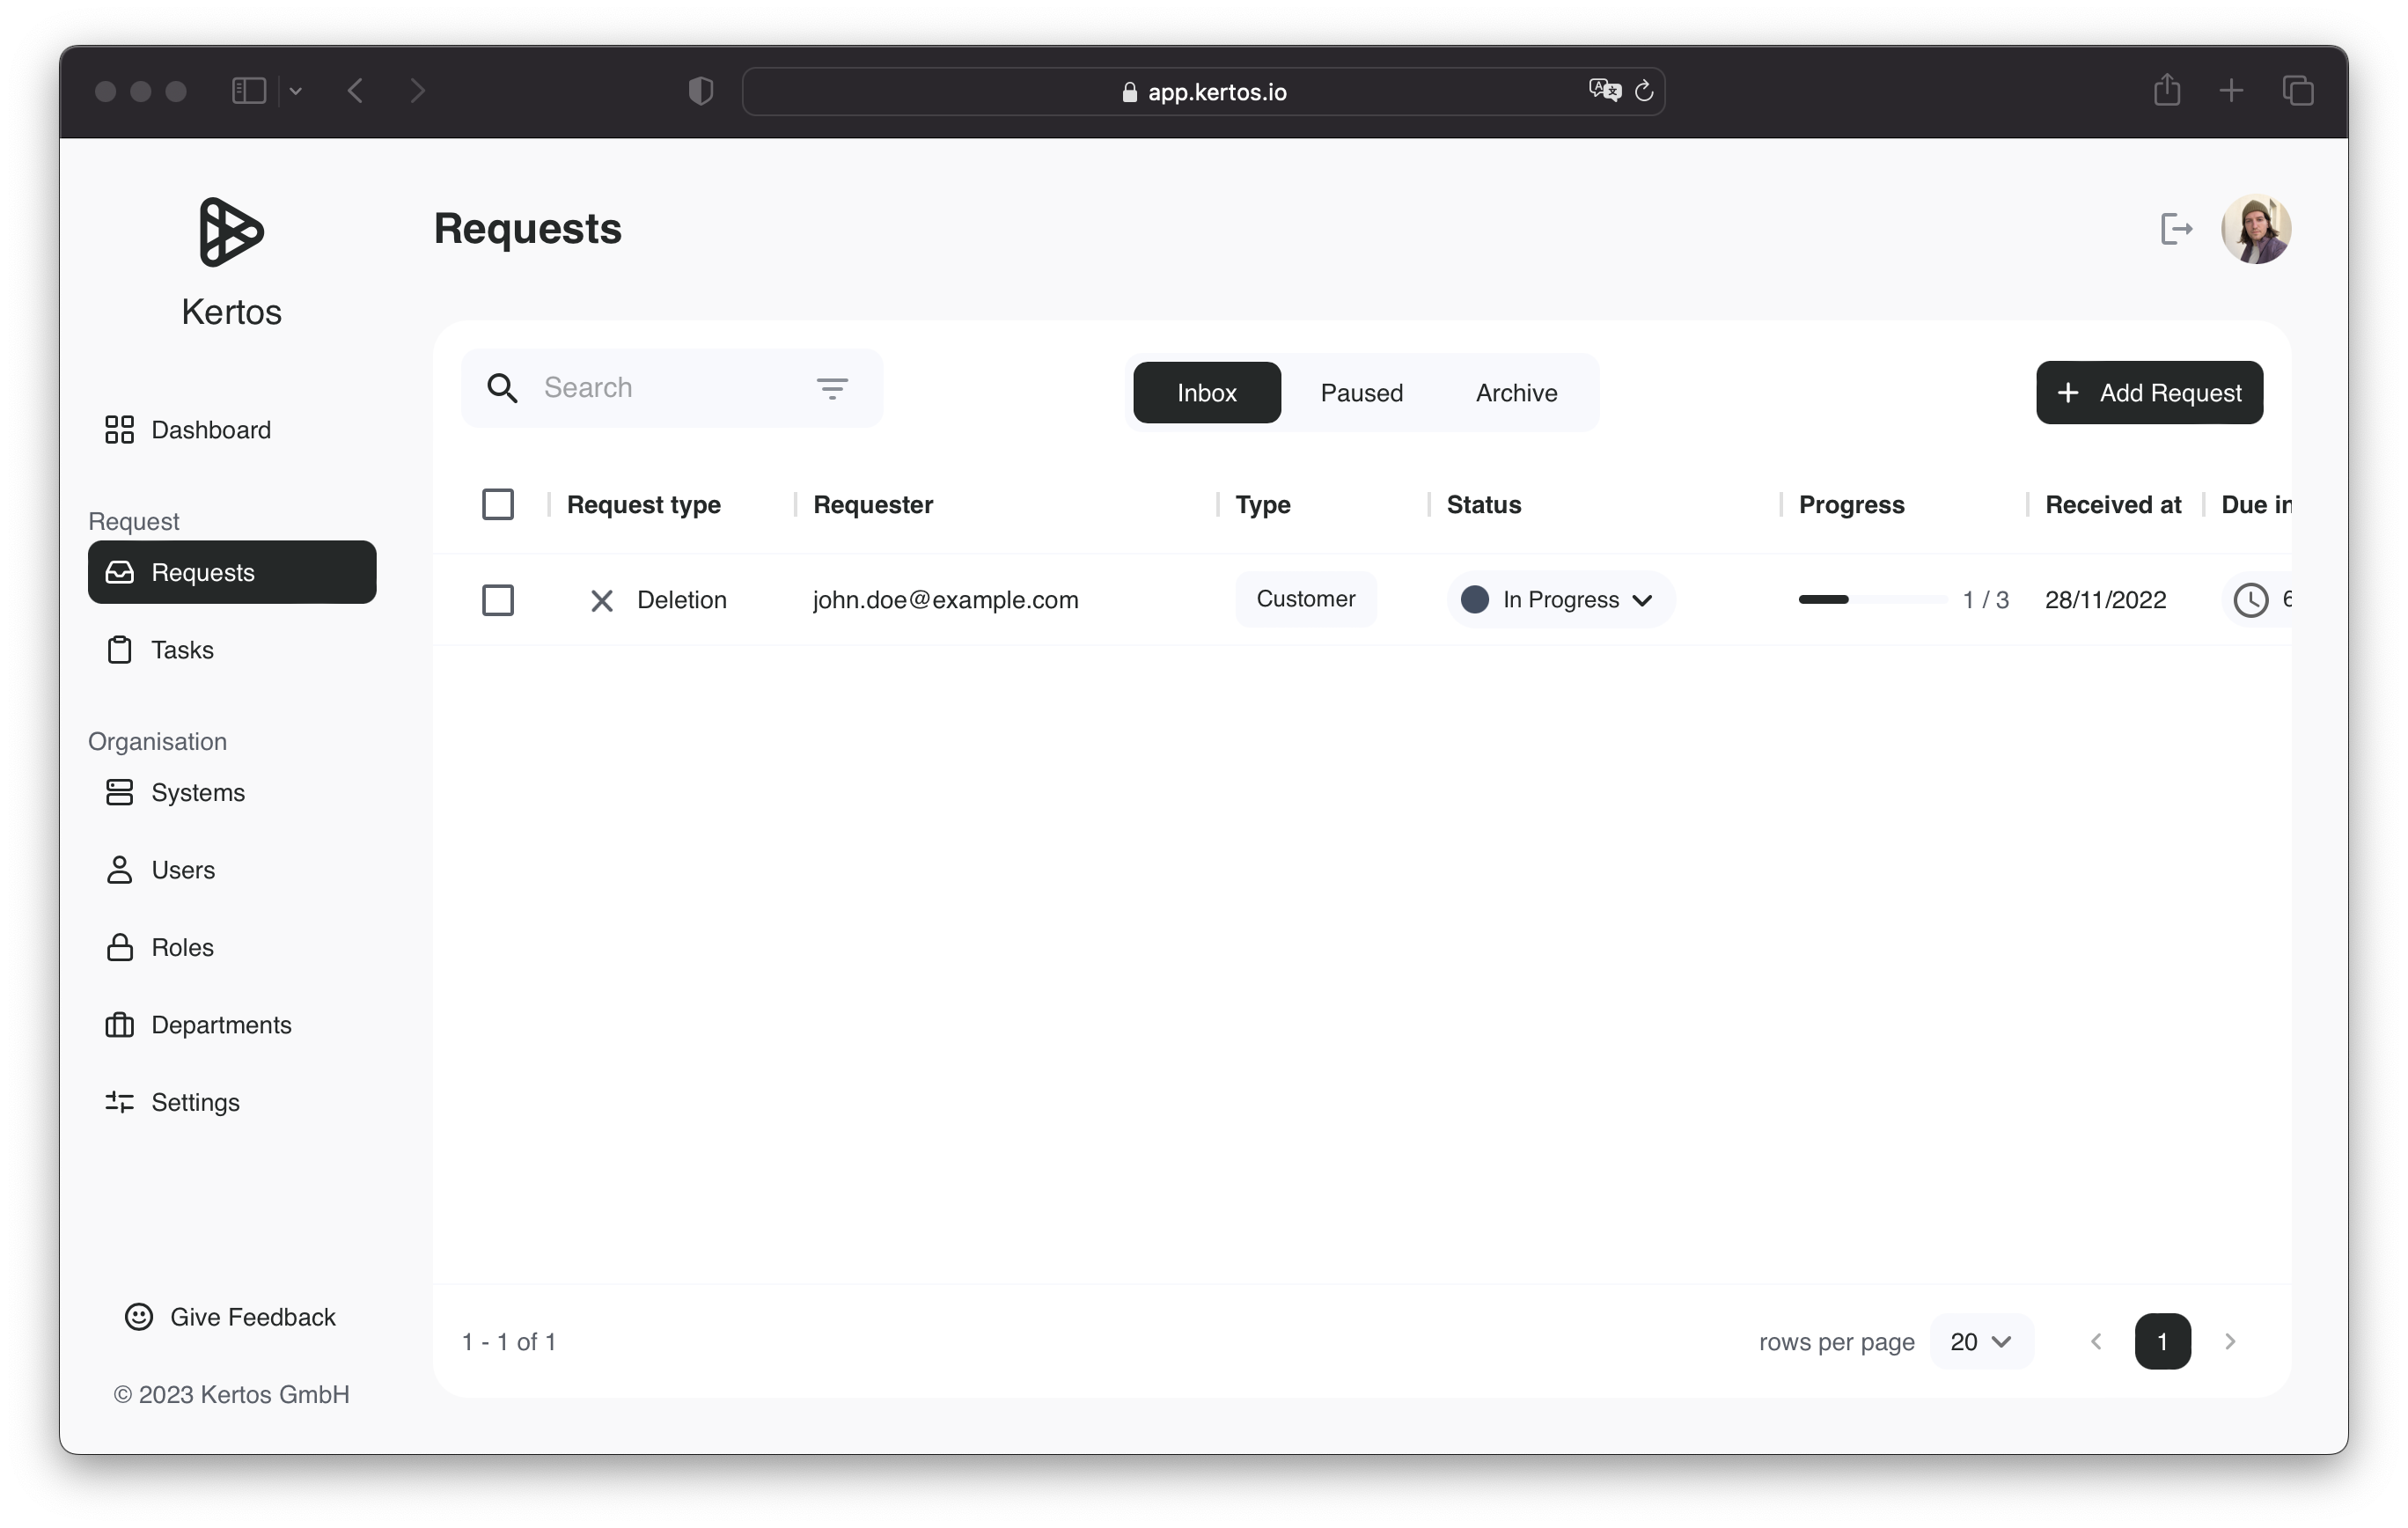
In this overview you can see the data subject (Requester column), the current request status, the progress, due date and the type of the request as well as the data subject type. The progress bar displays the number of open and closed as well as related System Tasks, which are required to close the request. You can also filter for any details, for example if you need to find requests for a specific data subject or request type. By clicking the "Archive" tab at the top of the screen, you are able to see all processed requests, that are yet to be deleted.
Manually Entering a New Data Subject Request
To add a new request, simply click the "Add Request" button that you will find at the top right of the screen.
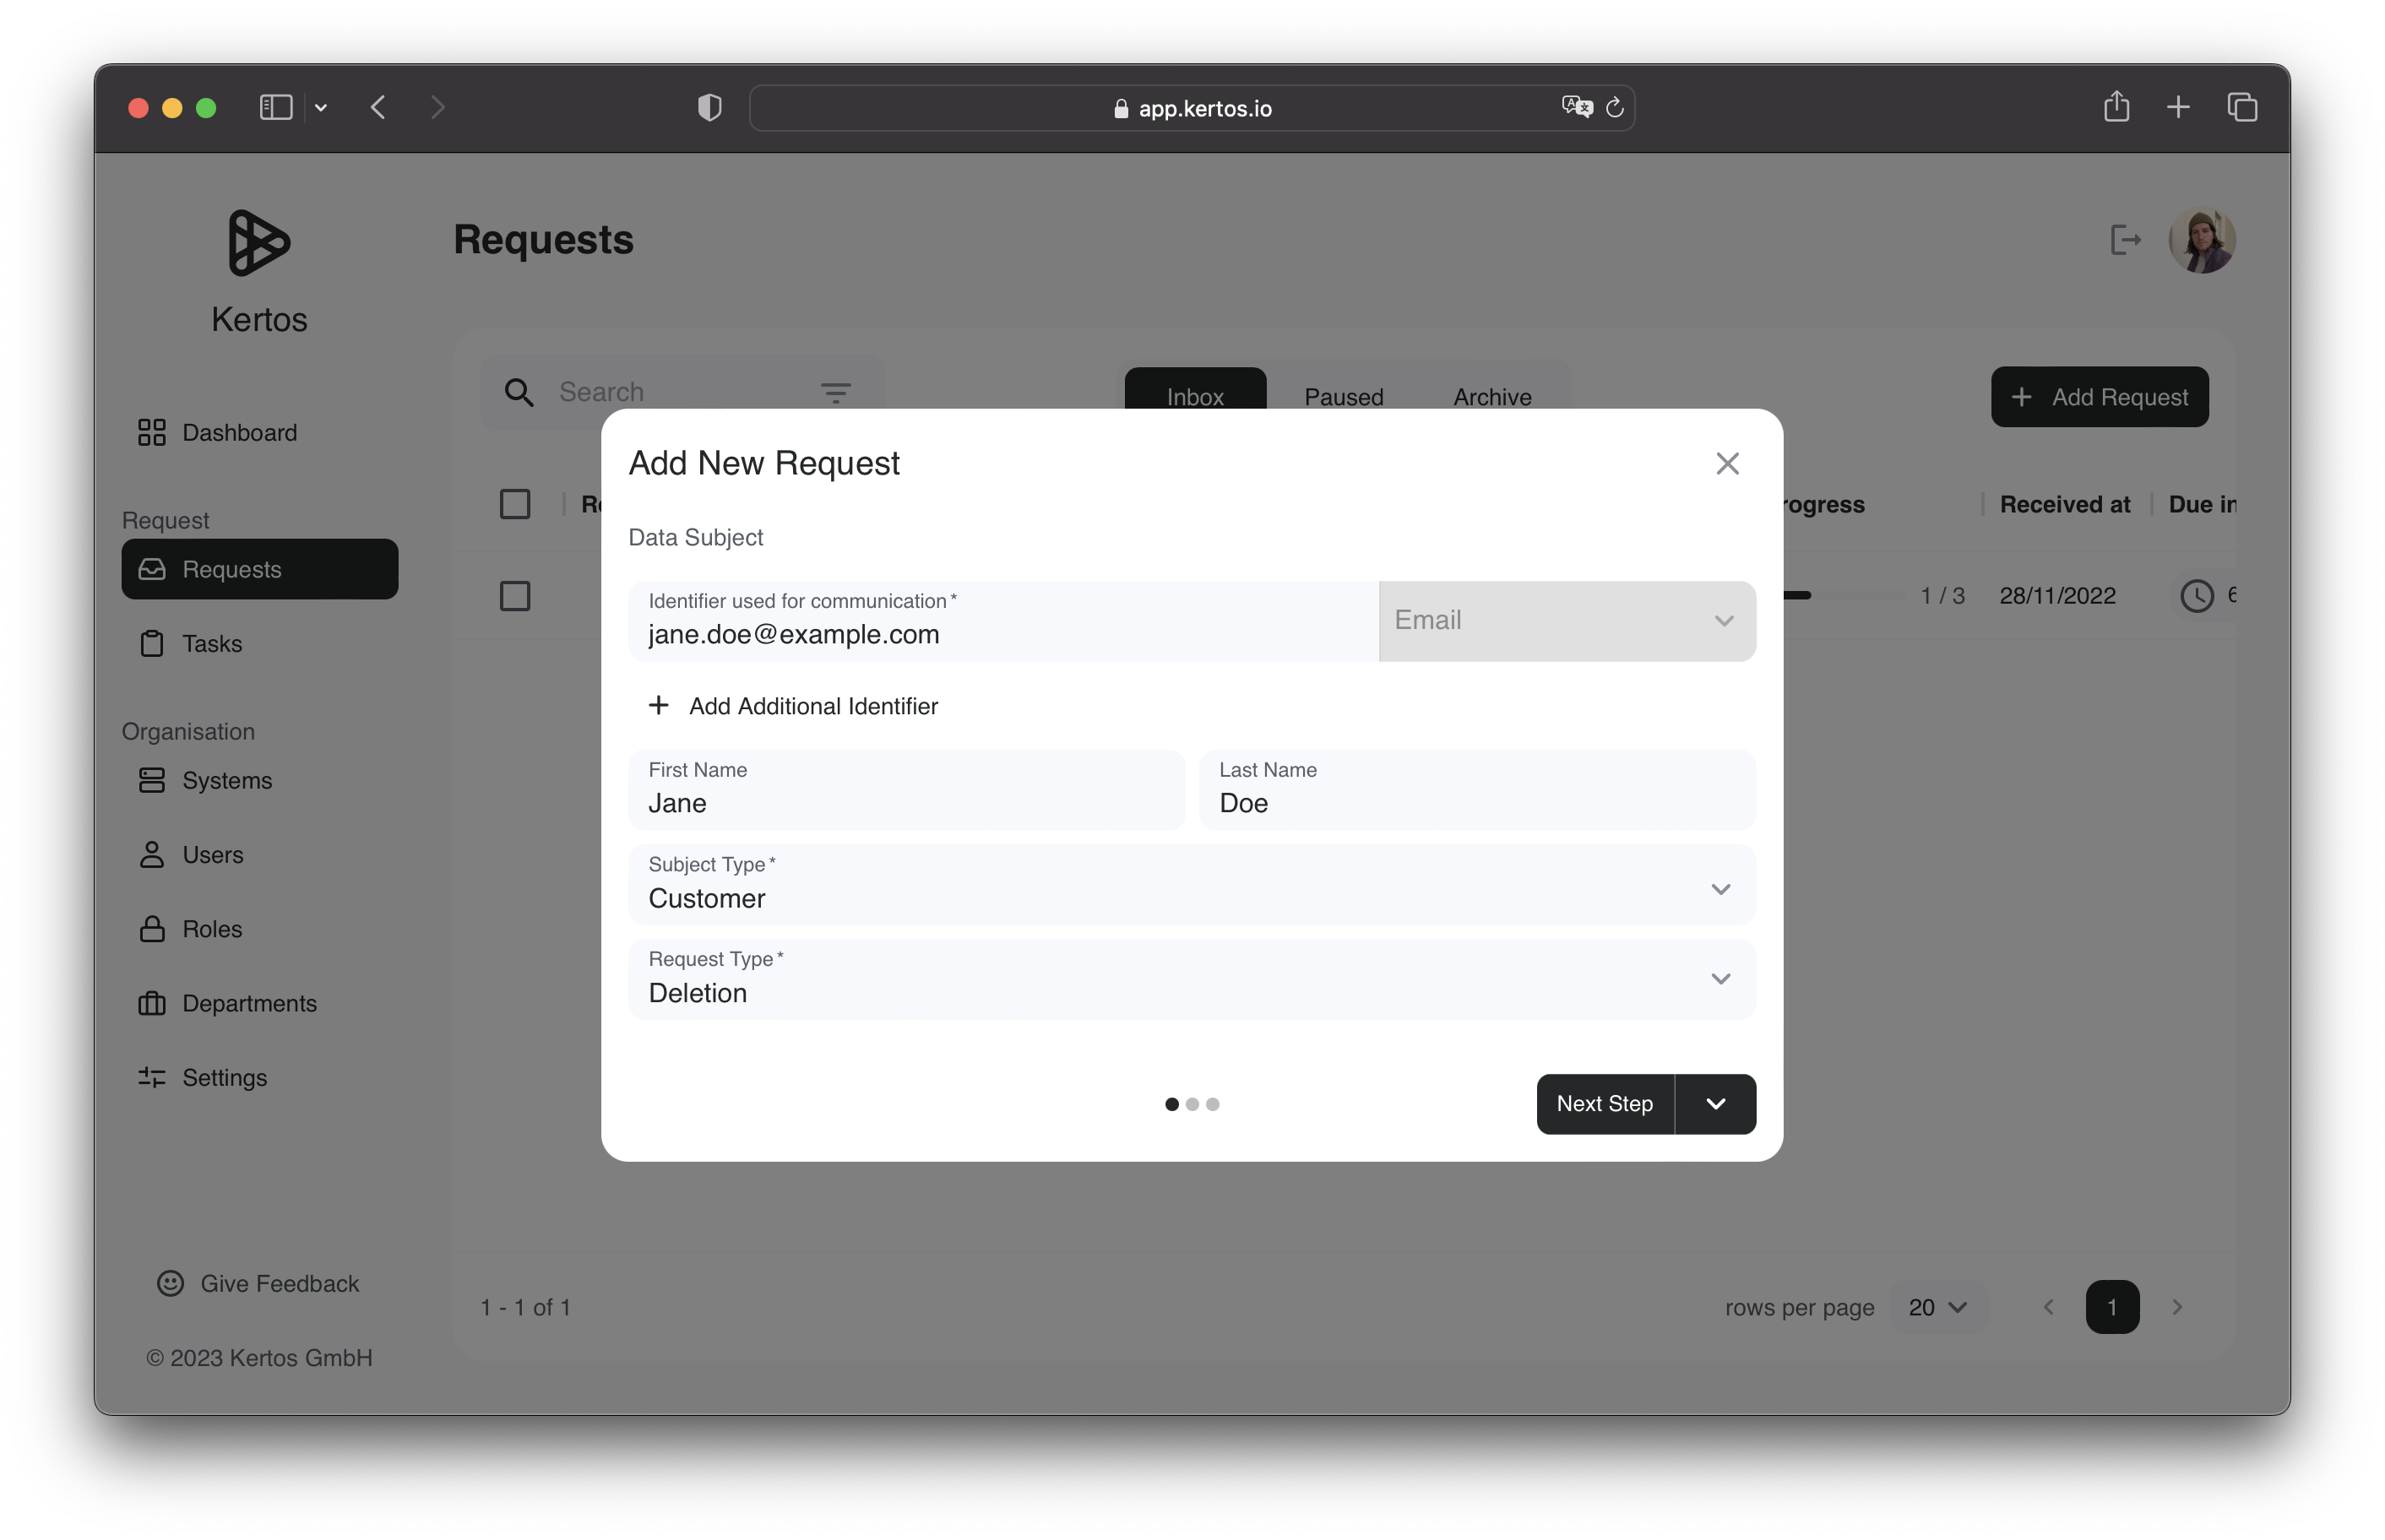
In the appearing form, you will see all required fields that constitute a new data subject request. There you can enter information like the name, email and provide further information in a free text field. The field for "Additional Identifier" lets you also provide an Unique ID for the Data Subject, which you can use to match system-wide identifiers. Some organizations might not make use of an identifier for all systems, making this an optional point of information.
In the "Request" subsection, you will find the possibility to set "Request Type" for the incoming request.
Please refer to the concepts page, to find out which request types exist, as well as their dedicated purpose (see :doc:../concepts).
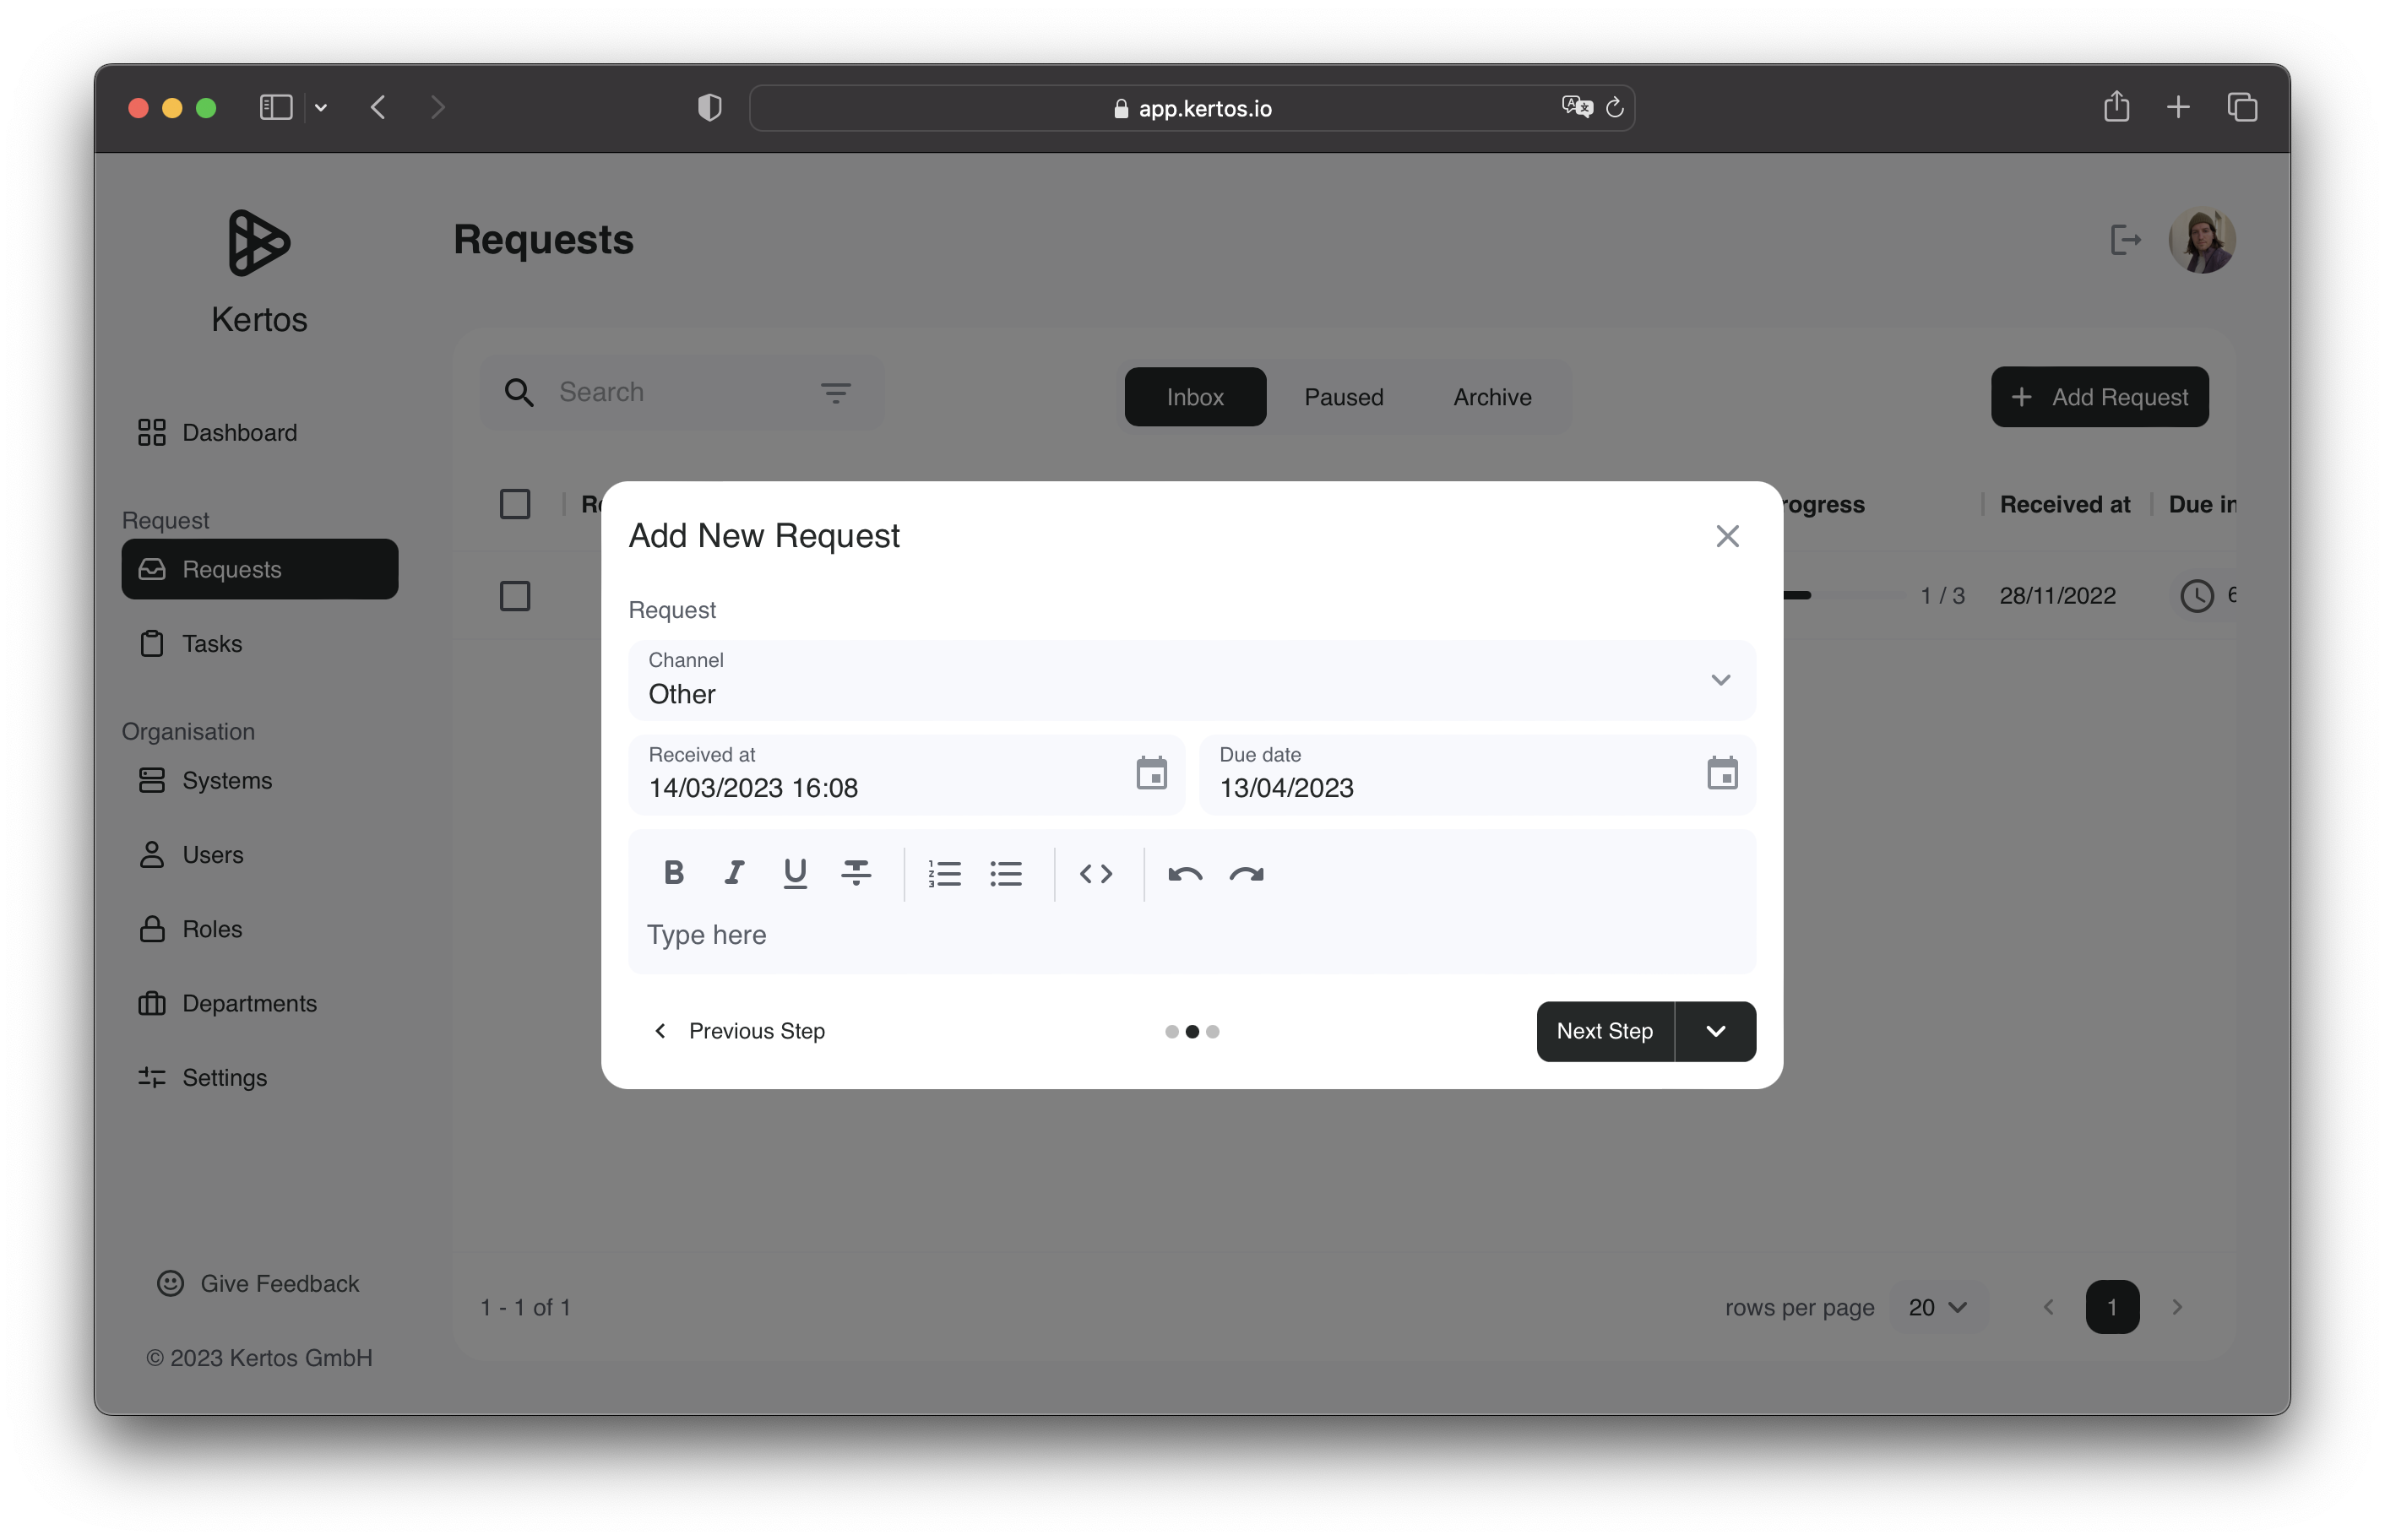
Next to the request type, you can also provide the "Channel" through which the request was received.
In this example the request was received via mail, alternatively a request could be communicated via telephone, physical mail or other forms.
Other important aspects in the "Request" subsection are the received and due date fields.
The due date is automatically calculated by using the default due date information found in the settings (see :doc:../preferences)
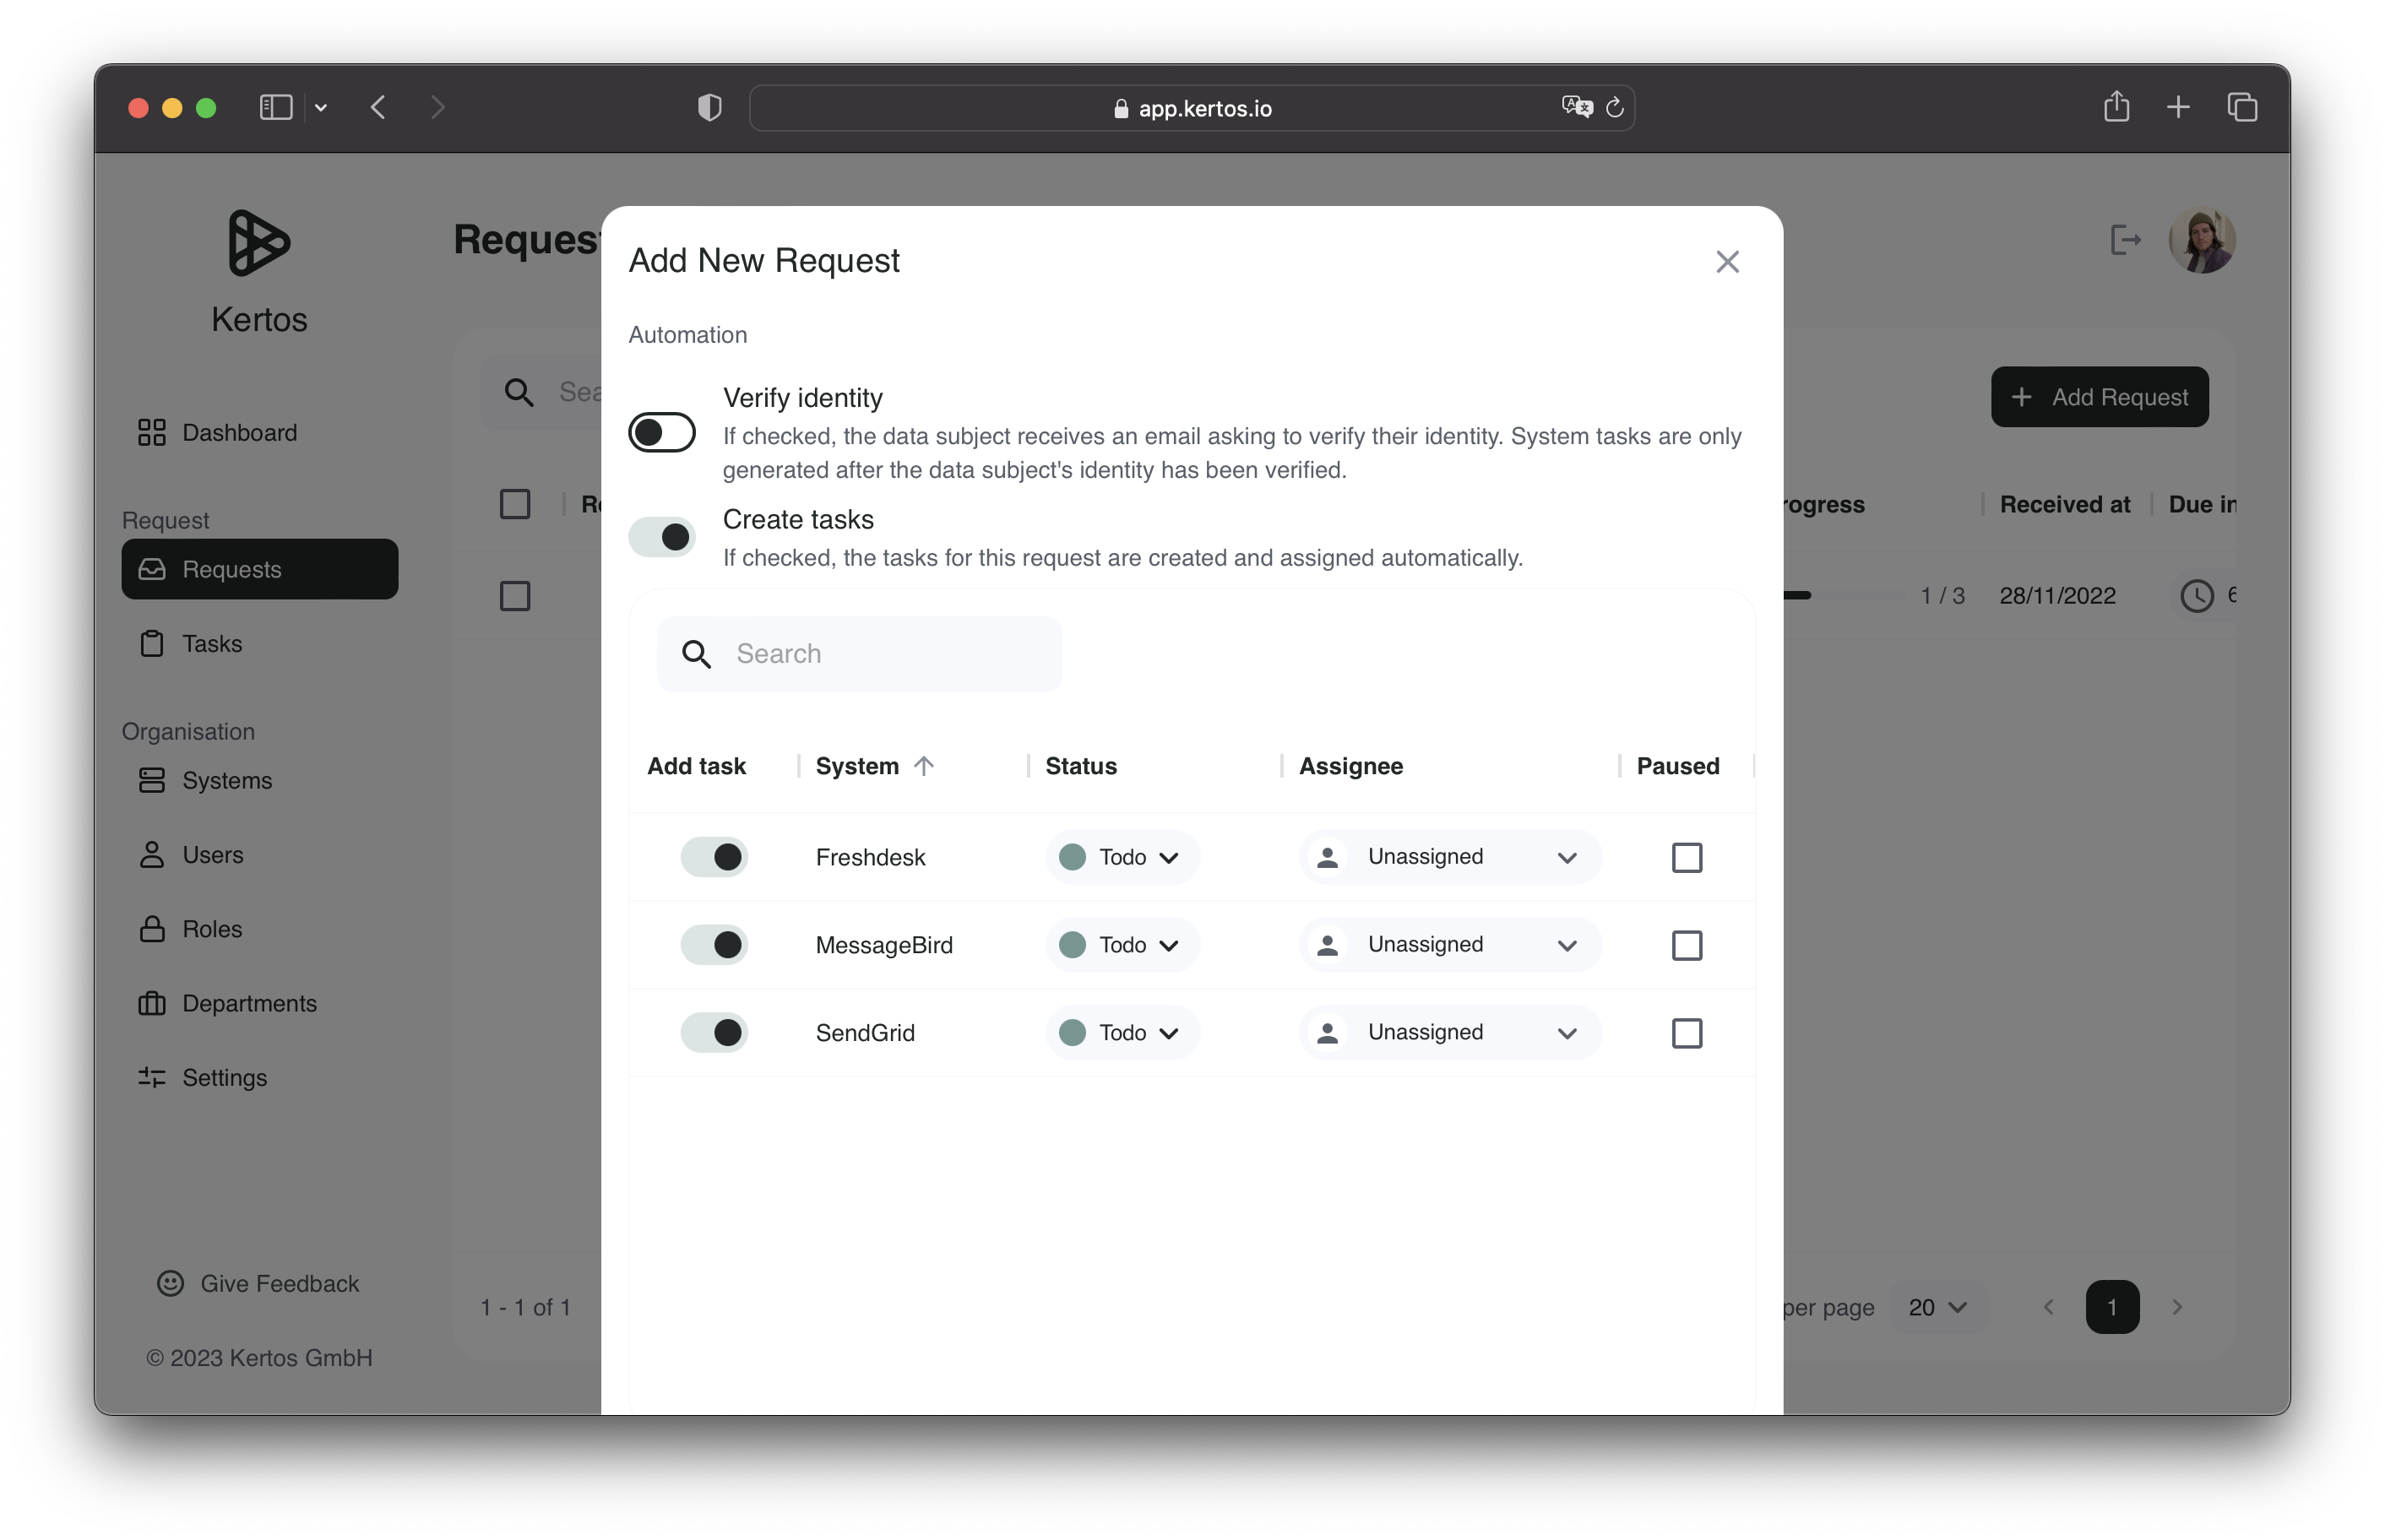
In the "Automation" subsection, it is possible to trigger the identity verification and System Task creation. By setting the "Create tasks" toggle, the creation of all related System Tasks, that need to be carried out for the specific request, will be automatically conducted. To include the verification of the data subject, you should additionally activate the "Verify identity" toggle. This will send out a verification email to the address, that was entered in the "Data Subject" section above. As soon as the Data Subject clicks the provided link, to verify themselves, all related System Tasks will be created.
Recap
Under "Request" you will find an overview of all your Data Subject Requests. To manually add a new request, click the "Add Request" button at the top right. A new dialogue will open, where you can fill out all required information for a new data subject request. By clicking the "Create" button, the data subject request will be added.
What's next
Next let's see how we can close the System Tasks that have been created by the Data Subject Request.