
Closing processed DSRs
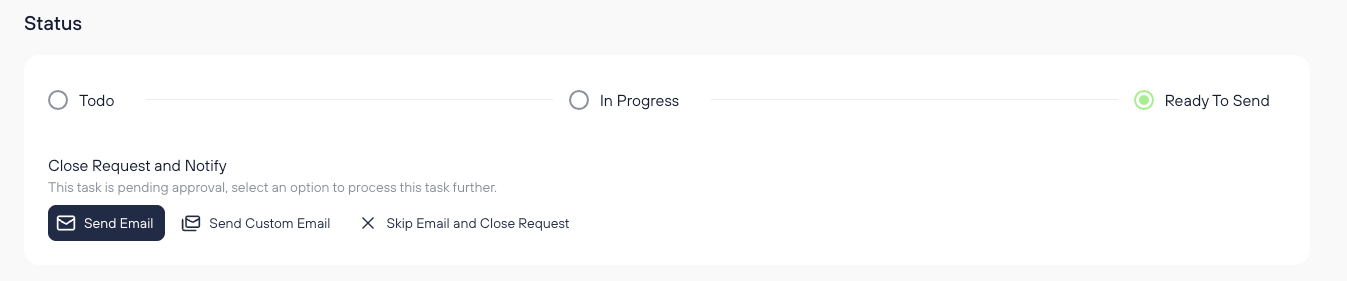
- Once all the tasks associated with the DSR are set to done, the status of the request itself turns to “Ready To Send”. This can also be set manually, which requires you to also save the status change.
- You then have the option to close the request automatically by setting up e-mail templates correspondingly or to manually close it.
Closing a request automatically
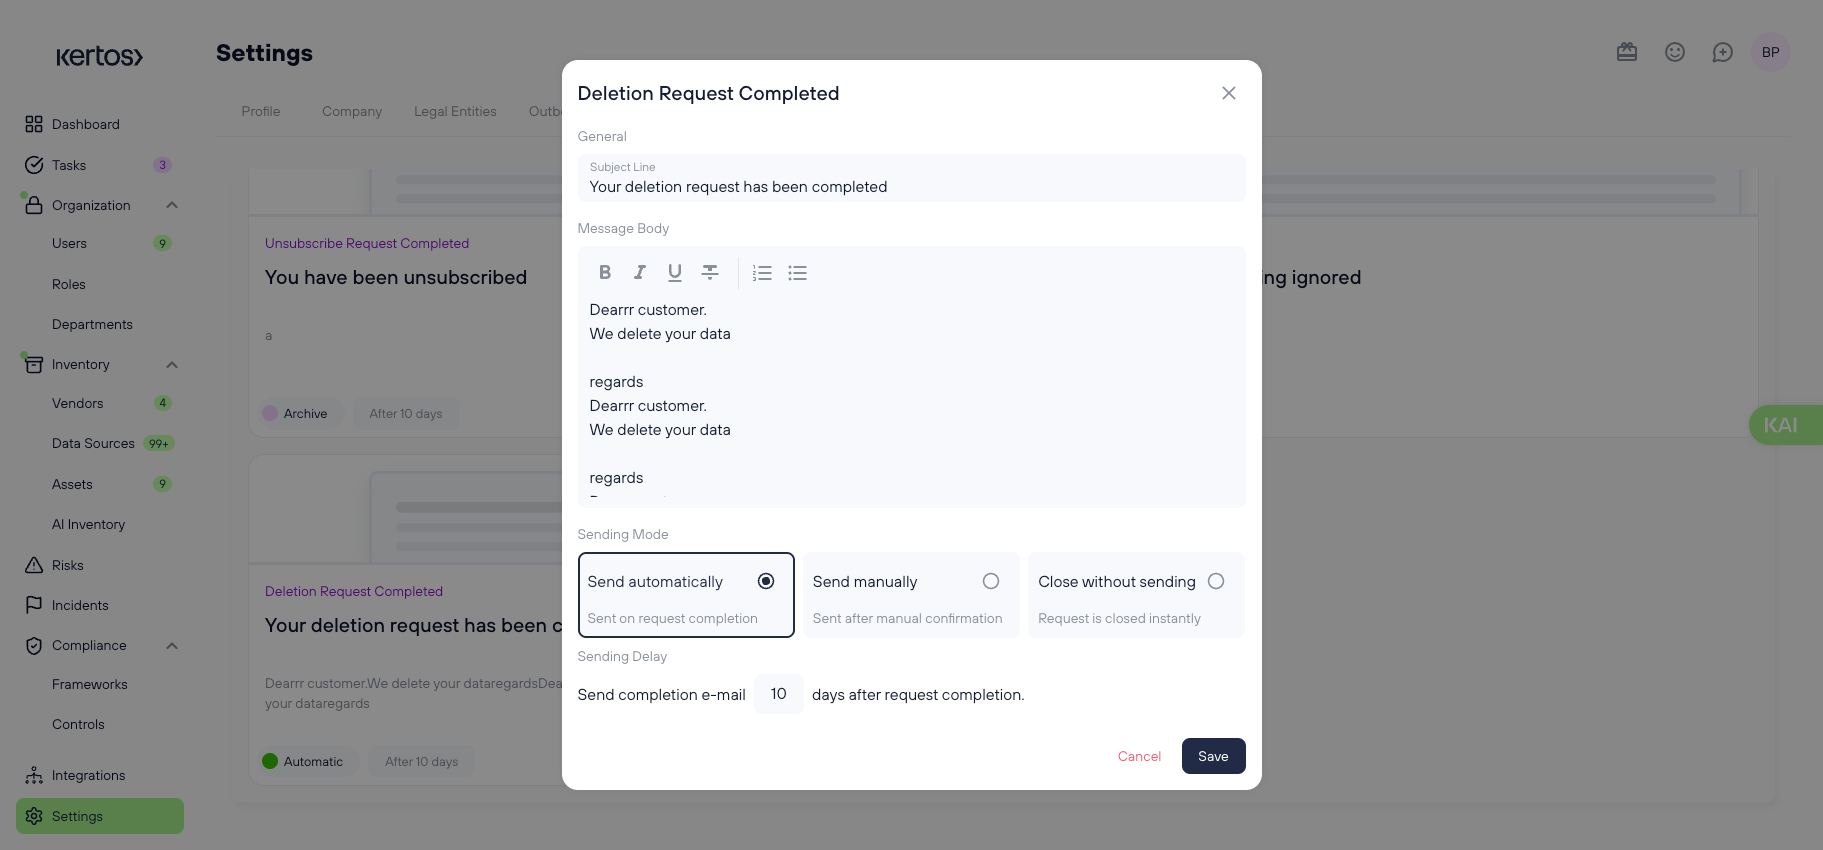
You can use E-Mail templates to facilitate the automatic processing of DSRs.
1. Go to “Settings”.
2. Go to “Outbound E-Mail”.
3. For each DSR type you will see one template (Deletion, Access, Unsubscribe). Click the one you want to automate notifications for.
4. You can keep the pre-defined text or customize it according to your needs.
5. Under Sending Mode, select “Send automatically”.
6. Define the Sending Delay (can also be set to 0).
7. Click “Save”.
8. The template that you just edited will now be used for the request type that you selected the template for. The request will be closed automatically and the Data Subject will receive a notification automatically.
If you select “Send manually” as Sending Mode, the template will still be used but you will have to manually confirm the closing of each request (see 1. in the section below).
“Close without sending” will close the request, but not send out a notification.
Once you have chosen either of the three options, the request will be set to “Done” and the request is moved to the “Archived” section on the request overview page.
Closing a request manually
Instead of pre-configuring e-mail templates so that requests can be resolved automatically, you have the option to do so manually within every DSR.
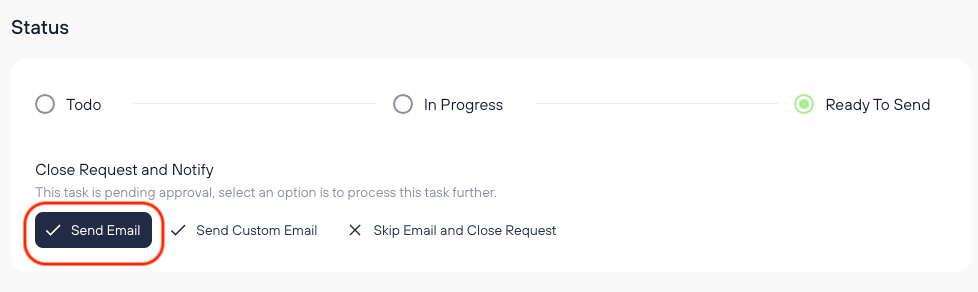
- Send Email: This will trigger an email that is sent to the data subject’s email address. It is based on the template you have chosen for the corresponding request type (Deletion, Access, Unsubscribe) and enabled “Send manually” as Sending Mode.
- Send Custom Email: This opens up another dialogue in which you can edit the title and text of the email that is sent to the data subject’s email address.
- Skip Email and close request: If you don’t want to send an email via Kertos you can do so by choosing this option. It will not send any email and the request will be set to “Done”.
Once you have chosen either of the three options, the request will be set to “Done” and the request is moved to the “Archived” section on the request overview page.
Using your own mail provider for DSR notifications
Per default, if you send e-mail notifications to Data Subjects via Kertos that their requests have been processed, Kertos will be the sender of these emails.
If you want to appear as the sender with your own mail address, you have the option to do so via setting up a custom mail server in Kertos.
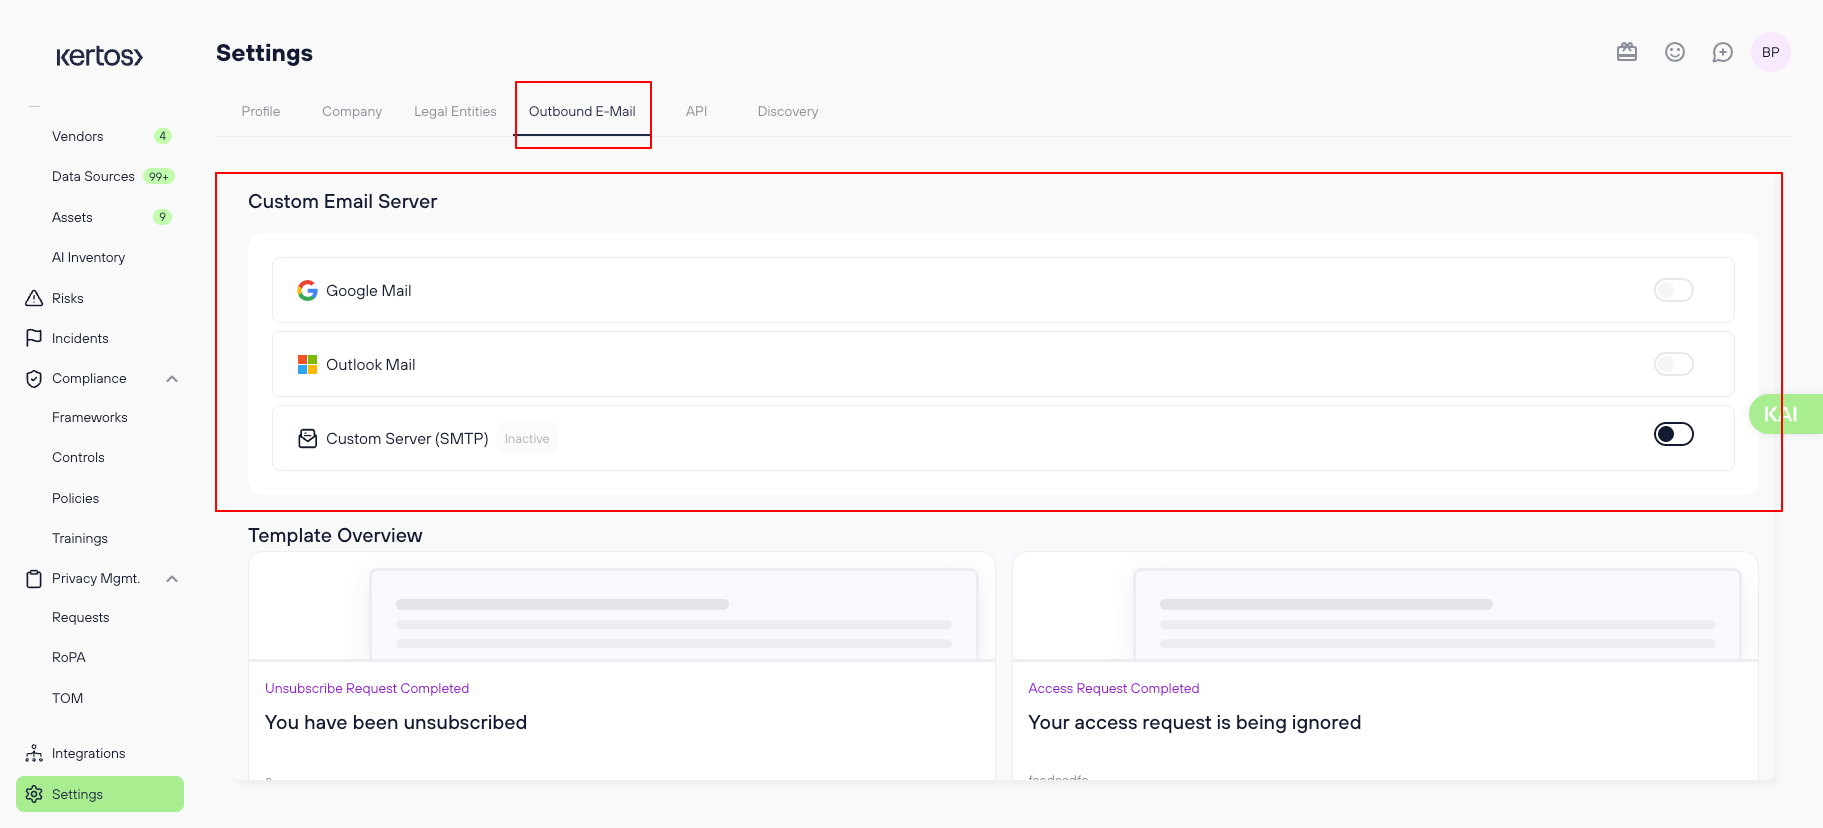
1. Go to “Settings”.
2. Go to the tab “Outbound E-Mail”.
3. Choose your E-Mail provider and click on it. If you are not using Google Workspace or Microsoft as your identity providers, you can use another provider by choosing “Custom Server (SMTP)”.
4. Enter the required information on the screen / Log-in via SSO and complete the process.
5. The toggle on the right side should now be switched on. This means DSR notifications will now be sent from your custom mail server.
If you make use of the Custom Server functionality, you will need the following information from your E-Mail provider:
- Password
- Host (SMTP)
- Port