
Inventorization of systems
Activating discovered systems
When you run any of our discovery integrations, Kertos automatically identifies systems used across your organization. These systems will appear under the "Discovered" tab in the Inventory > Systems section.
Your next step is to review these systems, activate the relevant ones, and archive the rest.
What information is available for each discovered system?
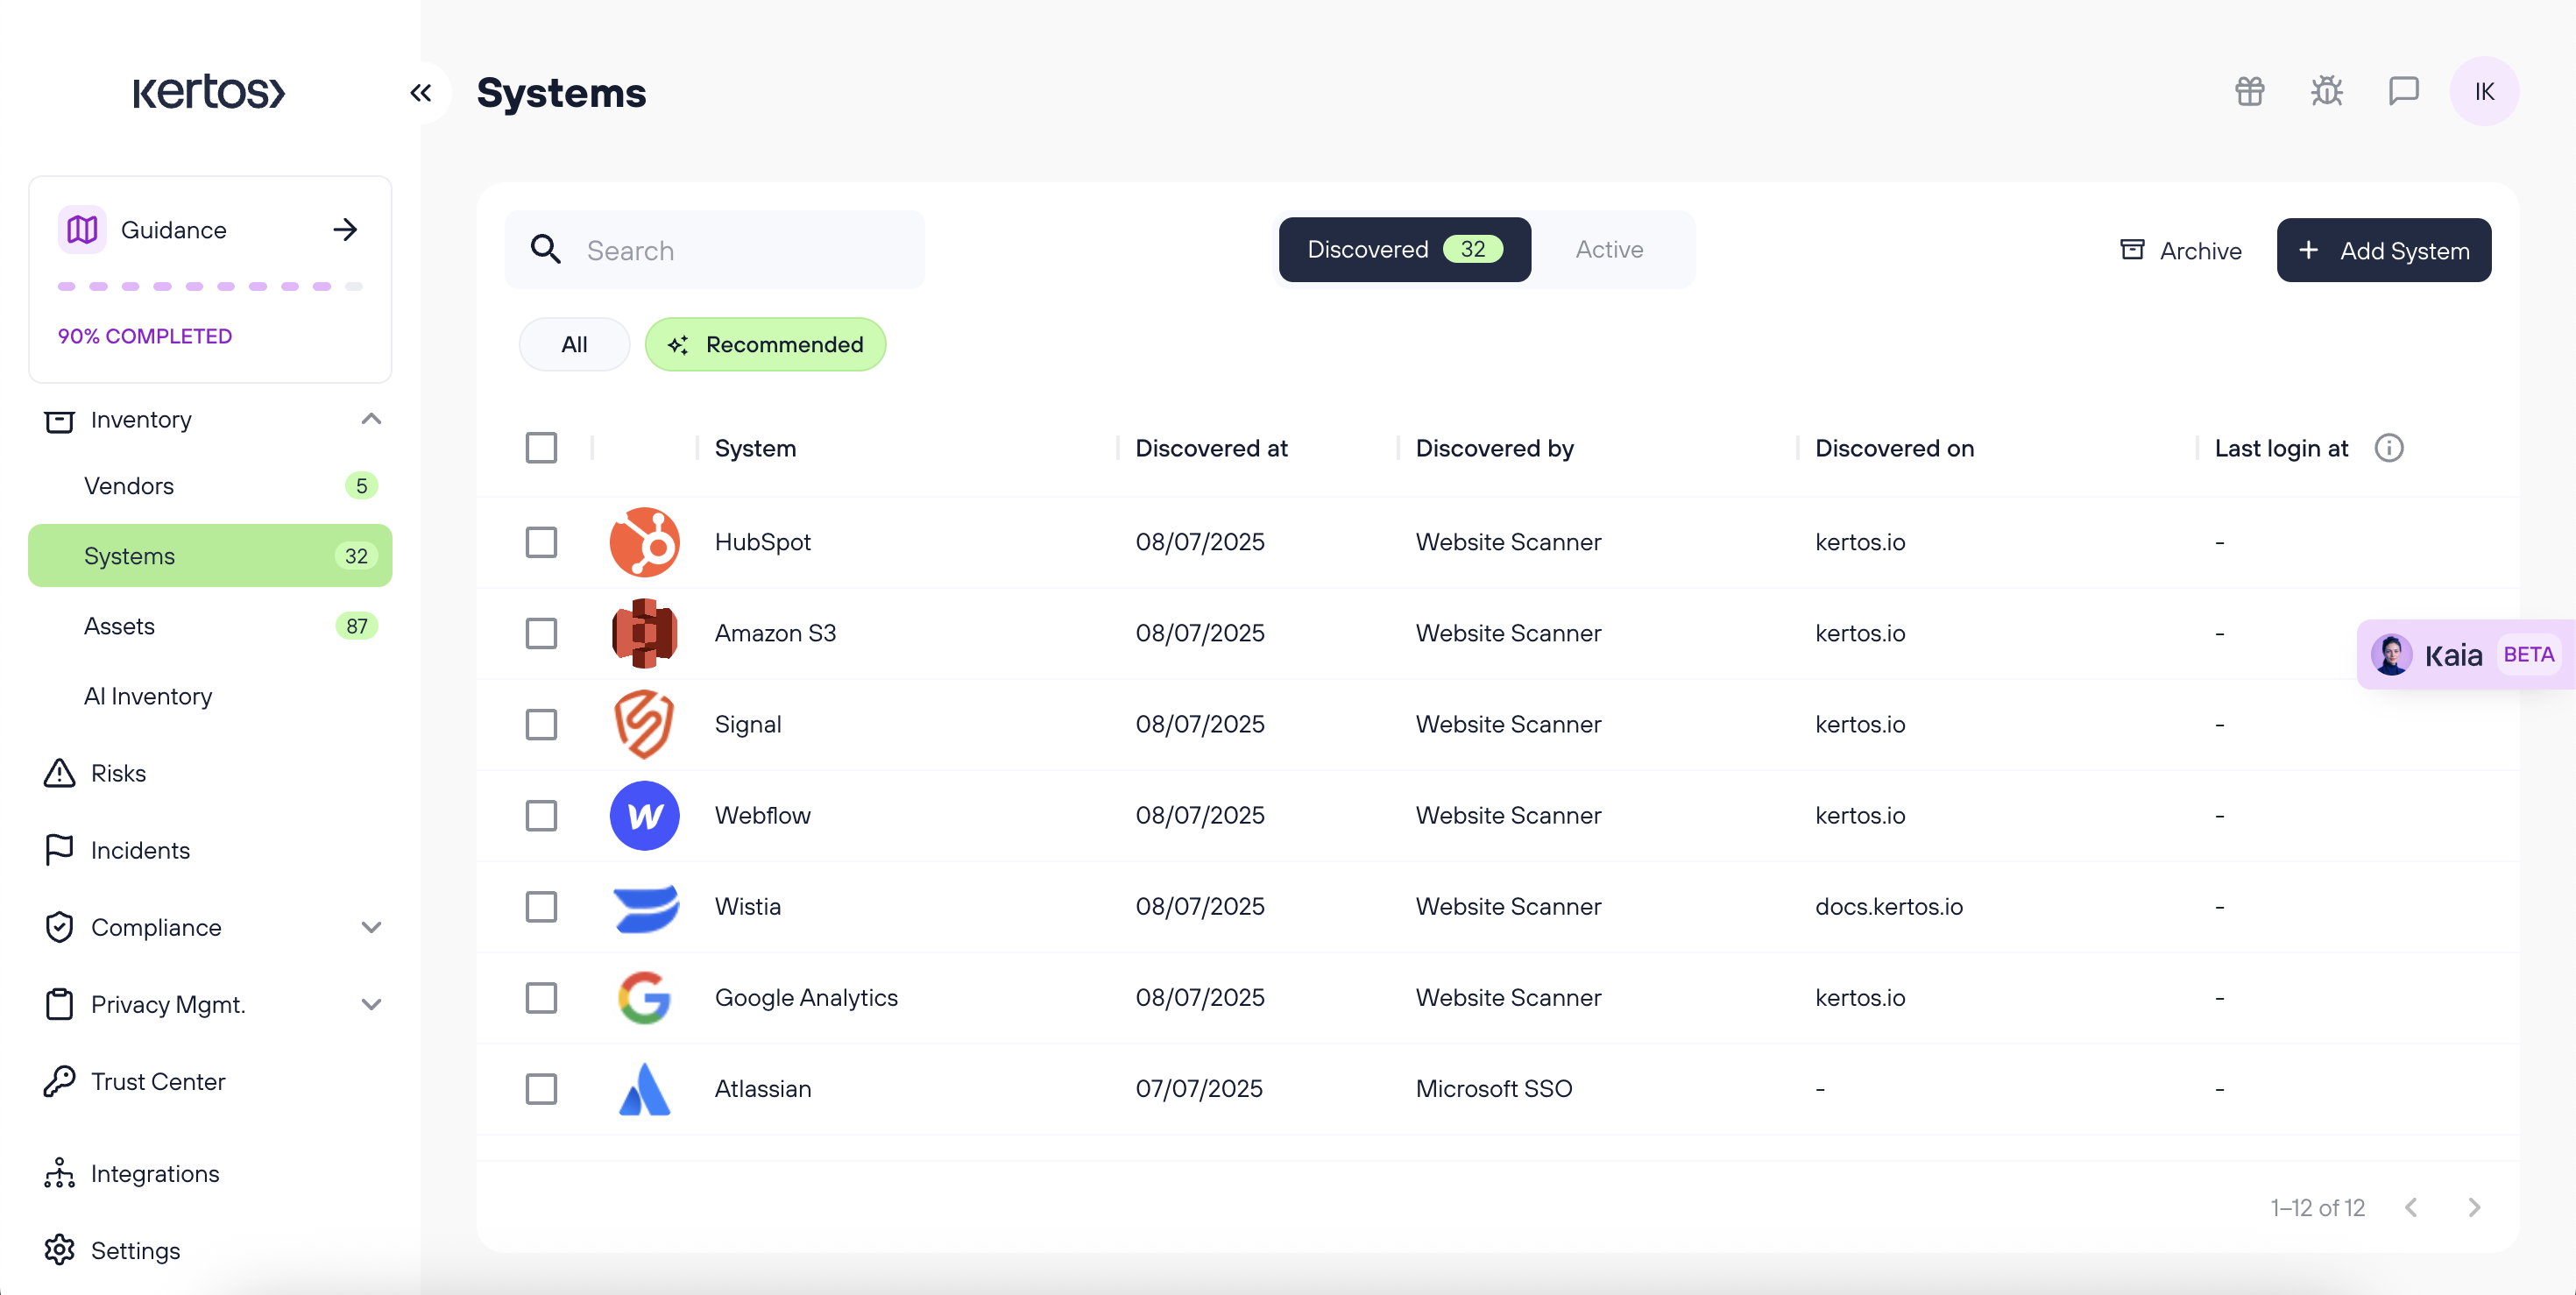
💡 By default, a "Recommended" filter is applied to only show systems with an existing Kertos template. To see all discovered systems, switch the filter to "All" on the left side of your screen.
In the "Discovered" tab, each system includes the following metadata:
- System logo
- System name
- Discovered at – Date when the system was discovered
- Discovered by – The integration or source (e.g., SSO, website scan) that detected the system
- Discovered on – If discovered via website scan, this is the URL where the reference was found
- Last login at – If SSO is used, this shows the most recent login timestamp
Steps to activate discovered systems
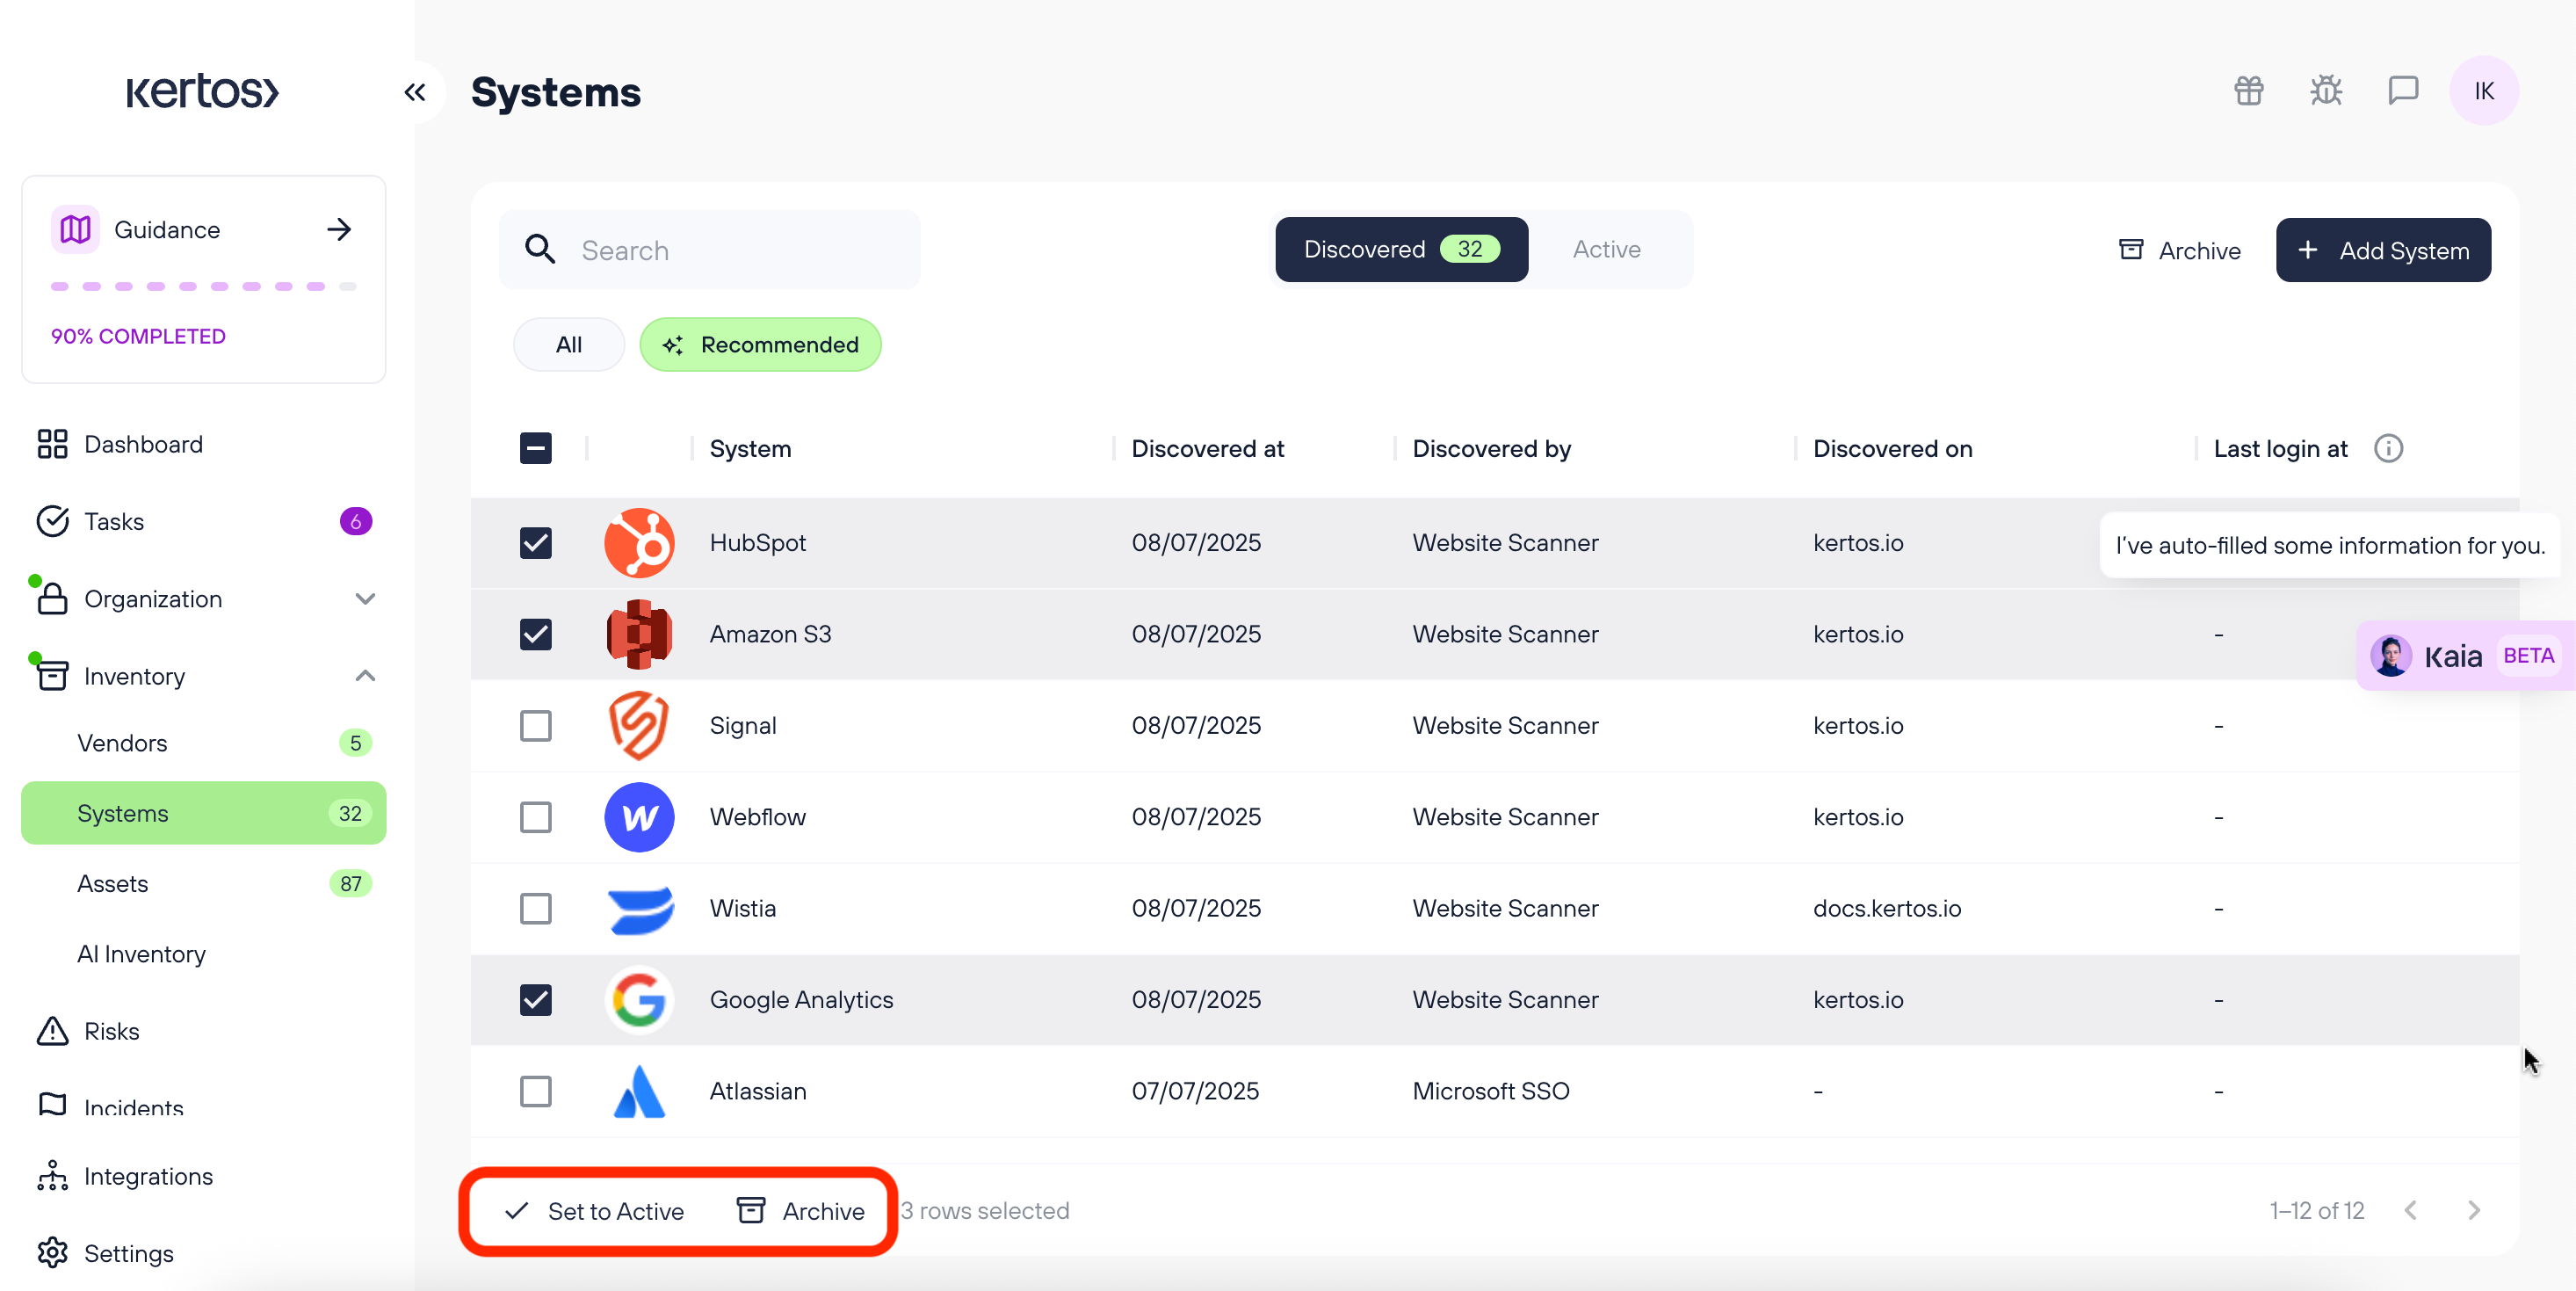
⚡ The Autofill feature works automatically upon discovery. This means system fields are pre-filled with relevant values where available. You can review and adjust these before or after activating the system.
1. Go to Inventory > Systems.
2. Select the "Discovered" tab.
3. Select the systems that your organization uses and click "Set to Active".
4. Select the systems that are not relevant and click "Archive". Archived systems will no longer reappear in future discovery runs.
5. Activated systems will now appear under the "Active" tab.
6. Click into each system to complete missing documentation as needed (see sections below).
Adding systems manually
If a system was not detected during discovery, you can add it manually.
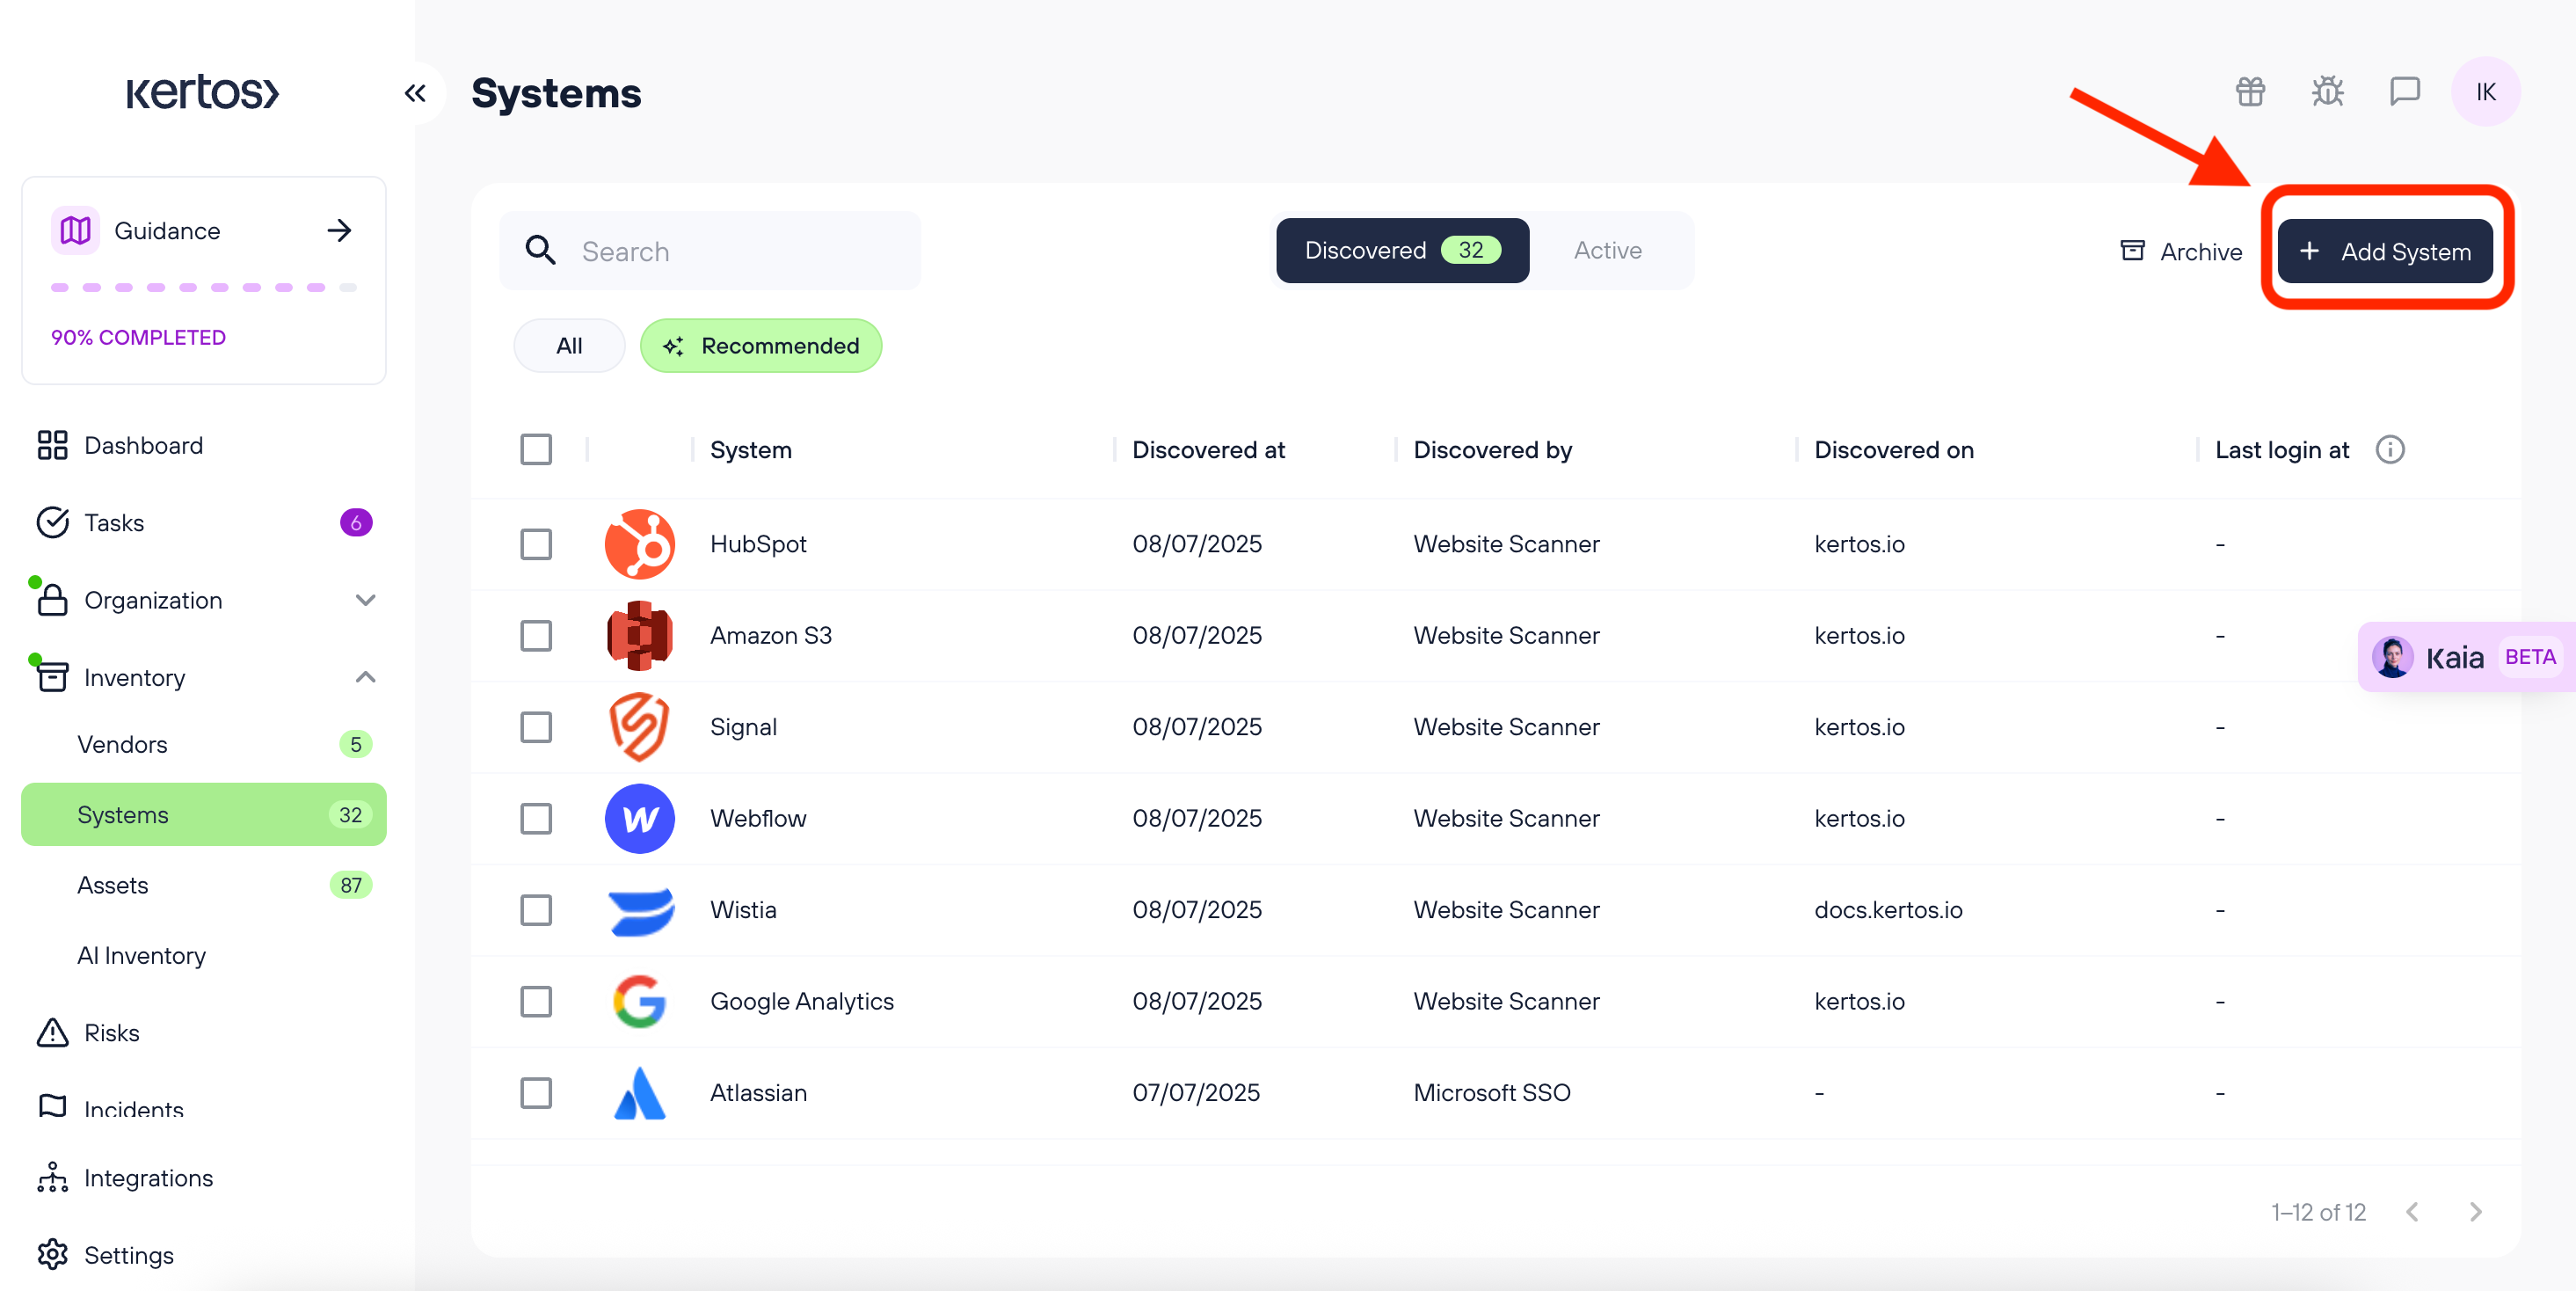
1. Click “Add system”.
2. In the System name field, type the name of the system.
If you want, you can select the option "Ask KAIA to fill data for <System>"
This will automatically populate:
- URL
- Description
- Departments using this system
More information about autofill is available here: KAIA Autofill
3. Fill in any additional fields (more information below) and click “Save”. Manually created systems are automatically set to Active.
Documenting System Information
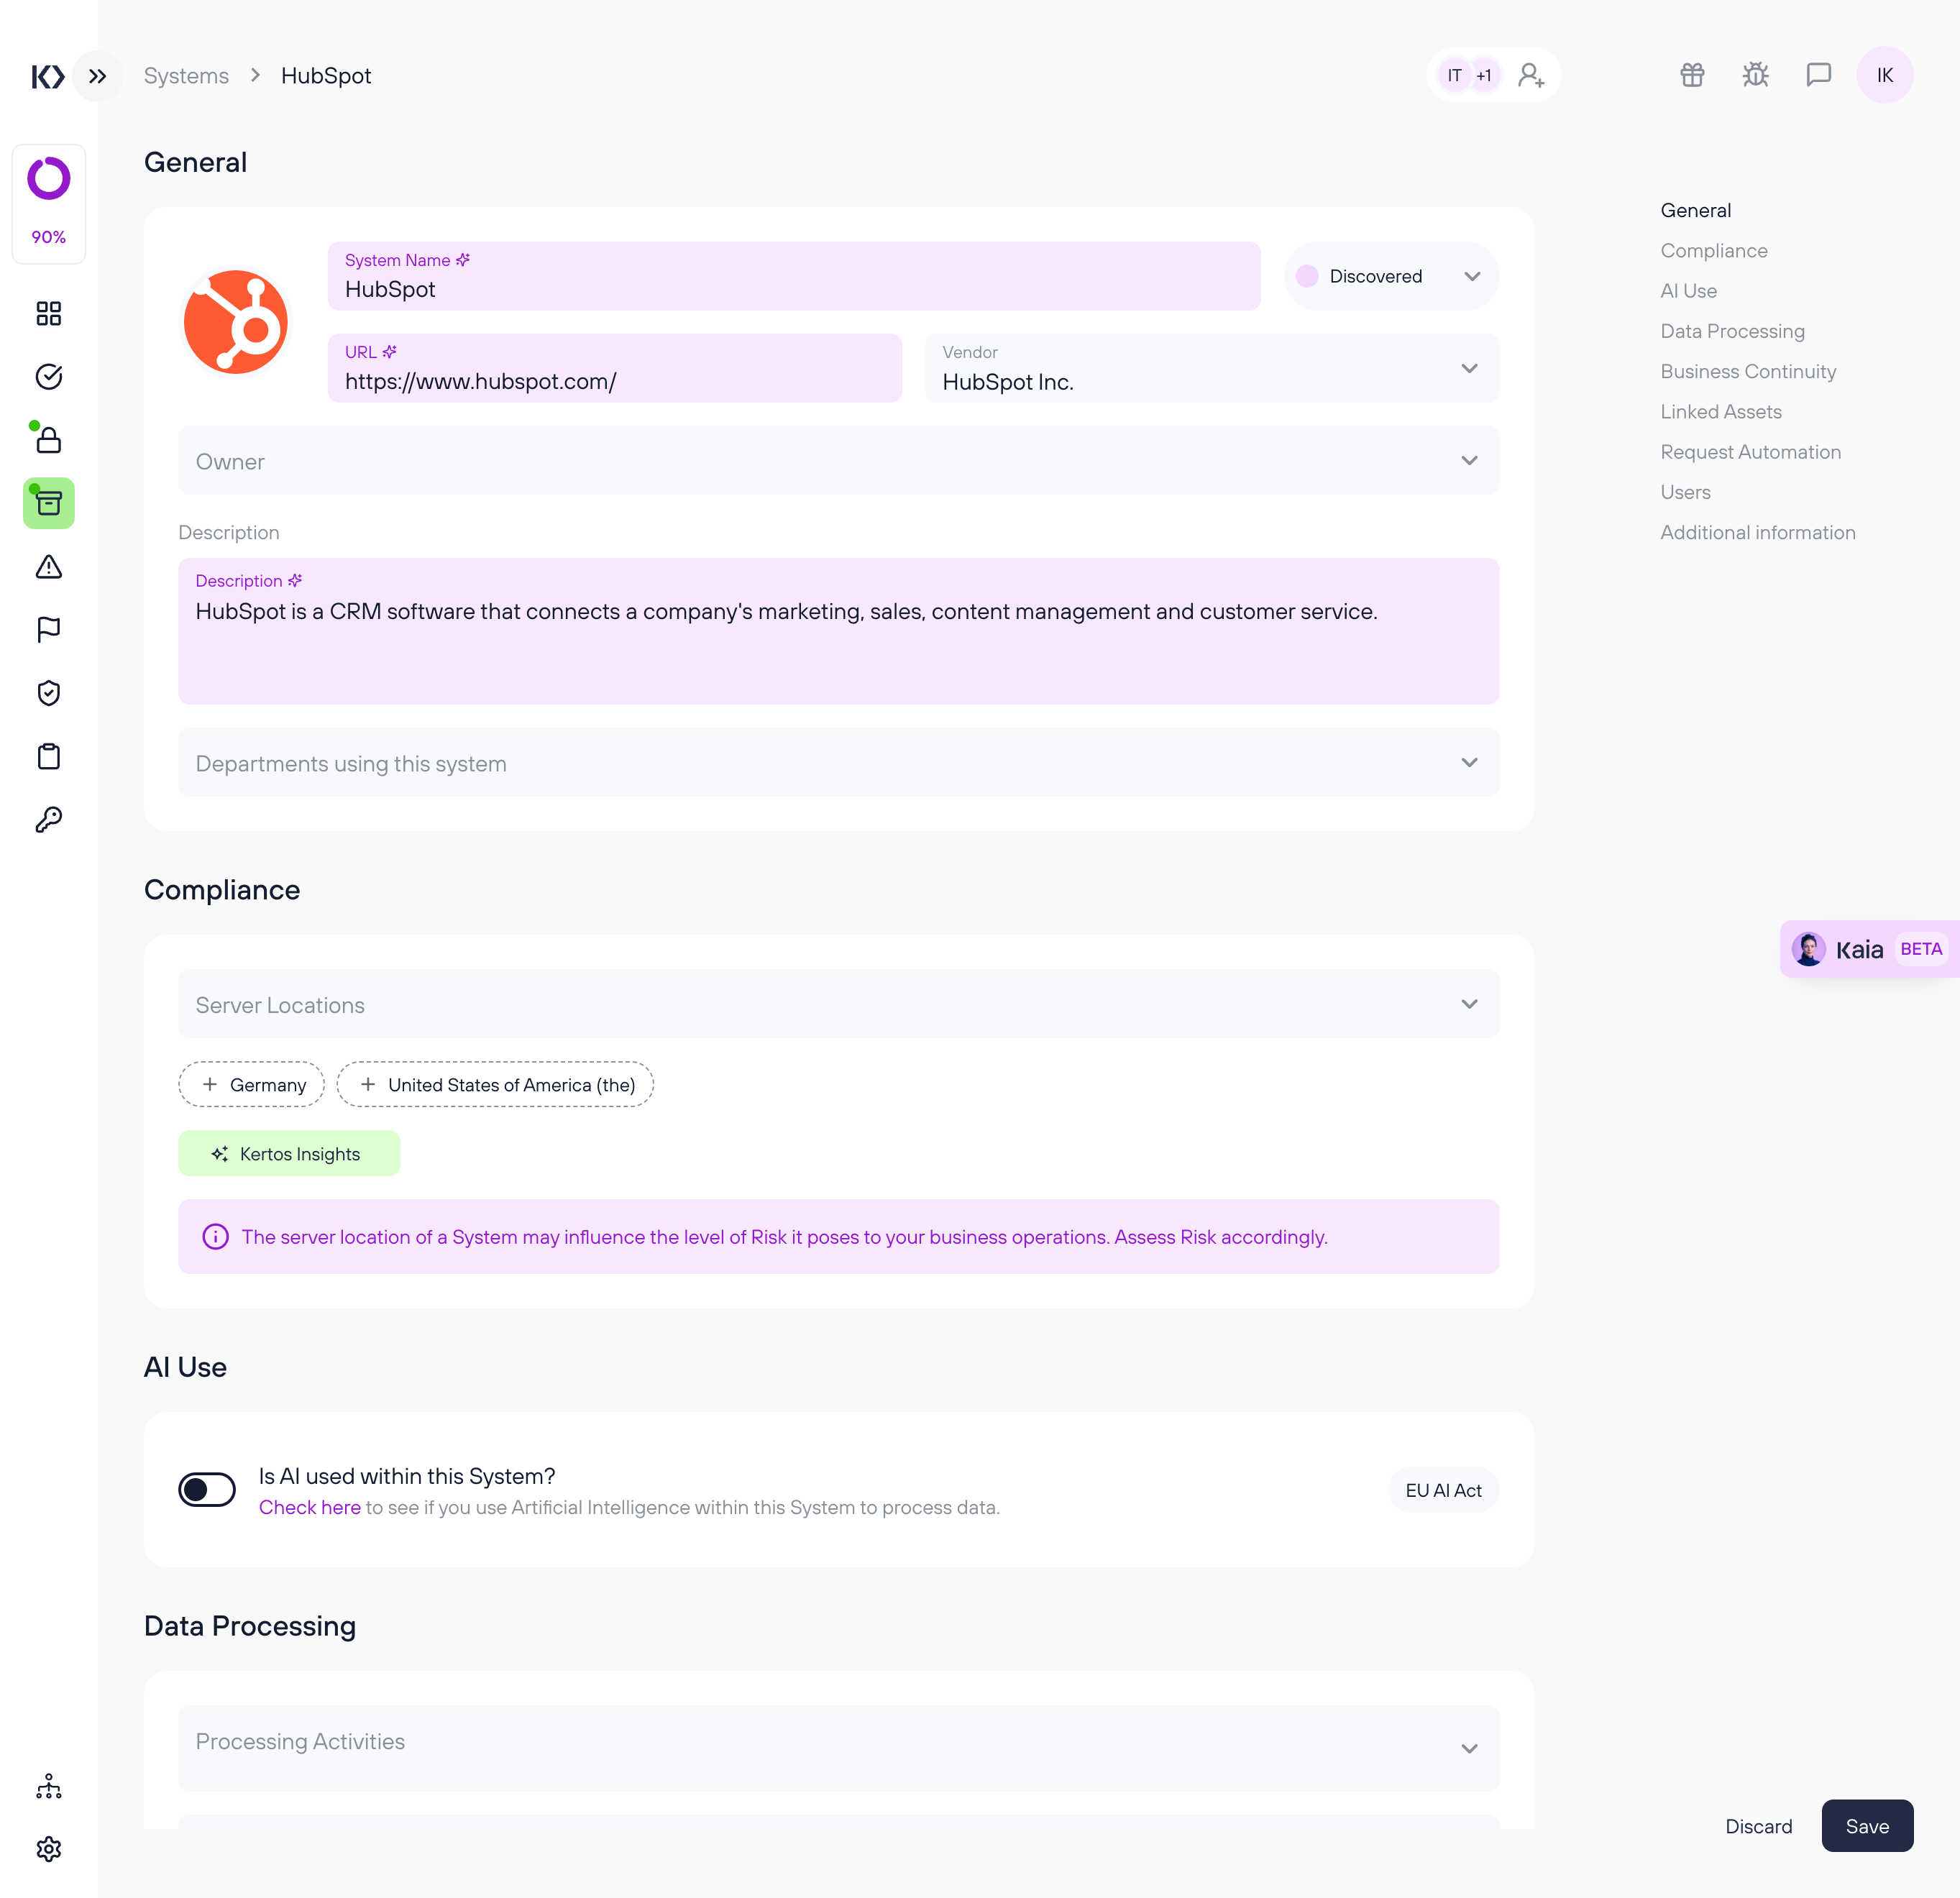
Once a system is created (via discovery or manually), you can supplement it with key information:
General
- Name
- Status (Active or Archived)
- URL
- Vendor: search and select an existing Vendor to link it to this system.
Each system can be linked to only one vendor.
To add a new vendor, go to the Inventory > Vendors page.
Alternatively, you can assign systems directly from the Vendors page.
For more information about Vendors, see Inventorization of vendors
- Owner: employee responsible for this system
- Description
- Departments using this system
Compliance
- Server Locations: select countries in which the servers hosting this system are located.
AI Use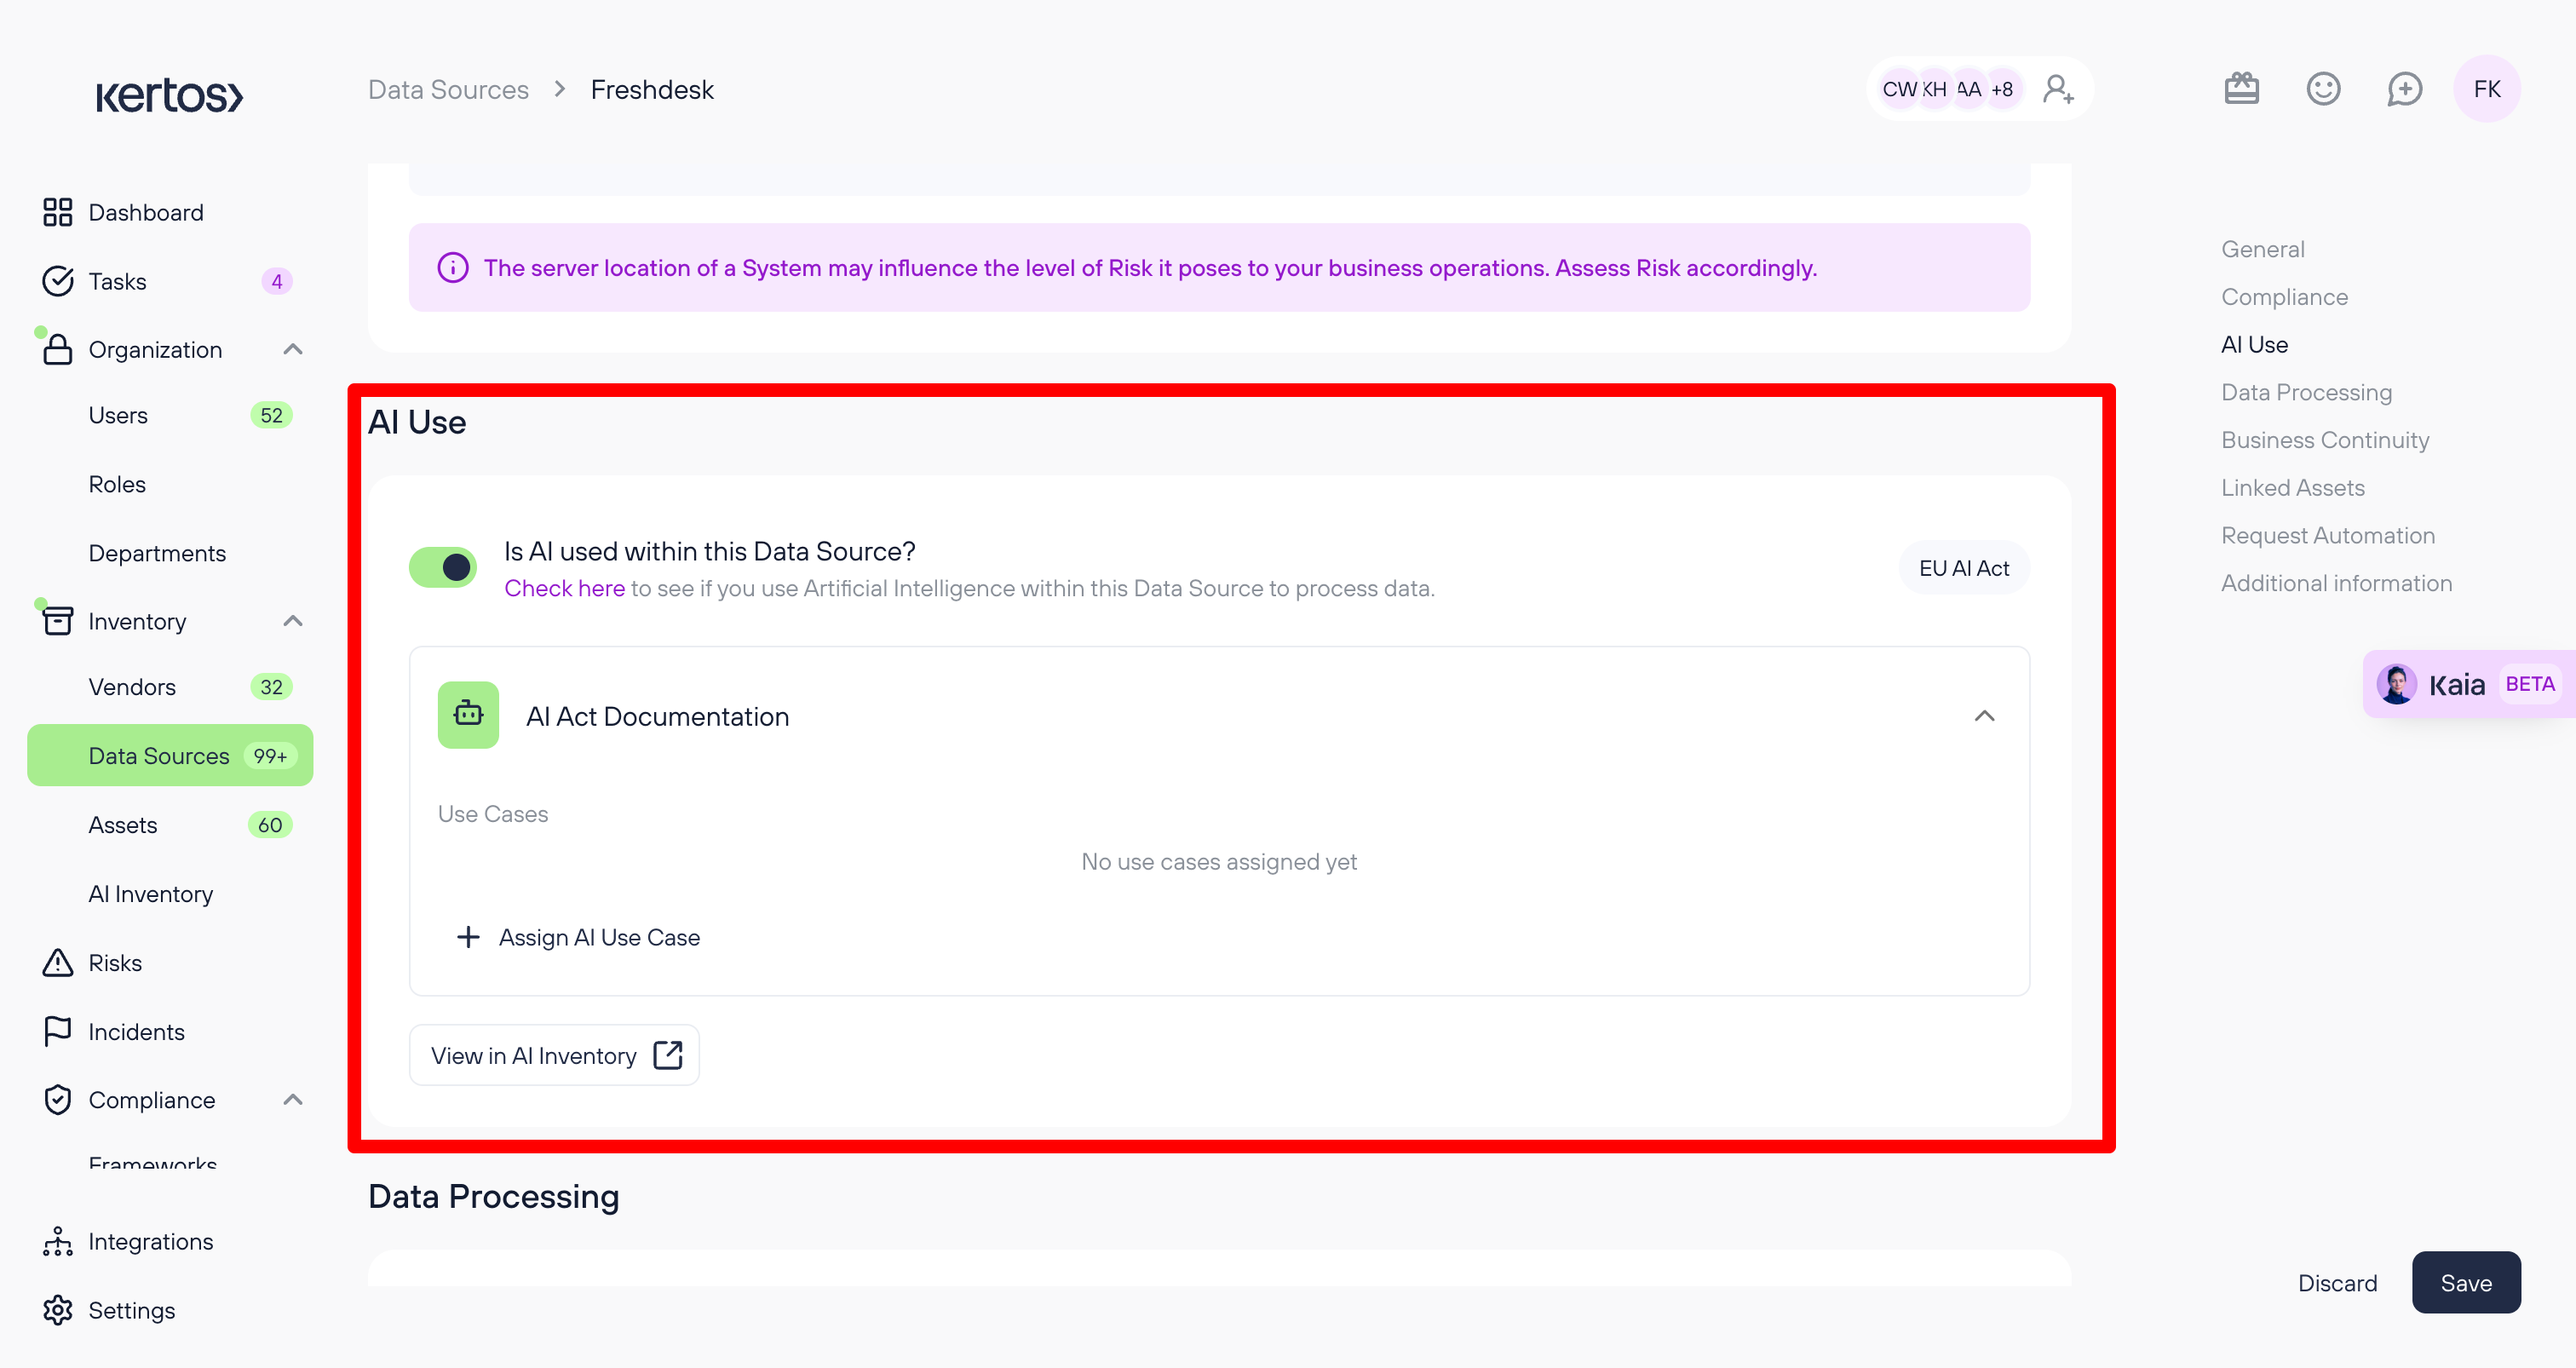
If you're subscribed to frameworks like ISO 42001 or the EU AI Act, you will see an AI Use section.
If you activate the "Is AI used within this system?" toggle, you can:
- Link AI Use Cases to this system
- Click "View in AI Inventory" to manage or add new AI use cases
For more information regarding AI Inventory, please see this article: EU AI Act: Inventorization of AI use cases
Data Processing
- Processing Activities
- Processed Data Subject Types
- Processed Data Classes
Business Continuity
- Recovery Time Objective (RTO)
Maximum time allowed to restore the system without unacceptable impact. - Recovery Point Objective (RPO)
Maximum acceptable amount of data loss before the impact on the organization becomes unacceptable. - Maximum Tolerable Downtime (MTD)
Max duration a system can be unavailable before the impact on the organization becomes unacceptable. - Service Level Agreement (SLA)
Terms like resolution time, uptime guarantees, etc.
Linked Assets
- Link the system to primary assets from the Assets section.
Request Automation
Allows automating the data processing requests for this system.
Please check Request Automation for additional information.
- Enable Automation toggle: if a system template supports request automation, you can enable it here.
- Additional toggles for:
- Access Requests
- Deletion Requests
- Unsubscription Requests
- Review Period: number of days for how long this system’s data should be reviewed after a deletion request has been received.
Additional Information
- Attachments: upload files or link resources.
- Notes: free-text area for extra documentation.
Archiving or Deleting a System
You can archive or delete any system:
- Archive: hides the system but retains the data
- Delete: permanently removes the data for this system from your inventory
⚠️ Deleted systems can be re-discovered in future scans! If you want to ensure that the system won't get discovered again, archive it instead.
FAQs
What happens if I accidentally activate a system that we don’t actually use?
No worries. You can simply go to the system’s detail page and change its status from Active to Archived. This won’t delete any data, but it will move the system out of your active inventory. If needed, you can reactivate it at any time.
Can I customize the autofilled information for discovered systems before activating them?
Yes. Autofill runs automatically upon discovery, pre-populating URL, Description, and Departments fields. You can review and edit this information in the Discovered tab before setting a system to Active.
Do I need to link every system to a vendor?
While not mandatory, linking systems to vendors is highly recommended. It ensures better tracking of vendor compliance, simplifies vendor reviews, and enhances your reporting. You can only assign a system to one vendor, either directly from the system page or from the Vendors section.